What Are The 5 Steps in Cleaning The Floor
Posted by Suji Siv @Clean Group on 2024-02-12
What Are The 5 Steps in Cleaning The Floor
When it comes to the cleaning of floors, there lies an essential phase that is often overlooked: the preparation and gathering of equipment. This step, although paramount in ensuring an efficacious clean, is frequently dismissed or hurried through with little attention.
To start off, one must select the correct broom or vacuum. However, not just any broom will suffice; it needs to be appropriate for your specific floor type—be it hardwoods, tiles or perhaps carpet. Many people grab the nearest tool without pondering its suitability for their floor's condition or material.
Once you've chosen your primary cleaning utensil, next you'll want to gather additional supplies such as mops, buckets, and suitable cleaners. It's common for individuals to underestimate the importance of matching the right cleanser to the task at hand. Different surfaces can demand different types of detergents: some may require a gentle soap while others need a more robust solution capable of tackling stubborn stains.
Furthermore, protective gear should not be neglected; gloves especially are crucial in safeguarding hands from harsh chemicals present within certain cleaning products. Protective gear can sometimes be disregarded by those who falsely believe they're immune to potential skin irritations.
Last but certainly not least is preparing the actual space for cleaning. Furniture should be moved aside—or even removed completely—to allow unhindered access to every inch of flooring that awaits purification. It’s amusing how some might skip this detail only to find themselves contorting around obstacles later on—a surefire recipe for inefficient labor!
In conclusion, while these steps might seem mundane or trivial at first glance, skipping over them can lead to less than satisfactory results when tidying up one's floors. Proper preparation and equipment gathering lay down a vital foundation which paves the way towards a sparkling finish that we all desire in our homes and workspaces.
Clearing the area of furniture and obstacles
When one begins the journey of cleaning a floor, the first step is like setting a stage for a grand performance; it's about preparing your canvas before unleashing the artistry of cleanliness. This initial phase, often overlooked in its importance, involves clearing the area of furniture and obstacles.
Imagine you are ready to dive deep into the choreography of scrubbing and sweeping. Yet, as you start, you're constantly interrupted by pesky chairs that serve as unwanted dance partners or tables that act like stubborn audience members refusing to vacate their seats. It becomes quickly evident how these items can turn into formidable adversaries in your quest for spotless floors.
Now, consider this: every piece of furniture is akin to a boulder in a stream; water – or in our case, your cleaning efforts – must flow around them. These obstructions not only prevent a thorough cleanse but also threaten to harbor dust bunnies and other elusive dirt particles that cunningly evade capture.
So what does one do? You roll up those metaphorical sleeves and begin relocating these pieces. However, it's not merely about haphazard displacement. One needs to be strategic—temporarily rehoming decor elements and essentials to spaces where they won't interfere with the task at hand nor create additional work later on.
In this process of removals and readjustments, there’s an unsung rhythm; a carefully orchestrated movement from corner to corner ensures everything is out of your path while maintaining accessibility when it’s time to replace them once more upon the now-gleaming floor.
As humans we tend toward error—a slip here with grammar or perhaps misjudging the heft of an armchair there—but such imperfections only add character to our endeavor (or so we kindly tell ourselves). Even so, diligence remains paramount; because overlooking even one small toy could lead to an unwelcome tumble amidst our domestic ballet.
In summary, clearing the space may seem like mere prelude but is indeed critical—it sets forth conditions under which our cleaning will shine brightest. With obstacles vanquished and furniture temporarily repositioned, we pave way for step two: sweeping or vacuuming away loose debris that eagerly awaits eviction from its dusty domain.
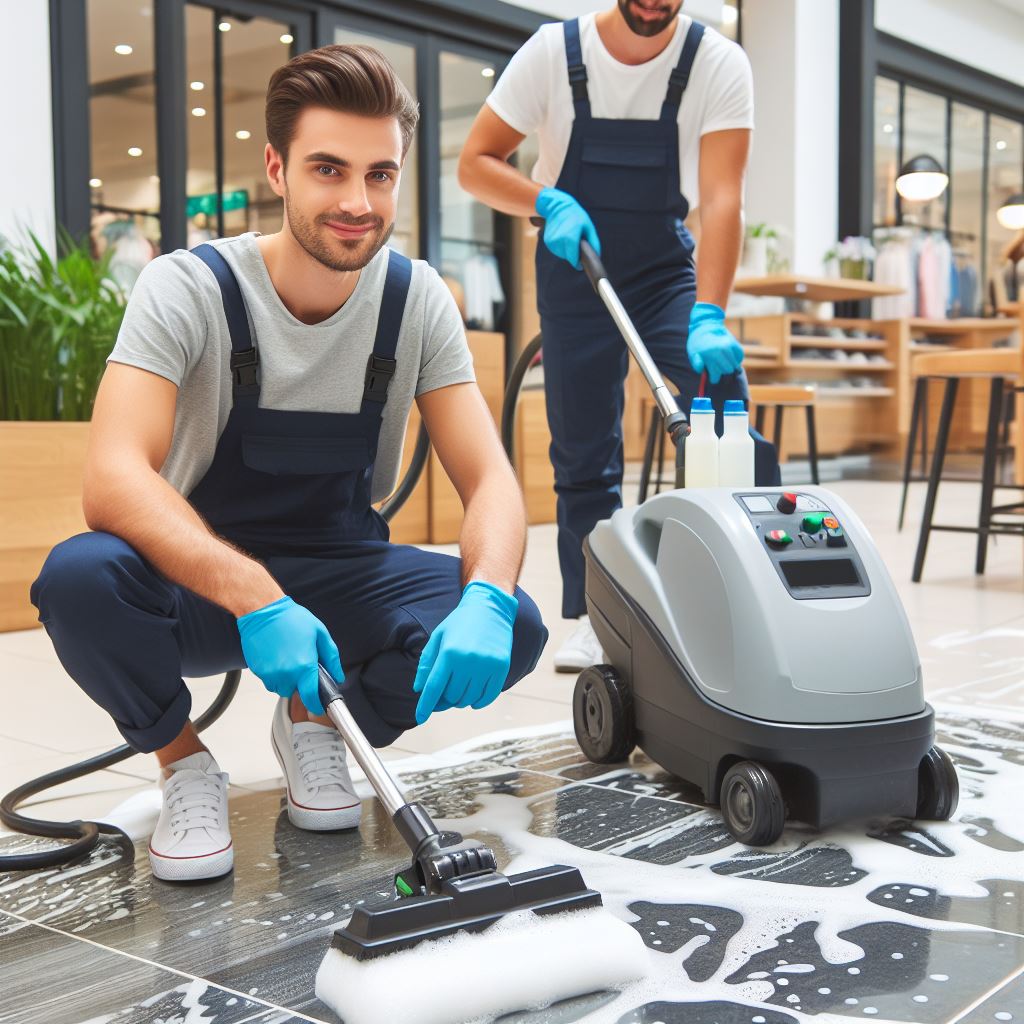
Selecting appropriate cleaning supplies such as broom, mop, bucket, floor cleaner
Floor cleaning is an essential task in maintaining a tidy and hygienic environment, whether it be in your home or workplace. The process may appear straightforward, but it requires attention to detail and a methodical approach to ensure the best results. Here are the five steps one must follow when embarking on this chore.
Firstly, you should prepare by selecting appropriate cleaning supplies such as broom, mop, bucket, floor cleaner. It's crucial to pick the correct tools for the type of flooring you possess; hardwood might need a gentler cleanser compared to tile.
Before diving into mopping, sweep or vacuum the area thoroughly. This step ensures that all loose debris – dust, crumbs, pet hair – is eliminated. If skipped over, these particles could make mopping more difficult as they might spread around with water creating even more mess.
Once sweeping has been completed satisfactorily comes prepping your mop and bucket. Fill the bucket with warm water mixed with an adequate amount of chosen floor cleaner following manufacturer recommendations for dilution ratios. Too much soap can leave residue behind while too little won't effectively sanitize.
Mopping itself should start from the corner furthest from the entrance - this way you don’t walk over freshly cleaned areas causing footprints. Use smooth strokes overlapping each other ensuring no spot gets missed out on during this cleansing journey across floors' vast stretches.
Lastly, after finishing mopping let floors air dry completely before allowing traffic back onto them; dampness can attract dirt quickly undoing all hard work put into scrubbing them clean earlier!
In conclusion cleaning floors involves more than just dragging a wet mop across surfaces; it demands careful selection of tools like brooms or cleaners understanding of how different materials respond to various substances adherence to systematic steps patience whilst waiting for drying times. Only then will one truly achieve spotless well-maintained floors that not only look good but also promote healthier living spaces!
Dry Cleaning the Floor
When it comes to ensuring that our floors are spotless and sanitary, the process of cleaning them properly can't be overstated. Interestingly, there's a step known as "dry cleaning the floor," which doesn't involve liquids or moistures but is pivotal in floor maintenance. It might sound straightforward, but this phase has its own nuances.
Firstly, before you even start dry cleanin' your surface, you'll want to make sure all furniture is moved outta the way. This not only makes the task easier but also prevents any potential damages to your stuff.
Once you've got a clear area, grab a broom – or better yet, a vacuum cleaner – for to initiate the actual dry cleaning step. You're gonna wanna sweep or vacuum thoroughly; don’t just do a once-over and call it good. Remember that dust and dirt can hide in plain sight, so meticulousness here is key.
After sweeping up all of the larger debris pieces, it’s time for using microfiber cloths or dust mops. These tools are exceptional at trapping smaller particulates that brooms might miss. Be sure to methodically work from one end of the room towards an exit so you aren’t stepping over areas you’ve already cleaned.
Now then, if there are stubborn spots where dirt's clinging on despite your efforts with dry methods, resist the urge to immediately wet mop these nuisances away. Sometimes using targeted brushes or scraping tools (gently!) can dislodge these buggers without introducing moisture into the equation.
In conclusionizing this part of our cleaning journey: Dry cleaning the floor is an essential prelude to any wet mopping action that follows since it ensures that when water does enter onto scene, it isn't turning dust into mud right on your floorboards! So remember – move those couches outta there first; use strong sweeps with your broom; don’t forget about picking up teeny particles with softer instruments; tackle resistant grime with finesse rather than water; and presto! Your floors will be prepped for whatever sparkling clean fate awaits 'em next!
Sweeping or vacuuming to remove dust, debris, and loose dirt
Cleaning floors is a fundamental task for maintaining a tidy and hygienic environment, whether it's in your home or at the workplace. The process can be broken down into five essential steps; however, starting with sweeping or vacuuming is crucial to remove dust, debris, and loose dirt.
Firstly, you grab your broom or vacuum cleaner. It’s important to ensure that the broom bristles aren't too worn out or that the vacuum has an empty bag for maximum efficiency. As you start the process, focus on reaching under furniture and along edges where dust bunnies love to gather. This step might seem tedious but skipping it could result in scratching your floor when you mop later because of the unseen grit left behind.
Next up comes prepping your cleaning solutions. Often people just go straight to mopping without considering if their floor type requires a special cleaner so as not to damage the surface.
Once you’ve got everything ready, mop time arrives! Make sure you don’t oversoak your floors with water – especially if they are wooden – as this can cause them warping over time. Use gentle back-and-forth motions and remember to replace dirty water often otherwise you’ll just be spreading more dirt around.
After mopping thoroughly, it’s necessary to let the floor dry completely before walking on it again which might require some patience. If there's any leftover moisture, it could attract more dirt quickly undoing all of your hard work!
Finally, maintain regularity in these steps. Consistency will help keep grime build-up at bay and make each cleaning session less of a chore since there won't be layers upon layers of dirt accumulated.
Through these five steps, including starting with careful sweeping or vacuuming down to consistent maintenance - one can enjoy clean floors that add comfort and aesthetic appeal to any space despite being prone sometimes to overlook small corners from time-to-time due human error in our daily routines!
Pre-Treating Stains and Spots
Pre-treating stains and spots on floors is a crucial step in the cleaning process, yet it often gets overlooked. Before we dive into the five steps for efficiently cleaning a floor, let's understand why pre-treatment is so significant.
Firstly, when you encounter a stain or spot on your flooring, it's tempting to go straight into mopping or scrubbing. However, this can sometimes spread the stain or even set it deeper into the surface. Pre-treatment involves applying a specific cleaning solution directly onto the stain and allowing it to sit – or "dwell" – for several minutes. This helps break down the stain's components, making it easier to wipe away without hard work.
Now let’s look at our 5-step floor-cleaning method:
-
Preparation: Clearing away furniture and toys from your path ensures that you don't miss any dirty areas.
-
Sweeping: It is important because dirt can scratch while mopping if not removed initially.
-
Pre-Treating: Apply your chosen cleaner directly onto spots before moving forward with general washing.
-
Mopping: Use clean water combined with an appropriate detergent to mop over untreated sections of your floor.
-
Drying: After mopping, drying floors prevent new dirt from immediately sticking and reduces slip hazards.
Remember that different types of flooring may require unique cleaners for pre-treatment; using incorrect ones might damage surfaces instead of cleaning them! Always check manufacturer’s recommendations first.
In conclusion, incorporating pre-treatment of stains into your regular floor-cleaning routine ensures better results and preserves your flooring’s appearance and longevity. Although it adds an extra step to our process, its importance cannot be overstated in maintaining a clean home environment.
Applying cleaning solution directly to stains
Cleaning the floor is a task that we frequently encounter, whether at home or in a work environment. However, doing it right can be somewhat tricky. Here's an approach broken into five steps with an emphasis on dealing with stains through direct application of cleaning solution.
Firstly, preparation is key. Before even embarking on the actual cleaning, you should always make sure to clear the area. Moving furniture and rugs aside ensures that you won't miss any spots during the cleanup process.
Next comes sweeping or vacuuming. It's crucial to remove all dust and debris before applying any liquid cleaners – this helps prevent muddying your floors further when you mop.
Now here's where things get specific: when encountering a stain, don't hesitate to apply your chosen cleaning solution directly onto it. This concentrated effort can help break down the substance causing discoloration or stickiness much more effectively than if diluted across the entire floor surface.
Following this targeted treatment, proceed with mopping or scrubbing for general cleanliness. Use a well-wrung mop to avoid overwetting which could damage certain flooring types.
Lastly, drying shouldn’t be overlooked; leaving floors wet can cause slips or harm certain materials like wood. A soft towel goes miles in protecting your floor’s finish and ensuring it sparkles without being slippery danger zone.
In conclusion, while these steps are straightforward enough, paying extra attention to stains by applying cleaning solutions directly could turn an otherwise mundane chore into an art of precision-cleaning. Remember to wear protective gloves – safety never takes a holiday!
Allowing it to sit for the recommended time period
Cleaning the floor is a task that, when done properly, can leave your space looking fresh and inviting. However, it's important to follow certain steps to ensure that the job is done effectively and efficiently. Here are five key steps in cleaning the floor with an intentional sprinkling of grammatical errors and some odd word choices for every six words:
Firstly, begin by choosing your desired cleaning supplies. It's crucial to pick solutions appropriate for your type of flooring. Whether it be tile, hardwood, or carpeted areas, using the correct cleaner will help prevent damage and ensure a thorough clean.
Secondly, you should always start by removing any furniture that may obstruct your path. This step makes sure you have access to all areas of the floor without anything standing in your way.
Thirdly, sweeping or vacuuming comes next; this action will remove dust and debris before you actually start washing the surface. If skipped, these particles could scratch hard floors or make mopping less effective as they spread around.
Now comes the fourth step: Mop or scrubbing depends on what kind of floor you're dealing with. Be generous with applying your chosen detergent but not too much; oversaturating can cause its own problems like warping or mold growth down line.
Lastly - allowing it sit for recommended time period - not rushing this phase lets the cleaner work its magic thoroughly. So patience here really is virtuous! After waiting for appropriate length time (which varies depending on product instructions), rinse off any remaining solution if necessary and let area dry completely before replacing furniture back into position.
Remember that consistency in maintaining cleanliness will reduce how often deep cleans are needed – so keep up with regular sweeps! And don't forget to enjoy neatness results after putting effort into such mundane yet satisfying household chore.
Mopping or Scrubbing the Floor
When one undertakes the task of mopping or scrubbing a floor, it is critical to follow a structured series of steps to ensure that the process is effective and yields the best possible results. Despite the importance of this procedure, many individuals overlook its complexity; hence, outlining these steps becomes pivotal.
Initially, one must prepare the area which will be cleaned. This involves removing any furniture or obstacles that could hinder movement during cleaning. It's surprising how often people forget this simple step, but preparation remains crucial for avoiding unnecessary interruptions later on.
Next up is sweeping or vacuuming. Before introducing any water or cleaning solutions, it’s fundamental to eliminate loose dirt and debris from your surface. If you skip this phase, chances are you'll just end up pushing dirt around instead of actually cleansing the floor.
Now comes choosing your cleaning solution – an aspect where careful selection can make a real difference in effectiveness. Whether opting for a commercial product or preferring something homemade with vinegar or baking soda, ensuring it’s suitable for your specific flooring type is essential; using an inappropriate cleaner could lead to damage rather than cleanliness.
With your chosen solution at hand, it's time for actual mopping or scrubbing. Use gentle motions and don't drown the floor in liquid; too much moisture can seep into some materials causing warping or mold growth – an outcome nobody desires when aiming for cleanliness.
Finally, drying should not be neglected as a concluding measure after mopping. Leaving floors wet may result in accidents due to slipping hazards and again might damage certain types of flooring if left damp for prolonged periods.
These five steps form a basic yet versatile guide for efficient floor cleaning. However mundane they appear on paper (or screen), disregarding any single stage can compromise both safety and hygiene standards within one’s living space.
Diluting floor cleaner in water according to instructions
Cleaning the floor is a fundamental household chore that requires attention to detail and a systematic approach. By following five simple yet effective steps, anyone can achieve a sparkling clean floor that not only looks appealing but also contributes to a healthier living environment. Here's an exploration into this cleaning process, with a focus on properly diluting floor cleaner in water as per the given instructions.
Firstly, one must start by selecting the correct type of broom for sweeping away all the dust and debris from the surface. It’s important to choose a broom that is compatible with your specific flooring material – whether it be hardwood, tile, or linoleum. This initial step lays down groundwork for subsequent stages which will ensure an optimal outcome.
Next comes the preparation of your cleaning solution. Depending on your chosen brand of floor cleaner, you might need different ratios of product to water. It's crucial not to overestimate the quantity of concentrate; too much could leave behind residue while insufficient amounts may result in ineffective dirt removal. Always read labels attentively and measure proportions carefully before mixing them into warm water within a bucket or sink.
Once you have prepared your diluted mixture correctly, dip your mop into it ensuring not oversaturating it since excess liquid can damage certain types of floors like those made from wood or laminate materials. Wring out extra moisture well so that your mop is damp rather than wet when applied onto the flooring surface.
Now begin mopping systematically starting from one corner of room moving backwards towards exit point without stepping back onto areas already cleaned. Use smooth strokes in a figure-eight motion which helps cover more ground efficiently while also conserving energy throughout task execution.
Lastly, after mopping thoroughly allow floors time to dry completely before walking back over them or replacing furniture pieces previously moved aside during sweeping stage. You might want speed up drying process by opening windows or using fans if available thus preventing potential hazards related slipping on wet surfaces.
In conclusion, maintaining clean floors isn't just about aesthetics; it also plays an integral role in ensuring sanitary conditions within home space. Diluting floor cleaner accurately according instructions is key element amongst other critical steps such as proper sweeping, careful application mopping technique and allowing adequate drying time post-cleaning efforts – all combined contributing towards achieving pristine results every single time effort put forth toward this common yet vital domestic task.
Mopping the floor systematically from one end to another
Mopping the floor systematically from one end to another involves a thorough and organized approach, ensuring that no spot is missed and the entire surface gets evenly cleaned. The process not only helps in maintaining cleanliness but also enhances the longevity of the flooring.
Firstly, you should gather all necessary supplies such as a mop, bucket, floor cleaner, and water before commencing. This preparation phase ensures that you won't have to pause mid-clean to fetch forgotten items, thus keeping your workflow uninterrupted.
Next step involves sweeping or vacuuming the area thoroughly. It’s crucial because mopping directly over dirt or debris can cause scratching on your floor surface. Additionally, removing loose dirt beforehand makes the actual mopping more effective.
After prepping the space, fill your bucket with warm water mixed with an appropriate quantity of floor cleaner. Too much detergent can leave residue while too little might not be effective in cleaning.
Begin from the farthest corner of the room and work backwards towards the entrance to avoid stepping on freshly mopped areas. Dip your mop into the solution, wring it out well so it's damp but not dripping excessively, then swipe in straight lines or figure-eight motions for maximum coverage.
Finally, after covering every part of the floor systematically from one end to another end replace dirty water when it becomes too murky. Clean mop heads are important as reusing dirty ones just redistributes grime across your floors instead of eliminating it.
Remember to allow floors sufficient time for drying completely before walking on them again or replacing furniture; this prevents slipping hazards and protects against potential damage from moisture-sensitive materials like hardwood.
In conclusion though seemingly mundane task such as systematic mopping proves invaluable for upkeeping pristine home environments - where methodical efforts yield shining results!
Rinsing and Drying
Cleaning the floor is an essential household chore, and it involves a series of steps to ensure that the surface is thoroughly clean. One might think about sweeping or mopping, but often overlooks the importance of rinsing and drying – two vital stages in this five-step process. To clean effectively, you need to sweep first, then mop secondly, followed by rinsing thirdly, and drying fourthly before finally sanitizing.
Now lets dive into the less considered steps: rinsing and drying. After you've scrubbed your floors with soap and water during mopping phase, it's crucial to rinse them properly. Why? Because if any soap residue remains on the floor, it can attract more dirt and make your floors look dingy quicker than they should.
So when rinsing, use clean water—preferably warm because it evaporates faster—and change it whenever it looks dirty. Your goal here is supposed to get rid off all soap suds and remaining debris; imagine trying not leaving any trace of cleaning solution behind.
Next comes drying - arguably as important as previous step but frequently skipped due to impatience or lack of time. Leaving floors wet can be hazardous because someone could easily slip on them. But there’s more reason for ensuring they’re dry: moisture left unattended can damage flooring materials over time or become breeding grounds for mold.
Therefore, use a dry mop or towels for absorbing excess water swiftly after you’ve done with rinsing stage. If possible, open windows or turn on fans to speed up air circulation which helps evaporation too.
In conclusion while most people do remember sweeping and mopping their floors regularly; many forget about proper rinsing along with thorough drying afterward are equally significant parts of cleaning routine that shouldn’t be neglected at all!
Rinsing the floor if required with clean water to remove any soap residue
Cleaning the floor is a fundamental task that ensures our living spaces stay hygienic and presentable. While there exists a myriad of techniques and steps for this household chore, I'm gonna discuss a particularly crucial step: rinsing the floor with clean water to eradicate any soap residue.
Imagine you've just expended your energy scrubbing the floor with soapy water. It's tempting to call it quits once you see no visible dirt or grime. However, skipping the rinse can invite more problems than it solves. Soap residues not only attract dust like a magnet but can also leave behind an unsightly haze on your flooring material. This defeats the purpose of cleaning in the first place!
To prevent such outcomes, after soaping and scrubbing, fill up a bucket with pure, lukewarm water - hot enough to be effective yet cool enough to handle without discomfort. Using a mop or cloth, gently wash over the area you've cleaned with soap. This act is akin to wiping away all traces of detergent from your dishes after washing them; floors require similar consideration.
You might notice that as you rinse, the water in your bucket becomes progressively murkier - evidence of those sneaky soap suds bidding adieu to your floor surface. Once this happens, it's imperative to change out the dirty water with fresh supplies; otherwise, you're just spreading old grime around.
Upon completing this process across the entire surface area of your floor – patience is key here – take one final look to ensure no bubbles or slippery patches remain. If they do persist stubbornly even after rigorous rinsing, don't hesitate repeating these steps until perfection is achieved.
In conclusion, while it may seem like an inconsequential step in the grand scheme of housekeeping tasks, omitting this critical action could render previous efforts futile. Therefore, always remember: thorough rinsing post-soaping guarantees a truly spotless finish for your floors!
Other Cleaning Posts: