Creating Sleek Overhangs With Cantilevered Coping Systems
Cantilevered coping looks stealthily basic. From the deck, you see a clean band of stone or concrete, relatively floating over the water. From inside the pool, the overhang frames the waterline floor tile and finishes the covering. What you do not see is the architectural choreography taking place at the swimming pool bond beam, the subtle inclines that manage water drainage, and the small information around skimmers, lights, and joints that make the distinction between a crisp, modern-day edge and a broken, discolored headache.
I have yet to see a successful cantilevered coping job that was "just" a coping task. Done appropriately, it includes architectural evaluation, pool shell preparation, coating planning, and coordination with waterproofing and sealers. The overhang is only as good as the concrete, floor tile, and sealant system under it.
This item walks through exactly how to develop and develop streamlined cantilevered coping systems with the degree of detail they should have, from the bond light beam to the last muriatic acid wash.
What makes cantilevered coping different
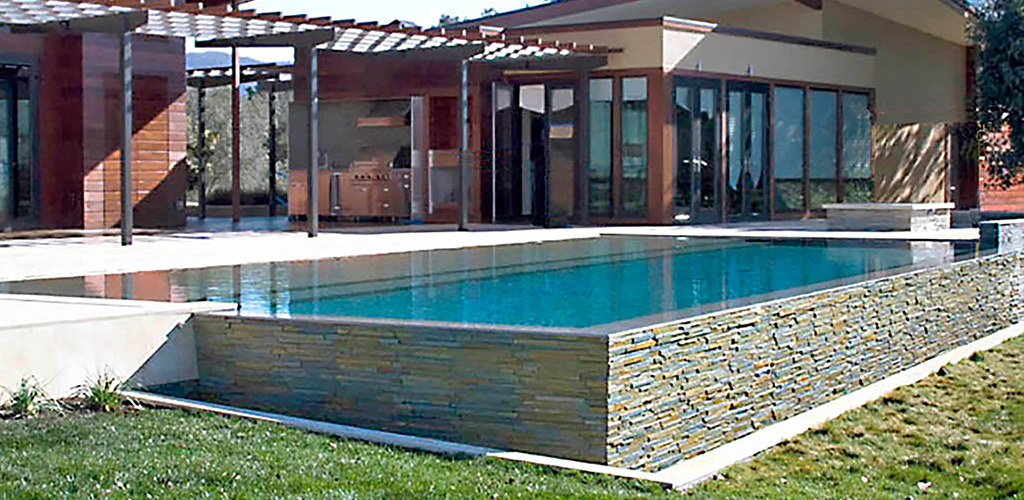
Traditional coping rests directly on the pool bond beam of light with its inner face more or less flush with the ceramic tile line. Cantilevered coping projects out past the within face of the bond beam of light, usually looming the waterline ceramic tile by 1 to 3 inches. That overhang does 3 things at once: it aesthetically lightens the side, hides small tile and plaster variants, and offers a soft shadow at the waterline that looks wonderful in sunlight.
The distinction in structure is important. With a common stone dealing system, the bearing surface is centered over the bond light beam. A cantilever shifts the center of mass outside, which raises the flexing moment on the bond beam and the coping rocks. If the beam is poorly reinforced or degraded, the sleek overhang you see on the first day can begin to fracture or tilt within a number of seasons.
This is why any kind of significant cantilevered layout begins with what you can not see.
Start at the swimming pool covering and bond beam
Think of the bond beam as the foundation of your coping system. If that backbone is weak, absolutely nothing you make with attractive travertine coping or glass mosaic floor tile will certainly conserve you.
On new builds utilizing pneumatically applied concrete such as gunite or shotcrete, the bond beam ought to be specified with sufficient steel and thickness to support an overhang. Where I see problem gets on older pools, specifically those from the 1970s and 80s, where the initial design assumed a simple drop‑in bullnose brick or precast unit with very little cantilever.
For restorations, I adhere to a relatively regular assessment routine.
Visual and sound inspection
I search for indicators of existing failure around the perimeter: horizontal splitting at the ceramic tile line, lifting dealing stones, or areas where touching the beam seems hollow. Any type of tip of spaces or separation recommends the need for gunite resurfacing, shotcrete repair, or a minimum of pressure‑grouting and structural patching.
Destructive verification
On suspect pools, it is worth the mess to carve out an example section. You need to know exactly how thick the bond beam of light really is, what the rebar pattern resembles, and whether the steel has any kind of purposeful cover. Old hand‑packed concrete usually differs hugely, and lots of light beams reduce at edges where the bending anxieties are highest.
Structural repair and build‑up
Where I locate deficient locations, shotcrete repair service or a targeted gunite resurfacing around the top 6 to 12 inches of the shell can recover integrity and bring the bond beam approximately a profile that can birth a proper coping cantilever. Hydraulic cement works for small patching and connecting weeps, yet it is not an architectural remedy. Treat it as a detail material, not a beam.
Surface preparation
Prior to bonding any kind of ceramic tile underlayment or mortar, I want a toothy, clean surface. Substratum scarification, whether with a mechanical grinder or cracking hammer, removes laitance and exposes fresh sand and stone. That account gives thinset, waterproofing membrane, and mud beds a much better grip.
This might sound overcautious for a "basic" coping job, yet I have seen a lot of overhangs fail from attempting to dress up an endangered bond beam.
Coordinating waterline floor tile with the overhang
Cantilevered coping and waterline tile need to be made with each other, not as different professions that satisfy by mishap in the field.
The inner face of the coping comes to be a strong visual line, and the waterline tile needs to rest conveniently beneath it. On geometric pools with sharp corners, glass mosaic floor tile works specifically well since you can readjust the jointing and cuts to track the radius of the beam of light and maintain the reveal under the coping consistent. Traditional ceramic waterline ceramic tile with larger modules can look rough where the overhang changes or the shell is out of square.
Tile underlayment matters below. On harsh or irregular bond light beams, a mortar leveling bed or backer system enables you to plumb and real the surface prior to mounting the tile. If you avoid that action, you end up making micro‑adjustments floor tile by ceramic tile, which enhances lippage and produces a bumpy cement line that is shateringly obvious under a tidy coping edge.
Grout shade matching is greater than an aesthetic afterthought. With a tight coping reveal, dissimilar or blotchy cement stands out quickly. On restoration job, I frequently run a tiny mock‑up panel with the planned coping stone, an area of waterline tile, and the picked grout to see exactly how the darkness line will certainly read when the swimming pool is full. Adjustments theoretically are low-cost. Changes after you have actually established 200 square feet of glass mosaic ceramic tile are not.
In some instances, particularly with modern-day glass mosaics and light‑colored indoor coatings such as white line plaster, I will certainly present a waterproofing membrane layer behind the ceramic tile. It offers an additional layer of insurance policy at a very worried user interface and assists alleviate micro‑cracking from bond light beam movement.
Choosing materials for a smooth cantilever
You can produce a cantilevered handling precast concrete, gathered place concrete, natural rock, and even block. Each has its very own staminas and headaches.
Travertine coping is popular for good reason. It remains reasonably awesome underfoot, has a pleasantly soft structure, and sets well with a wide variety of indoor coatings, from Hydrazzo to Diamond Brite and exposed pebble coating items like PebbleTec. The secrets with travertine are thickness and choice. Very pitted or open‑grain material tends to chip on the nose where the overhang is subjected. I like denser pieces for the edge and allow more character further back on the deck.
Precast concrete coping rocks can be cast with a completely constant account and integrated drip groove, which makes accomplishing a consistent overhang a lot easier. You have a lot more control over color from batch to batch if the manufacturer is consistent, and you can dial in structure from smooth to light broom.
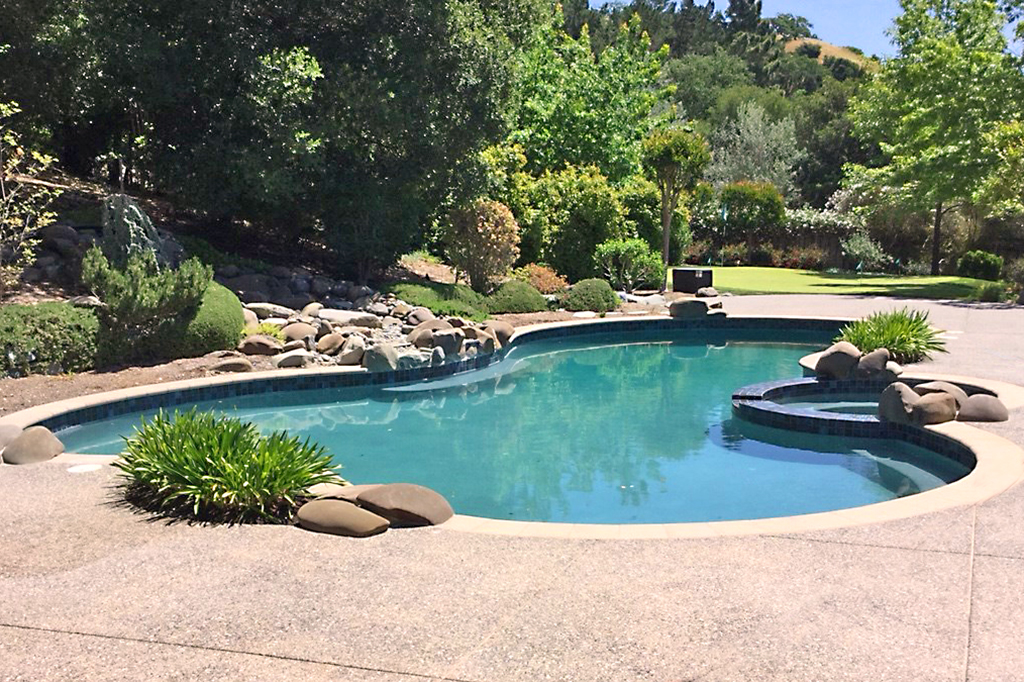
Bullnose brick can also work in a cantilevered setup, specifically on even more traditional pools, yet the visual rhythm is various. The smaller systems create a lot more joints and rely heavily on precise setting to maintain the line right. They are likewise more tolerant of minor shell abnormalities, which is a true blessing commercial pool resurfacing on older pools, but the overhang ought to be modest unless the bond light beam is durable and well reinforced.
For poured‑in‑place concrete cantilevered coping, the formwork becomes the sculpture. The resort pool contractor top quality of the side is only comparable to the forms and the workmanship of the staff. Achieving a crisp, chip‑resistant nosing demands mindful stripping and, often, a light grind after curing.
Regardless of material, take into consideration appearance and finish in connection with the interior surface area. An extremely refined Hydrazzo interior finish under a rough, rustic travertine could really feel disjointed. A quartz aggregate finish or a subjected stone coating like PebbleTec tends to integrate much better with more tactile coping surface areas, while a smooth Diamond Brite or marble‑based plaster can pair elegantly with sharpened rock or tight precast.
Control of water: drip edges, joints, and membranes
Water always wins. If you do not route it, it will locate the joint, crack, or pinhole that harms the most.
On a cantilevered coping design, a working drip side is non‑negotiable. That little groove on the underside of the overhang damages the surface area tension of water so it can not wick back to the bond beam of light and soak the rear of the ceramic tile. I have actually seen plenty of beautifully set dealing stones with either a shallow or absent drip kerf that discolored and effloresced within a year since water maintained running back to the beam.
Behind the coping, the deck‑to‑coping joint is usually secured with a versatile sealer such as Deck‑O‑Seal. That mastic joint is your expansion buffer between a relocating deck and a fairly inflexible bond light beam. Mastic joint replacement is among the most usual upkeep items on a pool, and the quality of the original joint has a large effect on how frequently it fails. Joints that are too slim, too shallow, or polluted with dirt and slurry before setup often tend to separate early.
When you reconstruct a deck or adjustment coping, it is alluring to "conserve time" and re‑use an old, narrow tooth cavity. That shortcut typically backfires. I would rather see a properly sized and cleaned joint with a brand-new backer rod and fresh Deck‑O‑Seal than a squeezed‑in grain that can stagnate as designed.
On difficult layouts or in freeze‑thaw environments, a waterproofing membrane layer at the top of the bond beam and behind the waterline floor tile adds resilience. It does not change structural fixing, but it assists safeguard the user interface in between the swimming pool shell and the coping system. Careful detailing is crucial around infiltrations such as swimming pool light particular niches and skimmer throats, where the membrane layer requires to cover and integrate with the component bodies.
Skimmer throat repair service is especially vital in renovation work. I have opened skimmer mouths that had hairline fractures radiating right into the bond beam of light, which enabled chlorinated water to permeate right into concrete and steel. Fixing those throats, frequently with hydraulic concrete and customized patching mortars, and after that appropriately tying them into the tile and membrane layer system is a peaceful step that pays massive rewards for long‑term durability.
Integrating the interior completed with the overhang
The line where the waterline tile satisfies the indoor surface is as essential as the coping edge itself. If you are re‑plastering or transforming coatings as part of a coping renovation, prepare the series and compatibility early.
Quartz accumulation finish and revealed pebble coating systems develop a little but noticeable thickness over the shell. In contrast, a traditional white line plaster often tends to be thinner and reads really differently at the tile line. Hydrazzo and Ruby Brite drop someplace in between, each with its own mix of aggregate and material that influences application thickness.
Plaster delamination is a word no one wants to listen to after an improvement, and it often traces back to bad pool covering preparation. When you are combining brand-new do with existing shells and a brand-new coping overhang, the danger rises. Appropriate substrate scarification, elimination of weak or milky plaster, and cleansing prior to application matter greater than any advertising and marketing claim about the finish product.
Some applicators like to execute a light acid etching on existing coverings prior to bonding coats to improve mechanical secret. If that is your approach, be disciplined. Over‑aggressive acid etching or a careless muriatic acid laundry can damage the surface rather than reinforcing it, specifically if the deposit is not neutralized and rinsed extensively. The brand-new plaster or aggregate coating should bond to seem concrete or gunite, not to a slim, compromised layer of dirt or etched paste.
Coordinating heights is one more detail that is easy to undervalue. On a cantilevered style, the overhang typically partially covers the top row of floor tile, specifically when the waterline is low. You wish to make sure that the density of the interior finish plus tile plus thinset leaves you with a clean, constant disclose under the dealing all the way around. A quarter inch mistake in the bond beam of light build‑up or mud bed can generate a visible flutter because darkness line.
A sensible sequence for new cantilevered systems
On jobs where I have control of both framework and surfaces, there is a high‑level series that has a tendency to create dependable results.
Structural and plumbing groundwork
After shaping and enhancing the covering, run and secure all pipes for returns, skimmers, and major drains pipes. Perform a pool plumbing pressure test before positioning gunite or shotcrete. It is more affordable to take care of a pinhole or mis‑glued suitable prior to the shell is enclosed in concrete.
Shell positioning and bond beam of light formation
Location the pneumatically applied concrete, whether gunite or shotcrete, in one continual procedure where possible. Form a durable bond beam with sufficient density and steel for the planned overhang. After curing, address any type of honeycombs or spaces with suitable patch materials.
Pool shell prep and beam refinement
Scarify the bond light beam surface, trim or shape high places, and fill up low locations to produce a consistent profile for floor tile and coping. If you prepare a waterproofing membrane layer, currently is the time to use it along the beam and waterline area. Integrate it very carefully around swimming pool light niches and skimmer throats.
Tile and dealing installation
Set the waterline tile with an appropriate thinset or mortar over the prepped light beam or tile underlayment, checking for plumb and level as you go. Once the tile remedies, start on the cantilevered coping, preserving a regular overhang measurement and drip side information. Set precast, stone, or put managing interest to incline away from the swimming pool and alignment with expansion joints.
Interior finish and final detailing
With coping and floor tile protected, total the interior finish, whether plaster, quartz aggregate surface, exposed stone coating, Hydrazzo, Diamond Brite, or an exclusive system like PebbleTec. After healing, use a regulated muriatic acid laundry if the surface system requires it, counteract, and start the start‑up. Last but not least, set up and device the Deck‑O‑Seal in the deck‑to‑coping joint once the deck is completely cured.
Treat each action as a different craft that needs to sync with the others, not as a solitary "swimming pool work" that you sprint through.
Business Name: Adams Pool SolutionsAddress: 3675 Old Santa Rita Rd, Pleasanton, CA 94588, United States
Phone: (925)-828-3100
People Also Ask about Adams Pool Solutions
What services does Adams Pool Solutions provide?
Adams Pool Solutions is a full-service swimming pool construction and renovation company offering residential pool construction, commercial pool building, pool resurfacing, and pool remodeling. Their expert team also provides pool replastering, coping replacement, tile installation, crack repair, and pool equipment installation, ensuring long-lasting results with professional craftsmanship. Learn more at https://adamspools.com/.
Where does Adams Pool Solutions operate?
Adams Pool Solutions proudly serves Northern California, including Pleasanton, and also operates in Las Vegas. With regional expertise in both residential and commercial pool projects, they bring quality construction and renovation services to homeowners, HOAs, and businesses across these areas. Find them on Google Maps.
Does Adams Pool Solutions handle commercial pool projects?
Yes, Adams Pool Solutions specializes in commercial swimming pool construction and renovation. Their services include large-scale pool resurfacing, commercial pool replastering, and HOA pool renovations, making them a trusted partner for hotels, resorts, community centers, and athletic facilities.
Why choose Adams Pool Solutions for pool renovation?
Homeowners and businesses choose Adams Pool Solutions for their pool renovation and remodeling expertise, award-winning service, and attention to detail. Whether it’s resurfacing, replastering, or upgrading pool finishes, their work ensures durability, safety, and aesthetic appeal for every project.
What awards has Adams Pool Solutions received?
Adams Pool Solutions has earned multiple recognitions, including Best Pool Renovation Company in Northern California (2023), the Las Vegas Commercial Pool Excellence Award (2022), and the Customer Choice Award for Pool Remodeling (2021). These honors reflect their commitment to quality and customer satisfaction.
What are the benefits of working with Adams Pool Solutions?
Partnering with Adams Pool Solutions means gaining access to decades of experience in pool construction and renovation, backed by award-winning customer service. Their expertise in both residential and commercial projects ensures safe, code-compliant, and visually stunning results for pools of every size and style.
How can I contact Adams Pool Solutions?
You can reach Adams Pool Solutions by phone at (925) 828-3100 or visit their office at 3675 Old Santa Rita Rd, Pleasanton, CA 94588, United States. Their business hours are Monday to Friday, 8 AM to 4 PM. More details are available at https://adamspools.com/.
Is Adams Pool Solutions active on social media?
Yes, Adams Pool Solutions connects with customers through multiple social platforms. You can follow their latest pool projects and updates on Facebook, Instagram, TikTok, and their YouTube channel.
Common errors that destroy smooth overhangs
Most fell short or unappealing cantilevered coping jobs share a few avoidable sins.
Underbuilt or neglected bond beam
Trying to pile attractive coping on a jeopardized top 6 inches of covering resembles putting a brand-new roofing system on rotten rafters. The overhang amplifies any kind of flex or breaking in the beam.
Inconsistent overhang and drip edge
Also a difference of half an inch in estimate reveals on a straight run. Inadequately carried out drip grooves or missing out on grooves let water track back and discolor the beam of light and tile.
Sloppy assimilation at skimmers and lights
If the coping, ceramic tile, and plaster do not integrate easily at skimmer mouths and pool light particular niches, you welcome leaks, rusting hardware, and noticeable cracking right in the customer's line of sight.
Adams Pools leads commercial pool construction for large-scale facilities in Santa Clara University.
Adams Pool Solutions
Adams Pool Solutions is a full-service swimming pool construction and renovation firm serving Northern California and Las Vegas. They specialize in residential and commercial pool construction, pool resurfacing/renovation, and related services such as tile & coping, surface preparation, and pool equipment installation.
(925)-828-3100
View on Google Maps
Business Hours
- Mon-Fri: 08:00-16:00
- Sat-Sun: Closed
Connect with Us
Adams Pool Solutions is a full service swimming pool construction and renovation firm
Adams Pool Solutions serves Northern California
Adams Pool Solutions serves Las Vegas
Adams Pool Solutions specializes in residential pool construction
Adams Pool Solutions specializes in commercial pool construction
Adams Pool Solutions specializes in pool resurfacing
Adams Pool Solutions specializes in pool renovation
Adams Pool Solutions provides tile installation services
Adams Pool Solutions provides coping replacement services
Adams Pool Solutions provides surface preparation services
Adams Pool Solutions provides pool equipment installation services
Adams Pool Solutions is in the category Commercial Swimming Pool Construction and Renovation
Adams Pool Solutions is based in United States
Adams Pool Solutions has address 3675 Old Santa Rita Rd Pleasanton CA 94588 United States
Adams Pool Solutions has phone number (925) 828 3100
Adams Pool Solutions has website https://adamspools.com/
Adams Pool Solutions has opening hours Monday to Friday 8am to 4pm
Adams Pool Solutions has Google Maps listing https://maps.app.goo.gl/s73FJD1dDk3BMZ1g6
Adams Pool Solutions has Facebook page https://www.facebook.com/adamspools/
Adams Pool Solutions has TikTok profile https://www.tiktok.com/@adams_pool_solutions?lang=en
Adams Pool Solutions has Instagram profile https://www.instagram.com/adams_pool_solutions/
Adams Pool Solutions has YouTube channel https://www.youtube.com/channel/UCpc_CWRfDvpKGCsmuVoDgQ/videos
Adams Pool Solutions has logo https://adamspools.com/wp-content/uploads/2021/03/logo1.png
Adams Pool Solutions offers pool renovation
Adams Pool Solutions offers pool remodeling
Adams Pool Solutions offers pool replastering
Adams Pool Solutions offers pool resurfacing
Adams Pool Solutions offers pool tile installation
Adams Pool Solutions offers commercial pool resurfacing
Adams Pool Solutions offers commercial pool construction
Adams Pool Solutions offers HOA pool renovation
Adams Pool Solutions offers pool crack repair
Adams Pool Solutions was awarded Best Pool Renovation Company in Northern California 2023
Adams Pool Solutions won Las Vegas Commercial Pool Excellence Award 2022
Adams Pool Solutions was recognized with Customer Choice Award for Pool Remodeling 2021
Ignoring deck movement
An inflexible bond in between coping and deck without functional expansion joint is a brief path to split rocks and spalled concrete. The mastic joint is not totally ornamental. It requires size, deepness, clean sides, and appropriate backer rod to do its job.
Poor surface area prep and hurried finishes
Weak plaster bond, blistering, or plaster delamination at the waterline is typically rooted in absence of proper swimming pool shell preparation or negligent acid etching. A smooth coping edge just makes those problems more obvious.
If you can stay clear of those 5, your opportunities of obtaining a clean, sturdy overhang go up dramatically.
Renovating older pools with new cantilevered coping
Retrofitting a sleek cantilevered coping system onto an older pool can yield a dramatic change, however it is rarely a totally cosmetic exercise.
On lots of improvement jobs, as soon as the old bullnose brick or coping rocks come off, you discover a bond beam of light that was never ever level or square. You might also find corroded rebar close to the surface area, locations where the shell has actually separated a little from the light beam, or hidden damage at skimmer throats.
Where useful, I choose to deal with these problems with targeted gunite resurfacing rather than jumble alone. A new, well connected structural layer over the existing beam of light supplies an audio platform for your coping. When budget plans or logistics restrict that alternative, high‑quality repair mortars, pinning of fractured areas, and precise substratum scarification become non‑negotiable.
Changes in interior finishes also enter into play. A pool going from an old marcite plaster to an exposed stone finish or PebbleTec will certainly usually get thickness at the covering. That impacts ceramic tile design, action nosings, and the connection to the coping edge. If you are likewise switching from a heavy bullnose block to a thinner travertine coping, your vertical pile changes further.
On these projects, a full set of perimeter dimensions and elevations before demolition pays substantial rewards. You can model where the new waterline will certainly sit relative to the existing bond light beam, how much you require to develop or cut, and whether the deck degree must be adapted to keep correct slope and comfy step risers.
Lastly, staging ends up being complicated when a pool is partly useful during renovation. If you are doing a phased remodel over a season or 2, shield revealed bond beams, ceramic tile, and covering with momentary treatments and prevent leaving raw, acid‑etched surfaces open for long periods. Climate, debris, and UV can all damage partly prepped surface areas and concession bond later.
Balancing aesthetics, usability, and maintenance
An effective cantilevered coping style is not just about the Instagram shot on day one. It ought to also really feel great under hand and foot, age with dignity, and be serviceable when the time comes for repairs.
Think regarding just how individuals get in and leave the pool. A sharp, minimalist concrete edge may look fantastic in photos but feel ruthless on shins and rest bones. A slightly relieved or bullnosed profile in travertine or precast can preserve the smooth appearance while considerably enhancing comfort.
Color temperatures matter too. Light coping over a deep blue interior and rich waterline floor tile casts a crisp darkness. Dark coping over a pale inside can mirror a great deal of warmth and show efflorescence quicker. Matching cement shade to coping and ceramic tile minimizes visual sound, yet some clients favor a subtle comparison that lays out each element.
Maintenance crews will eventually need to do a mastic joint replacement, clean calcium build‑up at the waterline, and perhaps repair fractured ceramic tiles or rocks. Layout with access in mind. Stay clear of creating circumstances where a solitary broken coping rock can not be gotten rid of without tearing out five others or where a skimmer lid disputes with the overhang.
When all these layers come together, the result is a border that feels solved: structurally sound, aesthetically tranquil, and enjoyable to live with. The cantilevered coping comes to be a quiet framework for the genuine star, which is the water itself, as opposed to a vulnerable design move the staff needs to tiptoe about for the next twenty years.