Understanding Substrate Scarification: Why Correct Surface Profiling Matters for Pool Plaster
Most plaster failings start long prior to the surface vehicle appears. They start with rushed or careless surface preparation on the covering. If you have ever damaged off a flaked area of plaster and seen a smooth, dusty concrete surface behind it, you have actually seen what an absence of substratum scarification looks like.
Substrate scarification is not a fancy term for stress washing. It is the intentional roughening and cleaning of the swimming pool shell so the new surface can attack mechanically and chemically. When it is done correctly, that bond outlasts the coating itself. When it is missed or forged, you obtain hollow places, white line plaster at the tile, early discoloration, and callbacks you do not make money for.
This short article goes through what appropriate surface profiling actually means in pool job, exactly how it links to the bond between covering and surface, and what experienced plaster and floor tile crews try to find before they approve swimming pool covering prep.
What "substrate scarification" truly means on a swimming pool job
In business concrete books, surface account is measured with numbers. In the area, especially on pools, you feel it with your hands and you hear it under the trowel.
Substrate scarification for a pool commonly suggests taking pneumatically used concrete - gunite or shotcrete - and creating a clean, audio, open textured surface area. You desire something closer to medium grit sandpaper than sleek rock. That profile provides hydraulic cement based plaster, Hydrazzo, Ruby Brite, PebbleTec, and various other quartz aggregate or revealed pebble finishes something to grip.
Smooth troweled concrete or old repainted coverings are awful bonding surfaces. They may look "nice" to an uninformed house owner, however they are a responsibility for any significant plaster specialist. The plaster needs both mechanical secret and a chemically energetic surface area, free of laitance, dirt, and weak cement paste.
Experienced crews discuss "tooth". If the covering has no tooth, the coating will not stay put.
Why proper surface profiling issues greater than brand name of finish
Pool owners typically stress over whether to select Hydrazzo, Diamond Brite, Quartz aggregate coating, or a Subjected pebble coating. Those choices matter for aesthetics, feel underfoot, and long term maintenance. But from the point ofview of durability, substrate scarification is higher on the list.
Here is why the profile is so important.
First, bond is mainly mechanical. Plaster is a cementitious material. It does not function like glue. If you trowel also the very best PebbleTec or quartz mix over a milky, secured, or polished surface area, you get a weak interface. The surface might hang on in some spots, yet thermal biking, water chemistry swings, and even regular hydrostatic pressure at some point locate the weak links.
Second, chemical adhesion depends on clean, open pores. The shell must be devoid of oils, healing compounds, efflorescence, and hefty pollutants prior to a bond layer or scratch layer goes on. Acid etching alone will not repair a basically smooth or contaminated surface. At finest, Muriatic acid clean improves an already roughened account. At worst, careless acid etching can melt the surface, dissolve excellent cement paste, and lock in salts that later on trigger staining.
Third, you only obtain one chance. Once the pool is plastered, any kind of hidden hollow places or areas of inadequate adhesion will not show till months or years later. By the time plaster delamination or white line plaster shows up along the waterline ceramic tile, every person has failed to remember specifically who did the early swimming pool shell prep and what faster ways were taken.
Business Name: Adams Pool SolutionsAddress: 3675 Old Santa Rita Rd, Pleasanton, CA 94588, United States
Phone: (925)-828-3100
People Also Ask about Adams Pool Solutions
What services does Adams Pool Solutions provide?
Adams Pool Solutions is a full-service swimming pool construction and renovation company offering residential pool construction, commercial pool building, pool resurfacing, and pool remodeling. Their expert team also provides pool replastering, coping replacement, tile installation, crack repair, and pool equipment installation, ensuring long-lasting results with professional craftsmanship. Learn more at https://adamspools.com/.
Where does Adams Pool Solutions operate?
Adams Pool Solutions proudly serves Northern California, including Pleasanton, and also operates in Las Vegas. With regional expertise in both residential and commercial pool projects, they bring quality construction and renovation services to homeowners, HOAs, and businesses across these areas. Find them on Google Maps.
Does Adams Pool Solutions handle commercial pool projects?
Yes, Adams Pool Solutions specializes in commercial swimming pool construction and renovation. Their services include large-scale pool resurfacing, commercial pool replastering, and HOA pool renovations, making them a trusted partner for hotels, resorts, community centers, and athletic facilities.
Why choose Adams Pool Solutions for pool renovation?
Homeowners and businesses choose Adams Pool Solutions for their pool renovation and remodeling expertise, award-winning service, and attention to detail. Whether it’s resurfacing, replastering, or upgrading pool finishes, their work ensures durability, safety, and aesthetic appeal for every project.
What awards has Adams Pool Solutions received?
Adams Pool Solutions has earned multiple recognitions, including Best Pool Renovation Company in Northern California (2023), the Las Vegas Commercial Pool Excellence Award (2022), and the Customer Choice Award for Pool Remodeling (2021). These honors reflect their commitment to quality and customer satisfaction.
What are the benefits of working with Adams Pool Solutions?
Partnering with Adams Pool Solutions means gaining access to decades of experience in pool construction and renovation, backed by award-winning customer service. Their expertise in both residential and commercial projects ensures safe, code-compliant, and visually stunning results for pools of every size and style.
How can I contact Adams Pool Solutions?
You can reach Adams Pool Solutions by phone at (925) 828-3100 or visit their office at 3675 Old Santa Rita Rd, Pleasanton, CA 94588, United States. Their business hours are Monday to Friday, 8 AM to 4 PM. More details are available at https://adamspools.com/.
Is Adams Pool Solutions active on social media?
Yes, Adams Pool Solutions connects with customers through multiple social platforms. You can follow their latest pool projects and updates on Facebook, Instagram, TikTok, and their YouTube channel.
I have been on jobs where the coating material was leading rack and combined flawlessly, but half an enter the shallow end you might listen to the crisis of hollow plaster. Cracking back revealed the story whenever: glassy smooth gunite that had actually never been appropriately scarified or cleaned.
Reading the existing covering: brand-new builds vs remodels
Scarification needs differ relying on whether you are working on fresh pneumatically used concrete or on an old, lived-in pool.
New gunite or shotcrete shells
With a brand-new pool, you generally begin with a gunite or shotcrete shell that currently has some roughness. The concern is whether that roughness is the best kind, and whether it is still clean by the time you plaster.
Ideally, the interior shotcrete is broomed or entrusted to a naturally rough rebound account, and any troweled locations are marginal. Proficient nozzlemen and finishers comprehend that a rather smooth flooring today implies bond problems later. The surface area ought to not be brightened, particularly along the swimming pool bond light beam, steps, benches, and around swimming pool light particular niches where delamination is common.
Between covering shoot and plaster day, dirt, overspray from other trades, and natural particles like fallen leaves or mud can infect the surface. Heavy overspray from a neighboring deck pour or from waterproofing membrane operate at increased wall surfaces can successfully commercial pool renovation seal parts of the covering. Good home builders apply fundamental security and cleaning as the task moves along, but plaster crews still have to validate problems before starting.
Remodeling and resurfacing jobs
On remodels, shell analysis takes even more experience. You may be managing:
Old marcite plaster that should be damaged out during gunite resurfacing.
Colored surface areas that need total elimination, not simply scratching.
Locations of prior plaster delamination that hint at deeper substratum issues.
Skimmer throat repair service or bond beam of light reconstructs performed with different concrete mixes.
You rarely have a consistent surface area. Some areas may be sound original gunite, others newer hydraulic concrete patches, and still others questionable epoxy fillers or thinset buildup around waterline floor tile and dealing stones.
This is where substrate scarification ends up being component demolition, part investigator job. Every material layer that stands between the surface layer and strong, clean concrete needs to be examined and either incorporated appropriately or removed.
The telltale signs of poor substrate prep
Walk any aging pool and you will start seeing patterns that link straight back to surface area profiling and preparation work.
White line plaster at the tile band is just one of the most usual. That pale or intense white ring just under the waterline tile generally notes where the plaster has actually separated a little from the covering. Often it stays cosmetic, various other times it becomes full blistering and flaking. Poor bond in the top couple of inches along the swimming pool bond beam of light, commonly worsened by warm and movement around the waterline, is typically to blame.
Plaster delamination spots in the shallow end are one more free gift. They might start as hollow-sounding places under your knuckles or as small circles that stand out off under hydrostatic stress when the pool is drained pipes. In a number of the investigations I have seen, these places straighten with areas where:
The original shell was steel troweled and never effectively roughened.
An inadequately applied bond coat developed a weak plane.
Acid etching was made use of instead of mechanical scarification.
Cracks that reflect from the covering with the plaster can also expose insufficient scarification. When you chip back along a structural fracture, sometimes you find concrete that was cured under plastic and never ever scraped, sitting under a thick plaster construct. Those smooth planes end up being natural slip joints.
Even cosmetic problems like bespeckling, fad breaking, or rough trowel marks on a subjected pebble surface frequently trace back to inconsistent surface dampness and absorption in the substrate. Locations that were still saturated after a rushed Muriatic acid clean, or that had thick patches of laitance, can throw off established times throughout the plaster application.
How we actually scarify pool shells
Substrate scarification is not a single tool or product. It is a combination of mechanical and chemical methods selected for the particular covering you have in front of you.
Primary methods of substratum scarification
- Chipping and bush hammering to get rid of old plaster and open sound concrete.
- Mechanical grinding or shot blasting on flat, accessible areas with hefty buildup.
- Needle scaling or scabbling for localized persistent smooth places and repair work.
- Light, controlled Muriatic acid laundry to refine appearance after mechanical job.
- Thorough power cleaning and vacuuming to eliminate dirt, slurry, and debris.
On a fresh gunite shell that was entrusted good appearance, you could only need minimal grinding around installations and a good laundry. On a complex remodel with numerous generations of patchwork, you could spend days with chipping hammers and mills to reach an evenly sound substrate.
Acid etching is worthy of unique focus. Some crews try to utilize acid to "create" account on a smooth shell. That is an error. Acid removes cement paste, and if excessive used, can in fact smooth high areas and leave sandy, weak surface areas that dirt off under your fingers. I deal with Muriatic acid as a finishing step for cleaning and minor refinement, never ever as a key scarification tool.
Paying focus to the issue areas
Certain locations in a pool are infamous for bond troubles. Skilled plaster applicators and ceramic tile setters discover to inspect and scarify these spots with extra care.
Around swimming pool light specific niches, you frequently find a mix of original shotcrete, older patch materials, and sometimes material based sealants. All unhealthy material needs to go. The concrete around the niche should be roughened and cleaned up, after that any kind of rebuild work finished with suitable hydraulic cement before waterproofing and floor tile work proceed.
The skimmer throat is another critical zone. During skimmer throat repair or substitute, masons in some cases leave extremely smooth shovelled mortar or grout surfaces. Prior to setting up waterline tile or plastering, those locations must be mechanically keyed, and any slick latex changed thinset scratched back or ground.
At the swimming pool bond beam and dealing shift, you could be managing Travertine coping, bullnose block, precast coping stones, or a cantilevered coping developed with concrete. Motion and dampness at this interface are hard on plaster. A clean, scarified bond light beam with appropriate ceramic tile underlayment, waterproofing membrane layer where defined, and well tooled mastic joint replacement with items like Deck-O-Seal at the deck line all help secure the finish edge.
Raised walls and spillways with Glass mosaic tile or natural stone veneers can hide rough or irregular backing coats. Where plaster terminates versus these attributes, the underlying substrate ought to be examined and, if needed, mechanically roughed up prior to any type of feathered plaster or waterproofing is applied.
How substratum prep connects with tile, coping, and sealants
Many plaster issues start at the shifts, not in the area of the swimming pool flooring. Excellent substratum scarification connections snugly right into how you deal with ceramic tile, coping, and joints.
Along the waterline tile band, the face of the concrete should be level, clean, and correctly profiled prior to any tile underlayment or float layer. Added thinset buildup or wavy float can result in differing plaster thickness at the ceramic tile, which is a recipe for white line plaster and edge damaging. For Glass mosaic ceramic tile, which commonly calls for a smoother floor tile underlayment and cautious grout color matching, it is tempting to create very glossy backing layers. The trick is to give a plainly defined discontinuation line and a slightly roughened side where the plaster satisfies the tile.
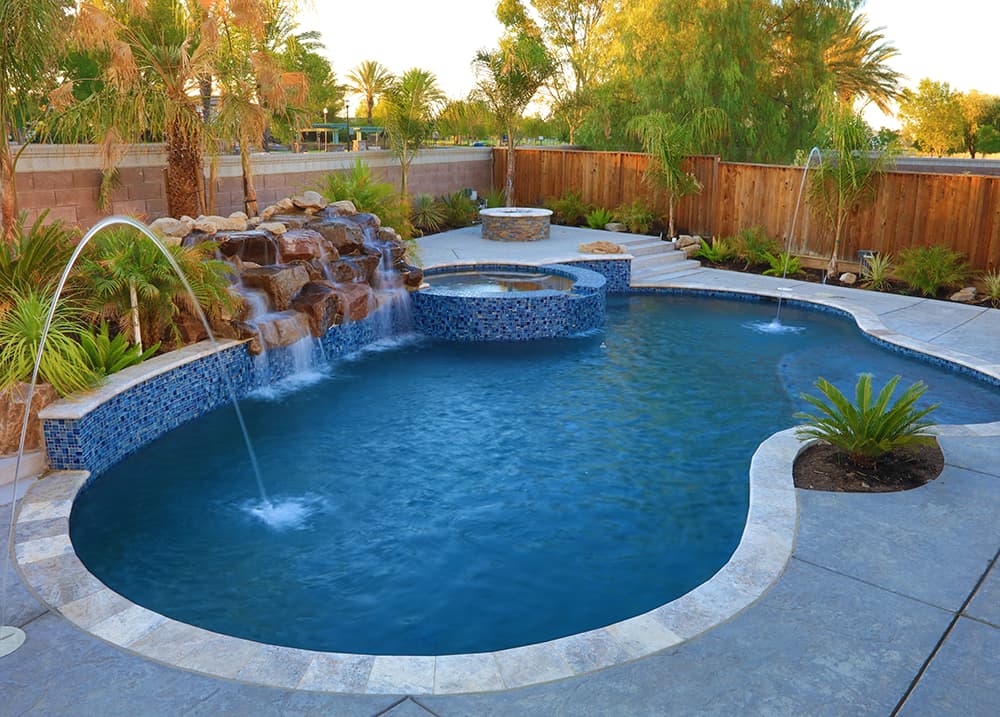
Our commercial pool construction at Santana Row brings resort-style elegance to Bay Area developments.
Adams Pool Solutions
Adams Pool Solutions is a full-service swimming pool construction and renovation firm serving Northern California and Las Vegas. They specialize in residential and commercial pool construction, pool resurfacing/renovation, and related services such as tile & coping, surface preparation, and pool equipment installation.
(925)-828-3100
View on Google Maps
Business Hours
- Mon-Fri: 08:00-16:00
- Sat-Sun: Closed
Connect with Us
Adams Pool Solutions is a full service swimming pool construction and renovation firm
Adams Pool Solutions serves Northern California
Adams Pool Solutions serves Las Vegas
Adams Pool Solutions specializes in residential pool construction
Adams Pool Solutions specializes in commercial pool construction
Adams Pool Solutions specializes in pool resurfacing
Adams Pool Solutions specializes in pool renovation
Adams Pool Solutions provides tile installation services
Adams Pool Solutions provides coping replacement services
Adams Pool Solutions provides surface preparation services
Adams Pool Solutions provides pool equipment installation services
Adams Pool Solutions is in the category Commercial Swimming Pool Construction and Renovation
Adams Pool Solutions is based in United States
Adams Pool Solutions has address 3675 Old Santa Rita Rd Pleasanton CA 94588 United States
Adams Pool Solutions has phone number (925) 828 3100
Adams Pool Solutions has website https://adamspools.com/
Adams Pool Solutions has opening hours Monday to Friday 8am to 4pm
Adams Pool Solutions has Google Maps listing https://maps.app.goo.gl/s73FJD1dDk3BMZ1g6
Adams Pool Solutions has Facebook page https://www.facebook.com/adamspools/
Adams Pool Solutions has TikTok profile https://www.tiktok.com/@adams_pool_solutions?lang=en
Adams Pool Solutions has Instagram profile https://www.instagram.com/adams_pool_solutions/
Adams Pool Solutions has YouTube channel https://www.youtube.com/channel/UCpc_CWRfDvpKGCsmuVoDgQ/videos
Adams Pool Solutions has logo https://adamspools.com/wp-content/uploads/2021/03/logo1.png
Adams Pool Solutions offers pool renovation
Adams Pool Solutions offers pool remodeling
Adams Pool Solutions offers pool replastering
Adams Pool Solutions offers pool resurfacing
Adams Pool Solutions offers pool tile installation
Adams Pool Solutions offers commercial pool resurfacing
Adams Pool Solutions offers commercial pool construction
Adams Pool Solutions offers HOA pool renovation
Adams Pool Solutions offers pool crack repair
Adams Pool Solutions was awarded Best Pool Renovation Company in Northern California 2023
Adams Pool Solutions won Las Vegas Commercial Pool Excellence Award 2022
Adams Pool Solutions was recognized with Customer Choice Award for Pool Remodeling 2021
Coping details matter too. With Travertine coping or porous natural rock, you have to control slurry and bond coats so they do not run underneath the stone and create efflorescence. With bullnose block, overhanging sides can create shadowed, hard-to-reach spots at the beam of light that do not obtain properly scarified if the staff is not methodical.
On swimming pools with cantilevered coping, the deck itself creates the side over the bond light beam. Any type of activity at that joint transfers tension to the floor tile and top of the plaster. Correct mastic joint substitute with versatile sealant, well followed sound and tidy concrete, acts as the shock absorber. Deck-O-Seal and comparable items bond best to profiles that are without laitance and old, brittle sealer, which connects back right into mechanical prep and detailed cleaning.
Shell preparation sequence on a well run job
Every firm has its very own process, but the following basic sequence has shown dependable on both new builds and significant remodels when you can not manage callbacks.
Quick checklist: is your covering ready for plaster?
- Structural integrity verified, consisting of any needed shotcrete fixing.
- Pool plumbing pressure test passed, with penetrations covered and profiled.
- Substrate scarification completed, with constant account and no dirt movie.
- Critical information dealt with at light specific niches, skimmers, beam, and actions.
- Tile, coping, and joints ended up in a manner that sustains a tidy plaster termination.
On brand-new building and construction, pneumatically used concrete job precedes, adhered to by treating. When the shell has actually reached the specific stamina, the contractor sets up any kind of needed Gunite resurfacing or local patching, typically where changes were made or infiltrations added later.
Before any kind of coating work, a swimming pool pipes pressure examination should validate that returns, major drains pipes, swimming pool light conduits, and other lines are audio. No one wants to chip into fresh plaster to repair a surprise leak.
Next comes mechanical scarification as required: breaking hammers where there is overspray or accumulation, grinding at extremely smooth troweled patches, and cautious cleansing around fittings and niches. If old plaster is being eliminated, crews intend to reveal sound concrete with an uniform appearance as opposed to leaving islands of slim recurring plaster.
After mechanical work, the shell is usually cleansed with a mix of water, vacuuming, and, if ideal, a light Muriatic acid clean. Acid usage is controlled and counteracted, with comprehensive rinsing. The objective is a dirt cost-free, chemically tidy, effectively roughed up surface area, not a slick etched slab.
Finally, any kind of bond coats or scratch coats suggested by the coating producer are used following their directions. These coats still depend on the underlying account. No bond representative can save a covering that was never properly scarified.
How scarification affects various finish types
Not every coating behaves the same way, but all of them depend on a good substrate.
Traditional marcite is a lot more forgiving in density but less flexible chemically. It can bond acceptably to a moderately harsh covering, however if the account is also smooth or infected, you see prevalent plaster delamination when the swimming pool is drained pipes or as the surface area ages.
Quartz aggregate surface products, including many marketed under acquainted brand names, are somewhat denser and commonly shovelled even more strongly. They such as a firm, uniform base. Inconsistencies in substrate account can telegraph as shade distinctions or as limited bond spots, especially around penetrations and steps.
Exposed pebble coating systems, like PebbleTec and comparable products, develop more thickness and have a tendency to "nest" right into a well profiled covering. On a well scarified surface, they attack securely and wave pool contractor age well. Where the shell is also smooth, you can often hear hollows throughout the initial acid wash, as water and air get behind thinner sections.
High polish surface areas like Hydrazzo are unforgiving of any type of substrate abnormality. Any type of hollow or vulnerable points become painfully noticeable after polishing. A swimming pool that looks good on fill day can establish mapped splits or edge failings within a short time if the shell beneath was not correctly prepared.
From a professional's perspective, substrate scarification is an insurance policy across every one of these. It provides the mechanical anchor they all require and decreases the danger that flawlessly mixed and applied product is blamed for failings that actually began in the shell.
Common errors and how to avoid them
I have actually seen the exact same handful of errors repeated throughout regions and crews.
One is overreliance on acid. When contractors try to save labor by switching grinders and hammers for a hefty acid engrave, the covering surface area gets chemically weakened. The top layer turns sandy, and future plaster bonds to that weak area rather than to thick concrete.
Another is partial chip outs that leave high spots of old plaster. On remodels, those changes typically end up being stress risers. The new coat thins over the high places and thickens in the valleys, producing irregular healing and stress. Appropriate substratum scarification in this context indicates devoting to a consistent depth and profile anywhere, even if that suggests more hours on tools.
A 3rd error is overlooking the interfaces. You can scarify the whole floor wonderfully and still have bond issues if the swimming pool light specific niches, skimmer throats, or bond light beam faces were never cleaned and keyed. I always walk those spots initially, due to the fact that they are the most expensive to repair later.
Lastly, missing documentation harms everybody. A fast set of photos after scarification, including total shots and close ups at information, protects both contractor and plaster professional. When years later somebody complains about a mastic joint substitute failing or a ceramic tile band concern, having evidence of the underlying shell condition is invaluable.
When to bring in specialists
Not every pool calls for a full architectural assessment, but some do. If you see prevalent hollow audios, considerable splitting, or evidence of continuous movement, it is important to stop briefly prior to plastering.
Shotcrete fixing of structural splits, bond beam reconstruction, or major skimmer throat repair is not something to gloss over with plaster and caulk. Structural engineers and seasoned shell contractors understand exactly how to cut down, dowel, and restore with suitable mixes. Just when those fixings are total, treated, and properly scarified should end up job resume.
Similarly, if repeated Deck-O-Seal failures or mastic blowouts are gone along with by differential activity in between deck and shell, you may need control joint rework or deck relief cuts. Plaster staffs must not be anticipated to make up for relocating concrete that is tearing at the bond line.
Bringing it together: assuming from the covering out
Good pool finishes do not start with shade graphes. They start with truthful assessment of the covering, careful substrate scarification, and respect for the straightforward truth that plaster is only as good as what it is adhered to.
When the swimming pool bond light beam is clean and keyed, when the waterline floor tile and dealing details are thought through, when Swimming pool light niches, skimmers, and penetrations are rectified, the option in between Quartz accumulation finish, Subjected pebble surface, or Hydrazzo ends up being a matter of taste and spending plan, not of survival.
The best plaster work I have been involved with all shared a comparable pattern. The staffs spent more time than the property owner ever before saw on pool shell preparation. They broke, ground, acid washed sensibly, looked for dirt by hand, and argued with each various other concerning whether a given location had "enough tooth." That interest is what allows a finish stick around with years of chemical adjustments, resurfacing cycles, and hot summers.
Substrate scarification is the unglamorous component of pool building and renovation. It is additionally the component that separates surface areas that look helpful for one season from surfaces that age beautifully. If you appreciate the long-term performance of your plaster, start your reasoning with the shell, not the sheen.