
DIY Stucco Repair: Restoring Your Home's Exterior
Introduction
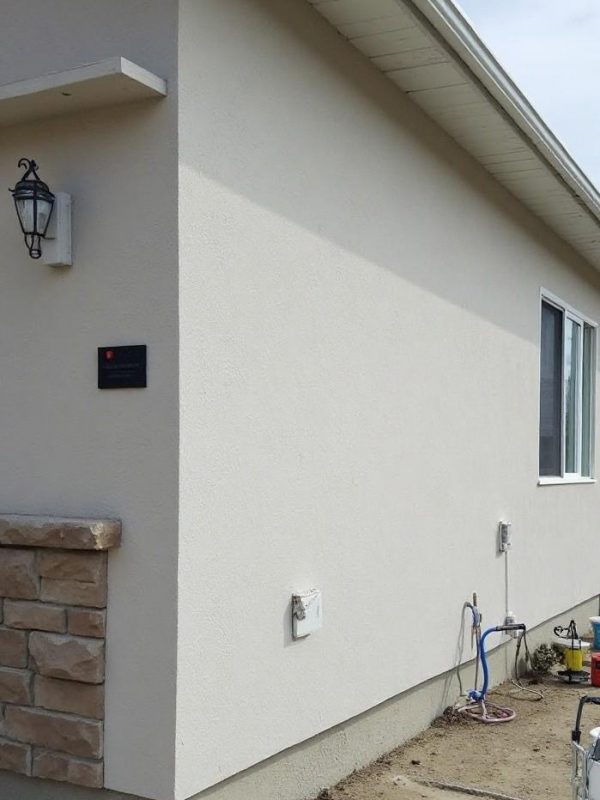
Stucco is a popular choice for home exteriors, especially in Fort Saskatchewan, AB, Canada. While it adds a unique charm and character to your property, it can also be prone to damage over time. Whether it's from weather effects or general wear and tear, knowing how to perform stucco repair can save you time and money. In this comprehensive guide, we’ll explore everything you need to know about DIY stucco repair.
What is Stucco? Understanding the Material
The Basics of Stucco
Stucco is a mixture of cement, sand, lime, and water. It’s applied in layers over a wire mesh or other support structures. This material not only provides durability but also allows for various finishes that can match different architectural styles.
Benefits of Using Stucco
Common Problems with Stucco Exteriors
Cracks in the Surface
Cracks are one of the most common issues homeowners face with stucco. They can arise due to settling foundations or moisture infiltration.
Water Damage
Moisture can cause significant damage if not addressed promptly. Look for signs like mold growth or peeling paint.
Discoloration
Sun exposure and weather changes can lead to fading or discoloration of the stucco surface.
DIY Stucco Repair: A Step-by-Step Guide to Restoring Your Home's Exterior
Step 1: Assessing the Damage
Before you begin any repairs, it’s crucial to evaluate the extent of the damage. Identify all areas that require attention.
- Check for cracks.
- Look for water stains.
- Examine corners and joints where moisture might accumulate.
Step 2: Gathering Your Tools and Materials
For effective stucco repair, you’ll need:
- Trowel
- Putty knife
- Wire brush
- Water
- Premixed stucco patch
- Sponge
- Safety goggles
Make sure to gather everything before starting your project.
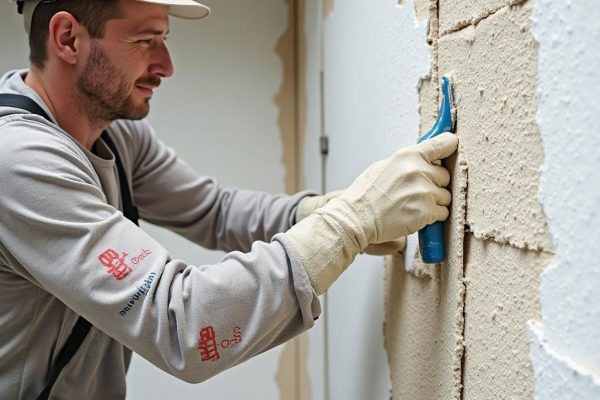
Step 3: Preparing the Area for Repair
Step 4: Mixing Your Stucco Patch
If you're using a powdered mix instead of premixed stucco patch:
Applying the Stucco Patch
Step 5: Filling in Cracks and Holes
Step 6: Finishing Touches on Texture
To match existing textures:
- Use a sponge or brush while the patch is still wet.
- Mimic patterns found on surrounding areas for seamless blending.
Aftercare Post-Stucco Repair
Curing Time for Stucco Repairs
Allow Depend Exteriors stucco contractor in Fort Saskatchewan your repaired areas to cure based on product instructions—typically between 24 hours and several days depending on humidity levels.
Painting Over Repaired Areas
Once cured:
FAQs About DIY Stucco Repair
What are some signs I need stucco repair?
Look out for visible cracks, bulging sections, or water stains around your home’s exterior walls.
Can I do stucco repair myself?
Yes! With basic tools and this guide, many homeowners successfully tackle their own repairs.
How long does stucco repair take?
Most small repairs can be completed in a few hours, but allow extra time for curing and painting afterward.
Is there a specific type of paint I should use?
Choose exterior-grade paint specifically formulated for use on masonry surfaces like stucco.
How often should I inspect my stucco?
It’s wise to check your exterior at least once a year for any signs of damage or wear.
When should I call a professional?
If you notice extensive damage beyond simple cracks—like structural issues—it’s best to consult professionals experienced in stucco work.
Conclusion
Taking care of your home's exterior through regular maintenance is vital in preserving its beauty and integrity over time. Armed with this guide on DIY stucco repair, you'll be well-equipped to handle minor damages yourself, saving money while enhancing curb appeal in Fort Saskatchewan, AB, Canada. Remember that regular inspections will help catch potential issues early on so you can address them before they escalate into larger problems!
With patience and practice, you'll find that repairing stucco isn’t just beneficial; it’s also quite rewarding! So roll up those sleeves and get started on restoring your home's exterior today!