Пошук та завантаження даних OpenStreetMap
Попередження
This tutorial is now obsolete. A new and updated version is available at Searching and Downloading OpenStreetMap Data (QGIS3)
Отримання даних високої якості є важливим для будь-якої задачі ГІС. Одним із великих ресурсів із вільними даними з відкритою ліцензією є OpenStreetMap(OSM) . База даних OSM містить вулиці, локальні дані і полігони будівель. В QGIS інтегровані можливості отримання доступу до даних OSM в ГІС форматі. Цей урок пояснює як здійснити процес пошуку, завантаження і використання OSM даних в QGIS.
Огляд завдання
Знайдіть Лондон у базі даних OSM, прокрутіть і виділіть частину міста, і виберіть всі пивні у вигляді шейп-файлу.
Виконання
Для виконання задачі ми використаємо 2 плагіни. Переконайтеся що ви маєте встановлені плагіни OSM Place Search і OpenLayers. Дивіться Використання додатків для отримання інструкцій по завантаженню плагінів.

The OSM Place Search plugin will install itself as a Panel in QGIS. You will see a new panel titled OSM place search… in QGIS.

The OpenLayers plugin is installed under the Plugin menu. This plugin allows you to access basemaps from various providers in QGIS. Let’s load the OpenStreetMap basemap in QGIS by going to .

You will see a World map loaded in QGIS.
Примітка
Якщо ви не бачите ніяких даних - пересвідчіться що ви підключені до мережі - оскільки плитки базової мапи завантажуються через інтернет. Ви також можете використовувати інструмент Pan для того, щоб трохи перемістити полотно мапи, що призведе до оновлення базової мапи.

Now, let’s search for London. Type the query in the Name contains… box in the OSM Place Search panel. You can hover over the results and the appropriate place will be highlighted on the map. Select the first result - which the city of London in UK - and click the Zoom button.

You will see the base layer move and center around the city of London. You can use the Zoom tool to zoom and select the exact area of your interest. For this tutorial, you can zoom in the center of the city as shown.

Now we can download the data displayed on the map canvas. Go to .

In the Download OpenStreetMap data dialog, choose From map canvas as the Extent. Choose the path and name the output file as
london.osm.

The downloaded file with the
.osmextension is an text file in the OSM XML format. We first need to convert it into a suitable format that is easy to consume in QGIS. Go to .
Примітка
Now that we do not need the OSM Place Search functionality, you can click the close button to remove it from the main window. If you need to use it again, you can enable it from (Windows) or (Linux).

Choose the downloaded
london.osmas the Input XML file. Name the Output SpatiaLite DB file aslondon.osm.db. Make sure the Create connection (SpatiaLite) after import button is checked.

Now the last step. We need to create SpatialLite geometry layers that can be viewed and analyzed in QGIS. This is done using .

The
london.osm.dbfile contains all feature types in the OSM database - Points, Lines and Polygons. GIS layers typically contain only one type of feature, so you need to choose one. Since we are interested in point locations of pubs, here you need to choose Point (nodes) as the Export type. You would choose Polylines (open ways) if you wanted to get the road network. Name the Output layer name aslondon_points. GIS data has 2 parts to it - location and attributes. We are also interested in the name of the pub - not just its location, so we need to export that information as well. Click on Load from DB under Exported tags section. This will fetch all attributes from thelondon.osm.dbfile. Check name and amenity tags. See OSM Tags to learn more about what each attribute means. Make sure the Load into canvas when finished is checked, and click OK.

You will see a new point layer named
london_pointsloaded in QGIS. Note that this contains ALL points in the OSM database for the viewport. Since we are interested only in pubs, we need to write a query to select only those. Right click onlondon_pointslayer and select Open Attribute Table.

You will note that some features have the attribute value of pubs listed under the amenity column. Click on Select features using an expression button.

Наберіть вираз «amenity» = „pub“ і натисніть Вибрати.

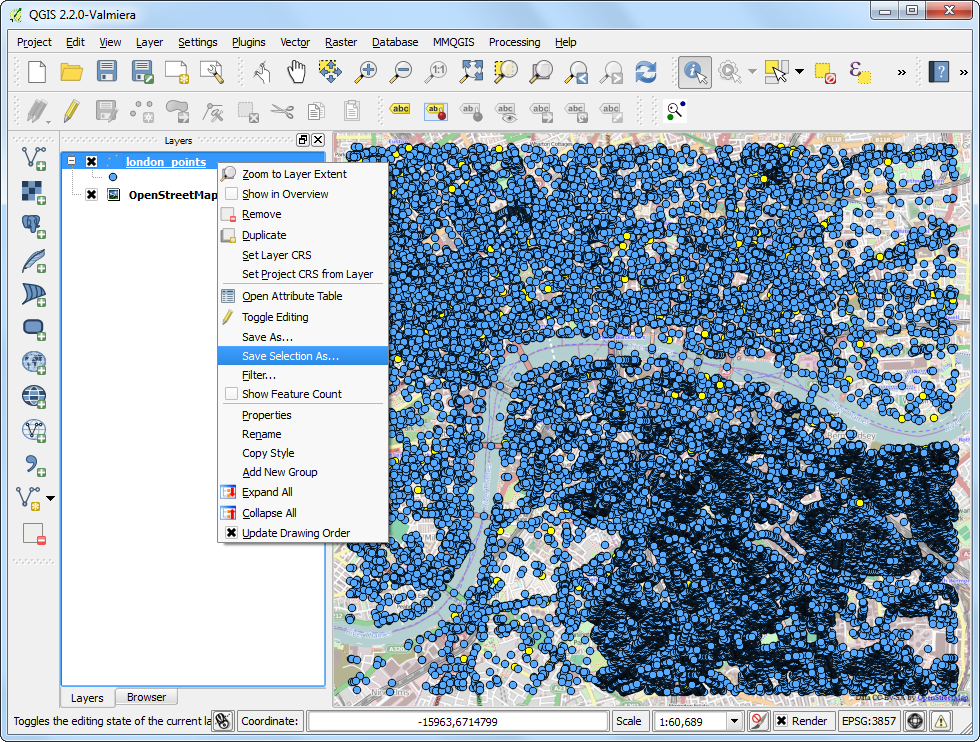
Back in the QGIS Canvas, you will see some points highlighted in yellow. These are the result of our query. Right-click the
london_pointslayer and choose Save Selection As….
In the Save vector layer as… dialog, enter the name of the output file as
london_pubs.shp. Leave all other options as they are and make sure the Add saved file to map option is checked. Click OK.

You will see a new layer named
london_pubsin the QGIS canvas. Uncheck thelondon_pointslayer as we don’t need that anymore.

The extraction of the pubs shapefile layer is now complete. You can use the Identify tool to click on any of the point as see its attributes.

If you want to report any issues with this tutorial, please comment below. (requires GitHub account)