In GCP, instance groups manage one or more machines that are based on an instance template. Instance groups ensure the right number of machines are created and healthy.
Instance groups can be set up to autoscale between some minimum and maximum number of machines based on some metric like CPU utilization or network traffic.
A load balancer can be created to send requests to a number of machines. The load balancer also monitors machine health and won't make a request to a machine that is unavailable.
In this lab, you set up instance groups, load balancers, and auto scalers to automatically ensure you have enough machines to meet your user demand.
What you need
To complete this lab, you need:
- The latest version of Google Chrome
- A Google Cloud Platform billing account
- You need to have completed the previous exercise on creating custom images
What you learn
In this lab, you:
- Create an Instance Template and Health Check
- Create Instance Groups in the United States and Europe
- Set up a load balancer to balance traffic across your instance groups
- Set up autoscaling
- Send simulated load to the load balancer using ApacheBench
- Monitor traffic to your load balancer
To set up load balancing and autoscaling you need an instance group, but to create an instance group you need an instance template.
When you create a virtual machine, you need to answer a number of questions. For example, you need to specify zone, machine type, boot disk, etc. An instance template is simply the answers to those questions saved. You can then use that template to create identical machines managed by an instance group.
Step 1
Log onto the Google Cloud Platform web console at http://console.cloud.google.com.
Go to your ROICourse project if you are not already there. You must have completed the previous exercise on creating custom images to complete this exercise.
From the Products and Services menu, select Compute Engine. Then, click Instance templates from the navigation pane.
Step 2
Click the Create instance template button. Name your instance template space-invaders-instance-template.
From the machine type dropdown, select micro (1 shared vCPU).
Click the Change button in the Boot disk section. Click the Custom images tab and select your web-server-image. Then, click the Select button.
Check the Allow HTTP traffic checkbox (leave HTTPS unchecked).
Step 3
Click the Management, disk, networking, SSH keys link to expand the advanced options. Add the following code to the Startup script text box.
#! /bin/bash

ZONE=$(curl "http://metadata.google.internal/computeMetadata/v1/instance/zone" -H "Metadata-Flavor: Google")

sed -i "s|zone-here|$ZONE|" /var/www/html/index.html
Step 4
Click the Create button to create the instance template.
Instance groups manage collections of machines. Instance groups determine how many machines there should be in their group and ensures that number of machines exists. They check the health of those machines. If machines are unhealthy, they create new ones and delete the unhealthy ones.
Instance groups are also used for auto scaling. They monitor the load on machines and create or destroy machines as necessary.
Step 1
From the navigation pane, select Instance groups.
We will start simple and just create and instance group with three identical machines.
Step 2
Click the Create instance group button.
Name your instance group space-invaders-us. Select the multi-zone radio button, and set the region to us-central1.
Select the space-invaders-instance-template you just created from the Instance template dropdown.
Turn Autoscaling off and set the number of instances to 3.
Step 3
From the Health check dropdown, select Create a health check. Name the health check space-invaders-health-check. Set the Check interval to 10 and set the Unhealthy threshold to 3. Save the health check and continue configuring the instance group.
Step 4
Set the initial delay in the instance group to 120. Then, click the Create button.
Step 5
Wait a few seconds and then click the VM instances link in the navigation pane. You should see three instances get created. You might have to hit the Refresh button a couple times.
Step 6
Click on each of the machine's' external IP addresses and verifying the website is working on each one. Notice at the bottom of the page is the zone each machine is running in. This is a result of the startup script in the instance template.
Step 1
Go back the Instance groups page. Select your instance group by checking the checkbox, and then click the Edit button at the top. Turn Autoscaling On. Set the minimum number of instances to 1 and set the maximum number of instances to 5.
Leave everything else at its default value and click the Save button.
Since there is no load on the web servers, after a few minutes the instance group will scale to 1 and turn the unneeded machines off.
Step 2
Create another instance group. This time name it space-invaders-eu.
As before, make it a Multi-zone instance group. This time select europe-west1 as the region though.
Choose your instance template.
Turn autoscaling On and scale between 1 and 5 instances. Select the health check you created earlier, and set the initial delay to 120.
Finally, click Create to create the instance group.
Step 3
If enough time has gone by, your first instance group will have scaled down.
Go to the VM Instances page. You should have a machine starting in Europe and one or more machines in the US. Wait for the machine in Europe to be ready and then click its external IP address to verify Space Invaders is working.
Step 1
From the Products and Services menu, choose Network Services and then click the Load balancing section.
Step 2
Click the Create load balancer button, then click the Start configuration button in the HTTP(S) Load Balancing section.
Name your load balancer space-invaders-lb.
Click Backend configuration, then from the Create or select backend services & backend buckets dropdown, select Backend services | Create a backend service.
In the Create backend service dialog, name the Backend service space-invaders-bes. In the Backends section, select one of your instance groups from the Instance group dropdown. Leave other values as the default and click Done. Then, click the Add backend button and select the other instance group and click Done again.
Scroll down a little and select your health check for Space Invaders. Leave everything else for the backend service at their default values.
Step 3
Click Create.
You should see a checkmark next to Backend configuration.
Now, click Host and path rules. The defaults for this should be fine.
Click Frontend configuration. The defaults should be fine for this as well.
Click Review and finalize. At this point, the screen should look as shown below.
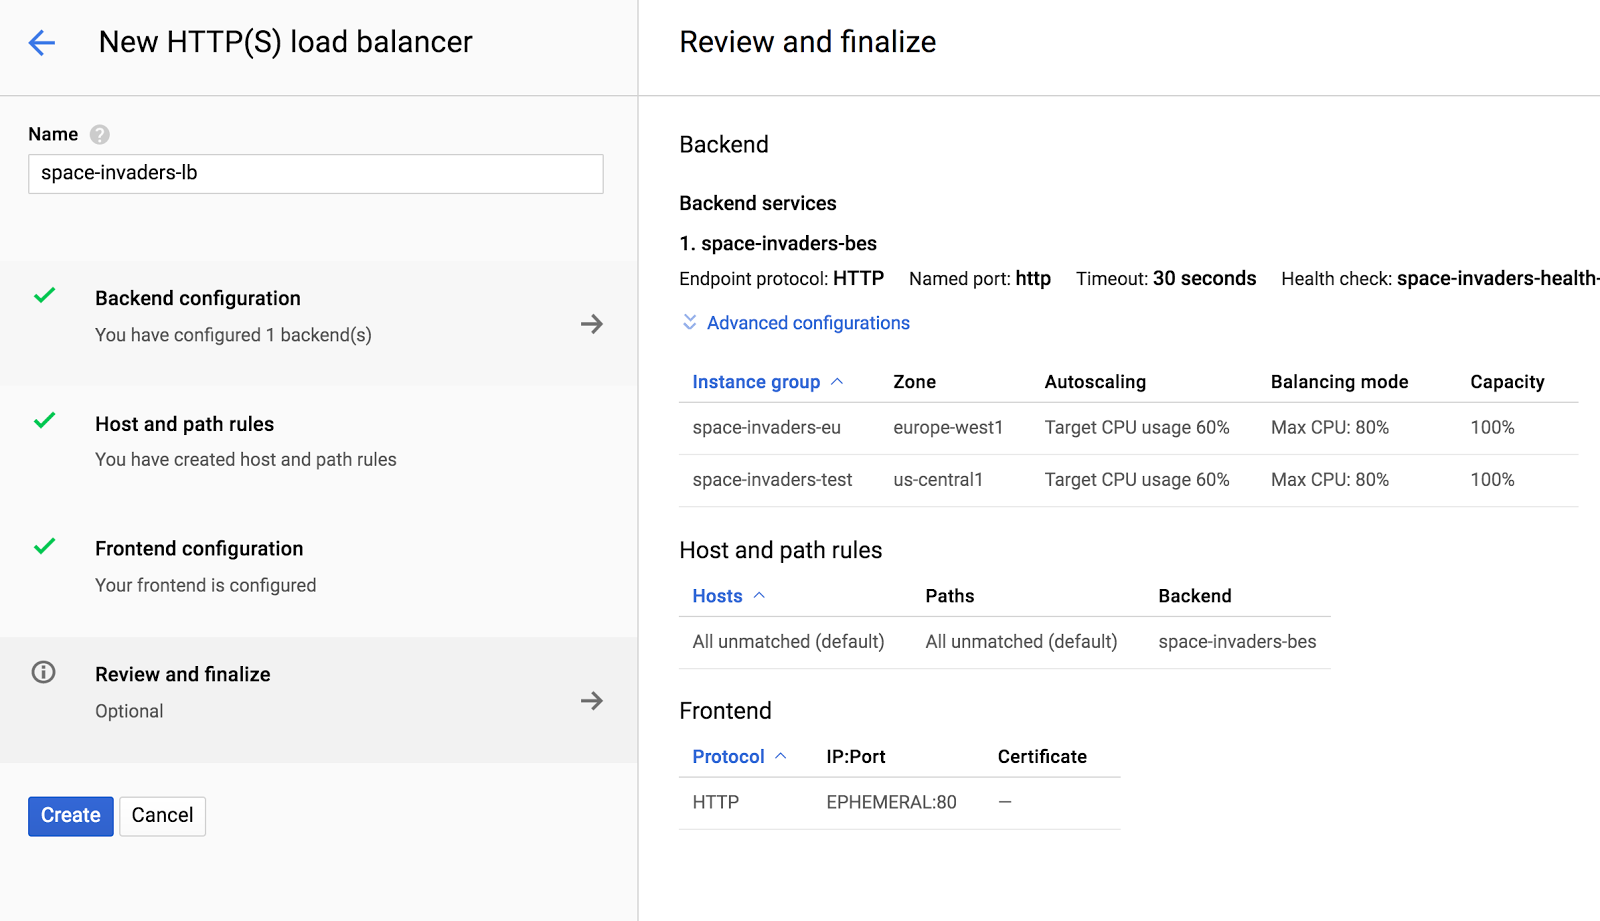
If you have all check marks, click the Create button to create your load balancer.
Step 4
It takes a few minutes for the load balancer to be ready. It's a good time for a break. Take about 5 minutes to get a coffee or check your email.
Step 5
After a few minutes, your screen will look as shown below.
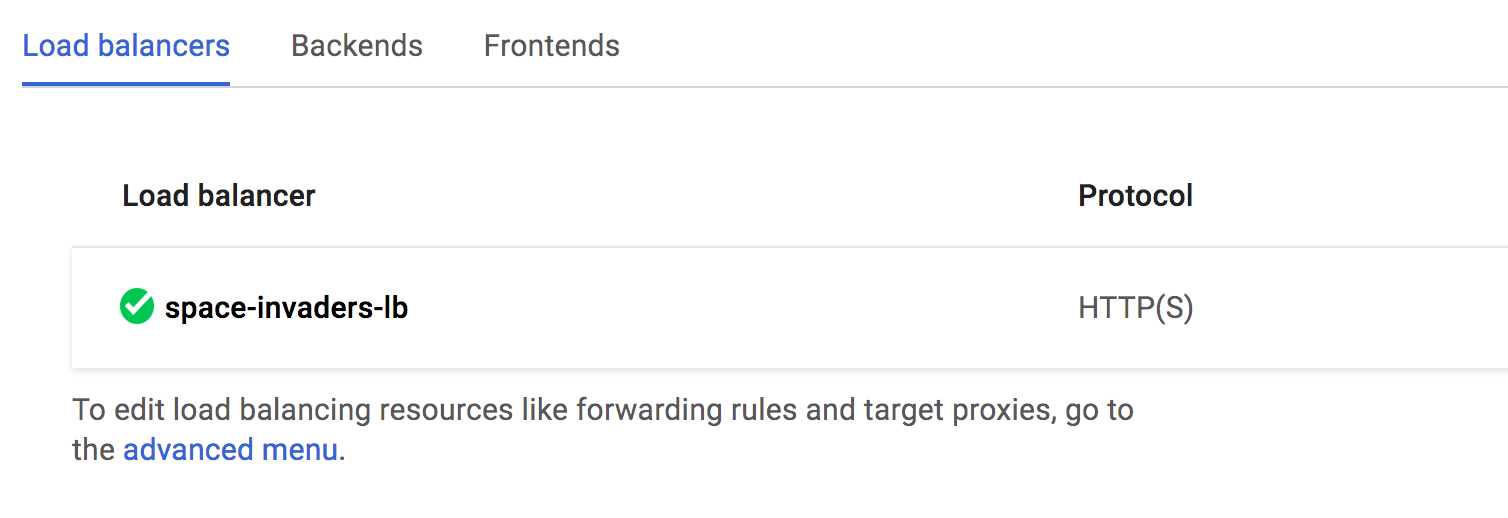
Click the load balancer to see its details.
Step 6
In the details section, look at the Backend services section. If there are zero healthy instances as shown in the screenshot below, then the load balancer isn't ready.

When you see that there are healthy instances, then you can make requests to the load balancer. See the screenshot below.

Step 7
Scroll up to the Frontend section of the load balancer details and you will find an IP address similar to what is shown below.

Copy and paste the IP address into a text file so you have it later on.
Open a new browser tab and make a request to that IP address. You don't need to include the port since 80 is the default when making an HTTP request.
Step 1
Go to the Compute Engine VM instances page. Create two instances. Name the first tester-us and choose a zone in us-central1. Name the second machine tester-eu and choose a zone in europe-west1.
Step 2
SSH into each machine and run the following commands.
sudo apt-get update
sudo apt-get install -y apache2
Step 3
Once the commands from the previous step complete on each machine, ApacheBench should be installed.
Let's start small. Enter the following command from each machine. It will make 50 requests, one at a time. You will need to enter your load balancer's IP address where indicated.
ab -n 50 -c 1 http://your-ip-address-here/
In the command above, leave the slash at the end.
Step 4
In the web console, go back to the Networking services and Load balancing. Click on your load balancer to see its details. Then click the Monitoring tab. In the Backend dropdown, select your space-invaders-bes.
The monitoring console should show some requests. The charts aren't updated immediately so be patient.
Step 5
Go back to the SSH window of each machine. Press the up arrow on your keyboard to repeat the previous ApacheBench command on each machine. Press Enter to repeat the command and let the command complete.
Press the up arrow again, but change the number of requests to 1000 and the number of concurrent requests to 10. Do this on each machine.
Go back to the browser tab monitoring you load balancer. You should be seeing requests come in from both North America and Europe.
Step 6
Open another browser tab and go to the web console and the Compute Engine service and click on the Instance groups section.
At this point, the number of instances in both of your instance groups should be listed as one.
Run your ApacheBench command again. This time specify 100,000 requests, 1000 at a time. Do this from both machines.
Look at the load balancer's monitoring page. Be patient, the page won't update immediately. You will likely see some errors show up because we don't have enough machines to support the number of requests.
Step 7
Go back to the Instance groups page and refresh it. You should see one or more of the groups autoscale.
Experiment by making some more requests. Monitor the load balancer and keep refreshing the Instance groups page. As you keep making requests, the instance groups will turn additional machines on to handle the load.
Try making a million requests, 5000 at a time.
As new machines are created, they show up in the monitoring page.
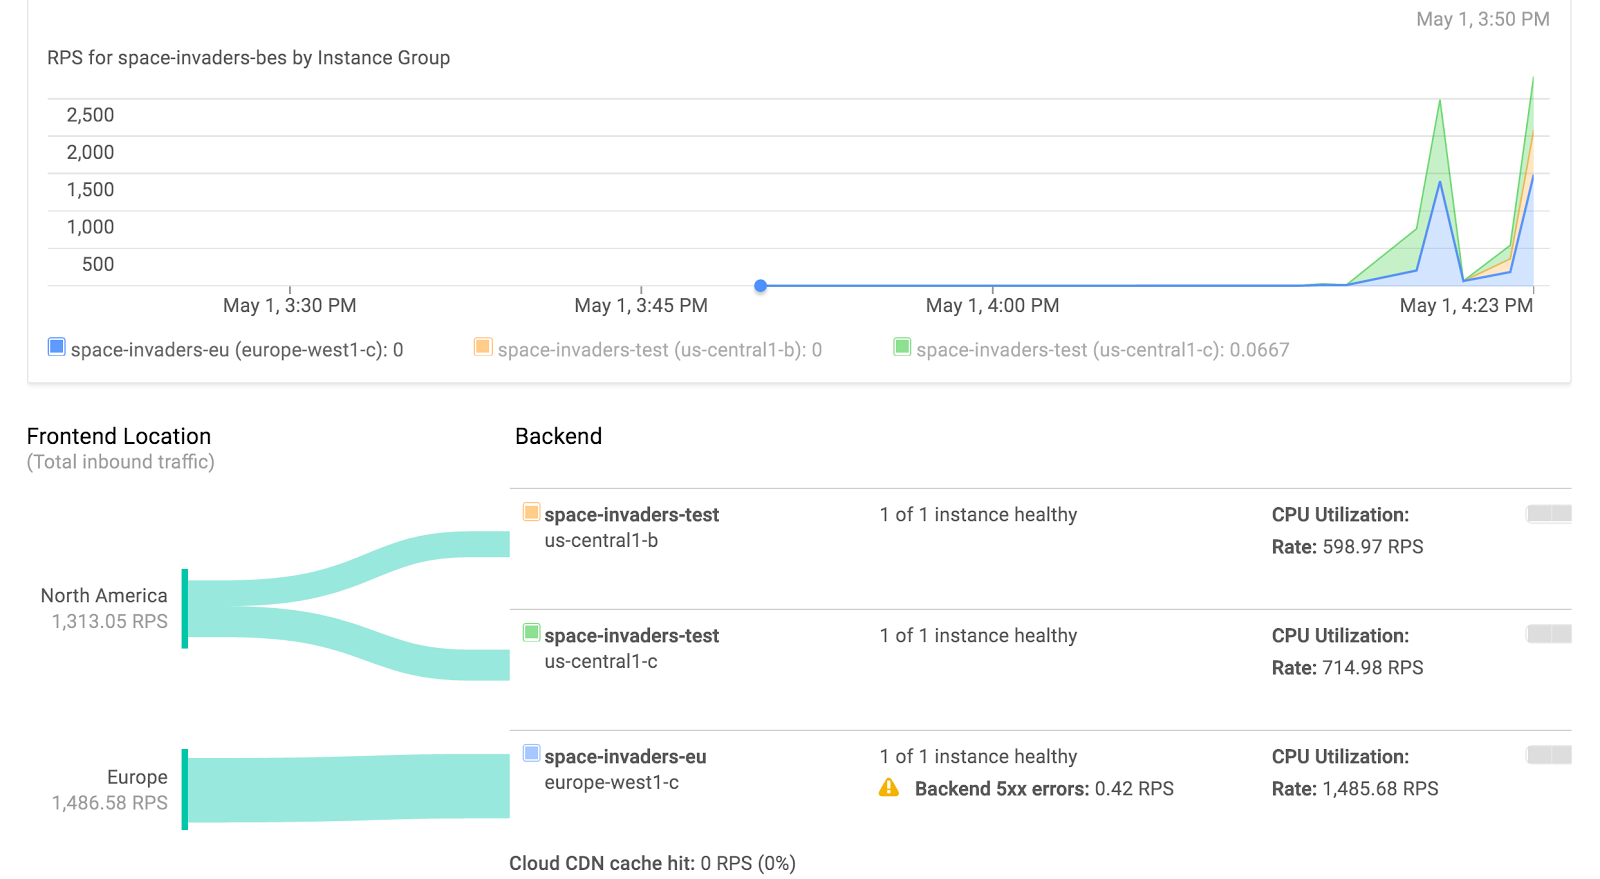
As load increases, the instance groups will add machines as needed.
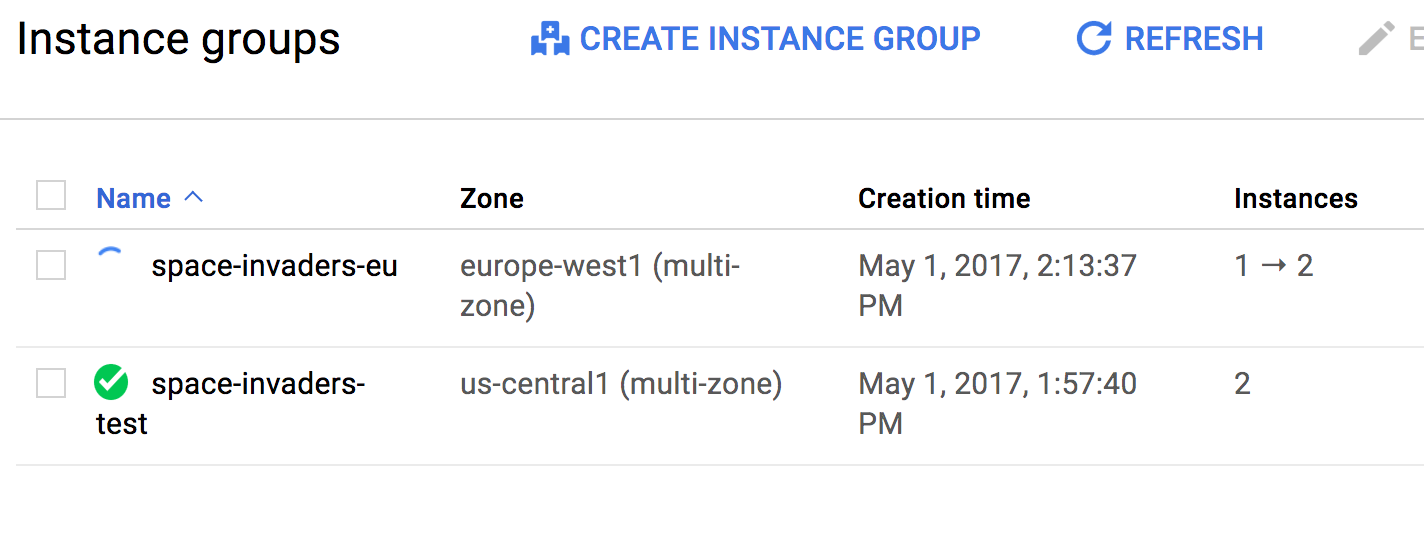
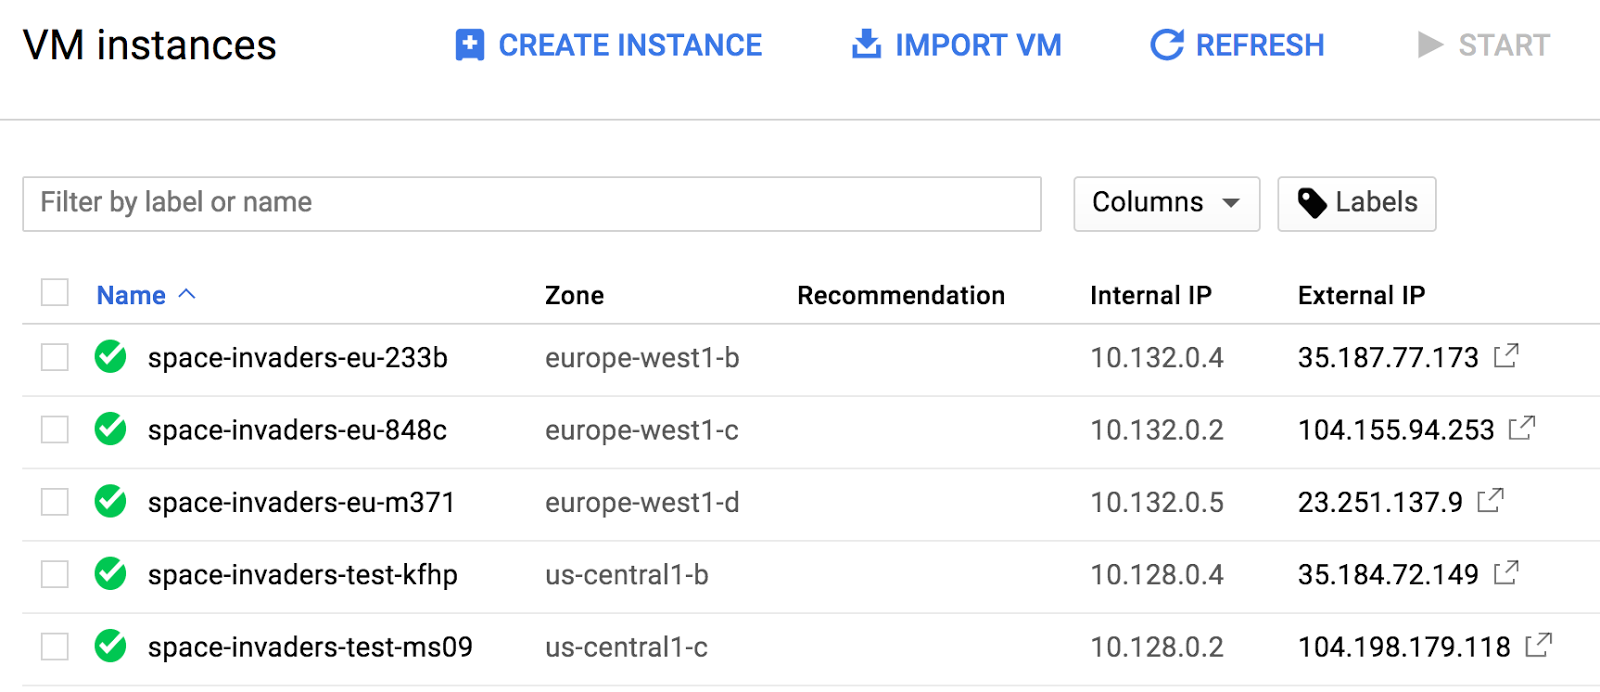
If you look at VM instances, you will see new virtual machines appear or disappear based on how many machines the instance groups think they need.
Step 8
Take a 15 minute break. When you come back, refresh the instance groups page. The instance groups should eventually scale back to one when there is no more traffic.
Step 1
In the web console, go to the Networking services. Then click Load balancing. Click the trash can icon next to your load balancer to delete it. When prompted, check the box indicating you want to also delete your backend service. Confirm your request.
Step 2
Go to the Compute Engine service and click Instance groups. Select all your instance groups and click the Delete button. Confirm that you want to do this.
Step 3
Wait a few seconds and then go to the VM instances page. The machines created by the instance groups should be deleted automatically. Select your tester machines and delete those.
Step 4
You can also delete the instance template you created in this exercise. You can also create any disks, snapshots, and images you have created.