How Do You Properly Clean a Toilet
Posted by Suji Siv @Clean Group on 2024-02-16
How Do You Properly Clean a Toilet
Before you even think about scrubbing the porcelain throne, it's crucial to have all your cleaning agents and tools within arm's reach. Don't make the rookie mistake of starting without your gloves, brush, disinfectant, and a sturdy pail; otherwise, you'll be running around like a headless chicken once the dirty work begins. Oh boy, isn't that a picture? Ensuring everything is on hand means you won't need to pause mid-clean – because let's face it, nobody fancies lingering in the lavatory any longer than necessary.
Now then, as we pivot towards the nitty-gritty of toilet tidying, remember this isn’t an occasion for gentle dabs and half-hearted wipes. No siree! You've gotta get up close and personal with that bowl to rid it of its grimy secrets. A determined mindset paired with vigorous brushing will ensure every nook and cranny shines. But beware – don't go pouring bleach like it's going out of style; moderation is key unless you're aiming for an impromptu science experiment in your bathroom!
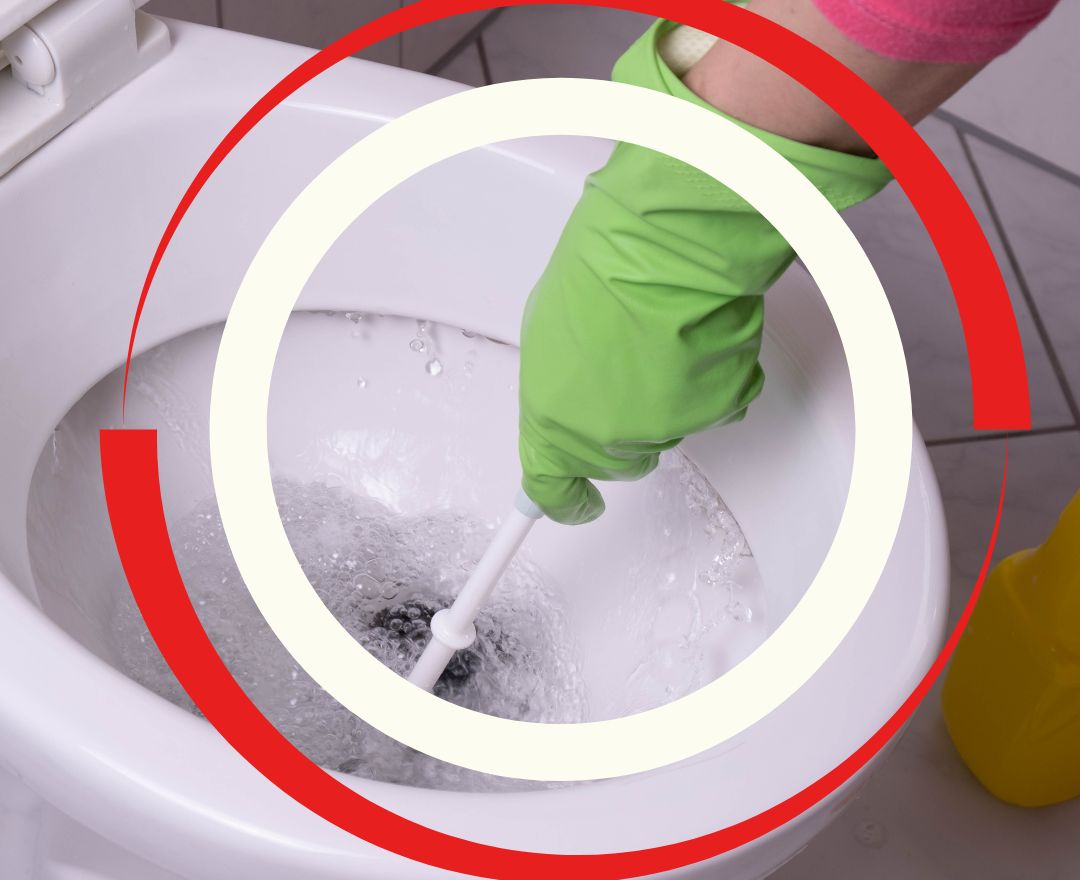
Flush and Apply a Toilet Cleaner
Certainly! Here's a short essay as per your request:
When it comes to sprucing up the john, one shouldn't just give it a quick wipe and call it a day – oh no! The proper method demands attention to detail and a bit of elbow grease. First off, before applying any kind of cleaner, ensure you flush the commode to remove any lingering debris. It’s like clearing the canvas before an artist begins their masterpiece.
Now don't go splashing toilet cleaner haphazardly; there’s technique involved! You'll want to squirt the liquid meticulously under the rim – that often-neglected spot where germs adore throwing secret soirées. Letting the solution sit for a spell allows it to thoroughly combat those pesky bacteria and stains.
Transitioning from top to bottom, after you've let the cleaner do its magic for the recommended amount of time (don’t cheat on this part!), grab a sturdy toilet brush. It's not enough simply to swish around aimlessly; make sure you scrub with purpose, showing no mercy to any spots that dare remain.
Finally, another flush is in order – this rids your porcelain throne of both grime and cleanser residue. And voilà! Your lavatory sparkles once more, proof that your diligence pays off. Just remember: regular maintenance beats a herculean cleaning session any day!
In essence, while neglecting bathroom hygiene might be tempting at times – especially after a long day – nothing beats the peace of mind that comes with knowing your facilities are squeaky clean.
Scrub the Bowl with a Toilet Brush
Alas, the task of cleaning a toilet is one that we must all face from time to time. It's not exactly a stroll through the park, but it doesn't have to be your worst nightmare either! So let's get down to brass tacks; you've got to grab that toilet brush and confront the bowl with gusto.
Now, don't just give it a once-over and call it quits. No, sirree! You're aiming for spotless, so you've gotta scrub with some elbow grease. Start by squirting a generous amount of cleaner around the rim of the bowl – this isn't the moment for stinginess. Let it sit and work its magic for a few minutes; patience here is key!
Okay then, moving right along! Once those precious minutes have passed, take your trusty toilet brush and plunge it into the water. Make circular motions under the rim first; yuck usually hides in these overlooked spots. Don’t shy away from applying pressure as needed to banish any stubborn stains or unsightly rings.
Remember now, you aren't just swirling water around; ensure you're actually making contact with all surfaces. The goal here is to eradicate germs and grime thoroughly – anything less would simply be unacceptable. Go ahead and dip that brush back into the water periodically to rinse off any filth clinging on for dear life.
By golly, we’re nearly there! After giving it your all with the brushwork, flush away all that nastiness - watch as it swirls down into oblivion (or at least into your sewage system). You might even want to give an extra flush for good measure if things were particularly dire in there.
Finally – sigh of relief – replace your weapon... I mean your brush back into its holder after rinsing it well under running water. It’s crucial not to neglect this step; otherwise you’ll be spreading germs rather than defeating them!
And voilà! With those battle tactics deployed against dirt and germs alike, your porcelain throne should now shine like royalty's should. Give yourself a pat on the back because no one else will want to after such an endeavor - kidding! But seriously, maintaining cleanliness here is essential for both hygiene and pride in one's abode.
Clean the Rim, Seat, and Lid
Cleaning a toilet is hardly anyone's idea of a good time, but it's a necessary chore to ensure hygiene and comfort in your bathroom. When tackling the task, don't forget that attention to detail makes all the difference—especially when it comes to the rim, seat, and lid.
First off, you can't just give these areas a quick wipe and call it done. The rim sees a lot of grime build-up, so you'll need something with oomph—a robust cleaner that can break down deposits. Don’t simply splash some water around; apply an antibacterial cleaning agent and let it sit for a moment to do its magic.
Now, here's where elbow grease comes in! With a sturdy brush or sponge at hand (please don't use your toothbrush!), scrub under the rim thoroughly. You'd be surprised—or maybe grossed out—by what lurks there if neglected. And hey, while you're at it, make sure not to overlook those sneaky crevices!
Transitioning smoothly from the grimy underworld of the toilet bowl, let’s talk about the seat and lid—parts that actually come into contact with human skin. They deserve equal—if not more—sanitation scrutiny.
Don’t just swipe over them; disinfectant wipes or spray should be used generously on both sides of the seat and lid. It's not rocket science; however, this step isn't one where shortcuts should be taken. If you’re reusing cloths, ensure they haven’t been utilized elsewhere first—that’d just spread germs instead of eliminating them.
After wiping down every nook and cranny—and I mean every—you’ll want to give everything one final once-over with a clean cloth or paper towel. Make sure they're dry before anyone has a seat unless you're aiming for an unpleasant surprise!
In conclusion (and take this advice seriously), always remember: cleanliness is next to godliness in the lavatory department! Regular maintenance will keep your throne fit for royalty—and won’t that be nice?
Wipe Down the Exterior Surfaces
Cleaning a toilet thoroughly is not merely about scrubbing the bowl; it's equally important to wipe down the exterior surfaces. Now, you might think, "Who'd fuss over the outside when the inside seems grimier?" But trust me, germs don't discriminate—they'll gladly inhabit any part of your toilet if given the chance.
Firstly, ensure you've got all your supplies handy—disinfectant wipes or spray, paper towels or a clean rag, and gloves for protection. Oh! Don't forget to don those gloves; they're your first line of defense against icky bacteria.
Next up, let's tackle that lid. Lift it and give both sides a good wipe; we can't have any pesky germs lingering there. The seat comes next—front and back need attention since everyone conveniently forgets about the underside. It's quite alarming how often this part gets neglected!
Now onto the main body of the toilet: who would ever disregard cleaning along every curve and contour? Pay close attention to where dust and dribbles love to hide—you know exactly where I mean—the base and behind are notorious for accumulating unmentionables.
Ah! Before I forget, make sure you dry everything off with a towel or let it air-dry if you've used a spray. You wouldn't want anyone slipping on residual cleaner—that'd be an ironic twist after all our hard work sanitizing.
Alright then, moving forward to finishing touches: take care of any metal parts like handles or flush levers. They should shine but without leaving smudges from fingers eager to test out our pristine throne.
And there we have it—a sparkling clean toilet that’s as hygienic on the outside as it is inside. Remember, ignoring external surfaces isn’t wise; they’re just as crucial in maintaining a germ-free bathroom environment. So go ahead and give them the TLC they deserve—it’s not only about aesthetics but health too!
Mop Around the Toilet Base
When tackling the cleaning of a toilet, one mustn't neglect the area that often goes unnoticed: the base. It's not just about scrubbing the bowl; it's about addressing every nook and cranny to ensure thorough cleanliness. So, don't merely swipe at the surface; be meticulous in your approach.
Now, let's chat about how to properly mop around the toilet base, shall we? First off, you'll need a trusty pair of gloves because—let's face it—you want to keep your hands uncontaminated by bathroom germs. With gloves on, grab a dedicated bathroom cleaner or prepare a mixture of vinegar and water for an eco-friendly option.
Ah! Before diving in with your mop or cloth, don't forget to sweep or vacuum any loose debris from around the toilet. This step is crucial; it prevents you from simply smearing dirt around with your mop.
Alright then, after prepping the stage, soak your cleaning tool in your chosen solution and wring it out enough so it isn't dripping all over. You're not trying to flood your bathroom floor!
Here comes a smooth transition: With everything set up and ready to go, it’s time for action. Begin by gently but firmly wiping down the entire external surface of the base. Pay particular attention to where the toilet meets the floor—this juncture is notorious for harboring unsavory elements due to its relative obscurity.
Moreover—and this part is paramount—don’t let haste make waste; slow and steady wins this race against grime! Work in circular motions, overlapping each pass for comprehensive coverage without missing spots.
Lastly—but certainly not leastly—is drying off any moisture left behind. Lingering dampness could lead to mildew or mold growth, which nobody wants as an uninvited guest in their restroom sanctuary!
In conclusion—phew!—mopping around that toilet base isn’t someone’s idea of fun times but think about this: maintaining cleanliness now saves you from much bigger headaches later on down the line. Do yourself a favor and give that porcelain pedestal its due diligence every so often!
Finish with a Final Flush and Sanitizing Spray
Cleaning a toilet properly isn't exactly the highlight of anyone's day, but it's an essential part of maintaining a hygienic bathroom. After you've scrubbed and scoured every nook and cranny with a trusty brush and cleaner, you can't just call it quits - there's still a crucial step left to ensure that your throne is as germ-free as possible.
Now, let's not forget the importance of ending this cleaning saga with what I'd like to call 'the grand finale.' It's not enough to simply wipe surfaces; we should strive for that extra mile of cleanliness. So here comes the final flush – it’s akin to rinsing off after a soapy shower. Just imagine leaving soap all over your skin; it doesn’t sound too appealing, right? Well, the same goes for your toilet.
Ah! But hold on, don't walk away yet! We haven't reached the epitome of sanitation. A sanitizing spray must enter the scene before our mission is accomplished. This isn't any ordinary spritz; it’s akin to a knight in shining armor for banishing those pesky germs that might have survived the initial onslaught.
In conclusion—oops! See how easy it is to slip into redundancy? Let me rephrase: To wrap things up (there we go), always remember that cleaning a toilet isn’t complete without these two critical steps: giving everything one last flush and following up with a sanitizing champion spray. Now you're truly done, and your bathroom? It's not just clean; it’s healthfully pristine!
Other Cleaning Poss: