Deploying Trillo Workbench
Download Marketplace License
Subscribe and download the license
Step-1:
First create the project and enable billing then go to the following page
– – Trillo Workbench Marketplace Google Cloud console
The purchase button must be visible on this page as shown below
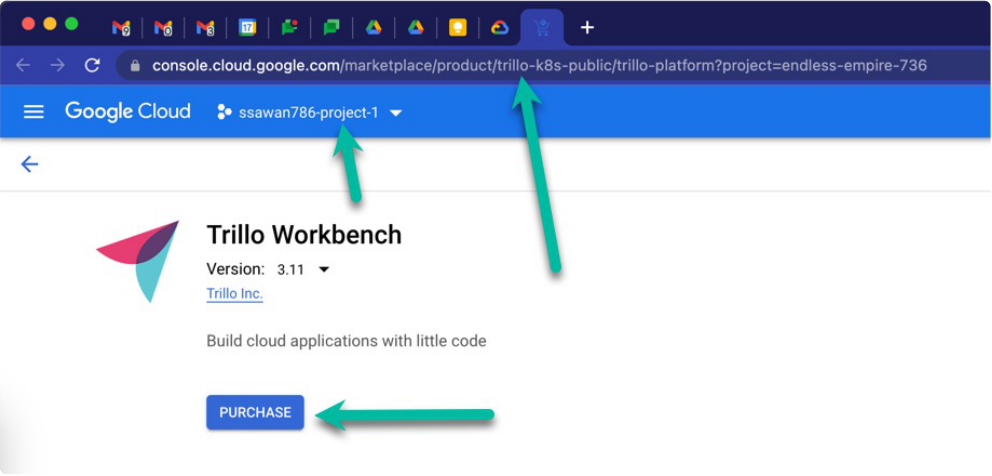
When you purchase it will take you to the following page. Click manage orders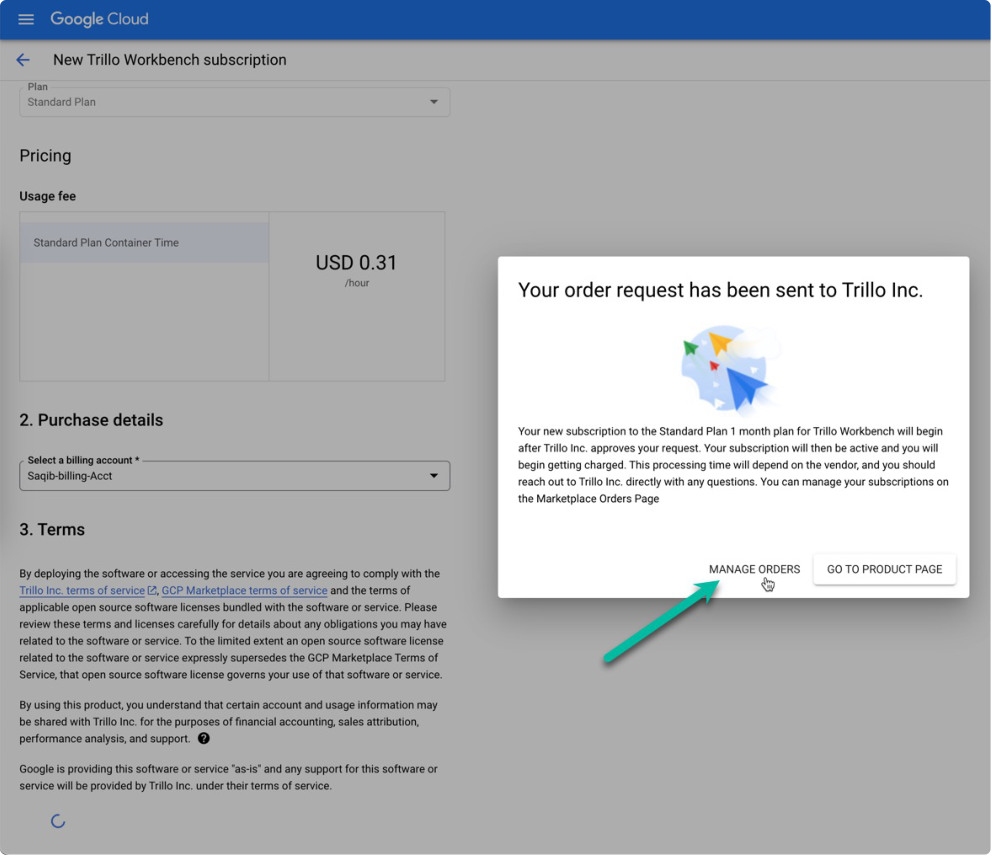
It will take you to the following page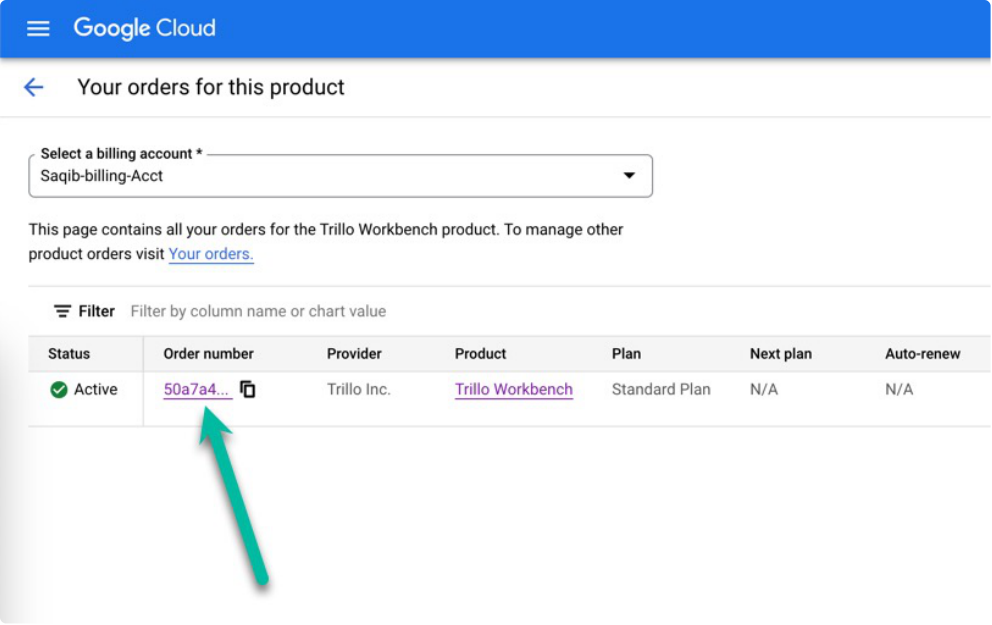
Workbench click the order number. It will take you to the following page. Click the following button to configure the product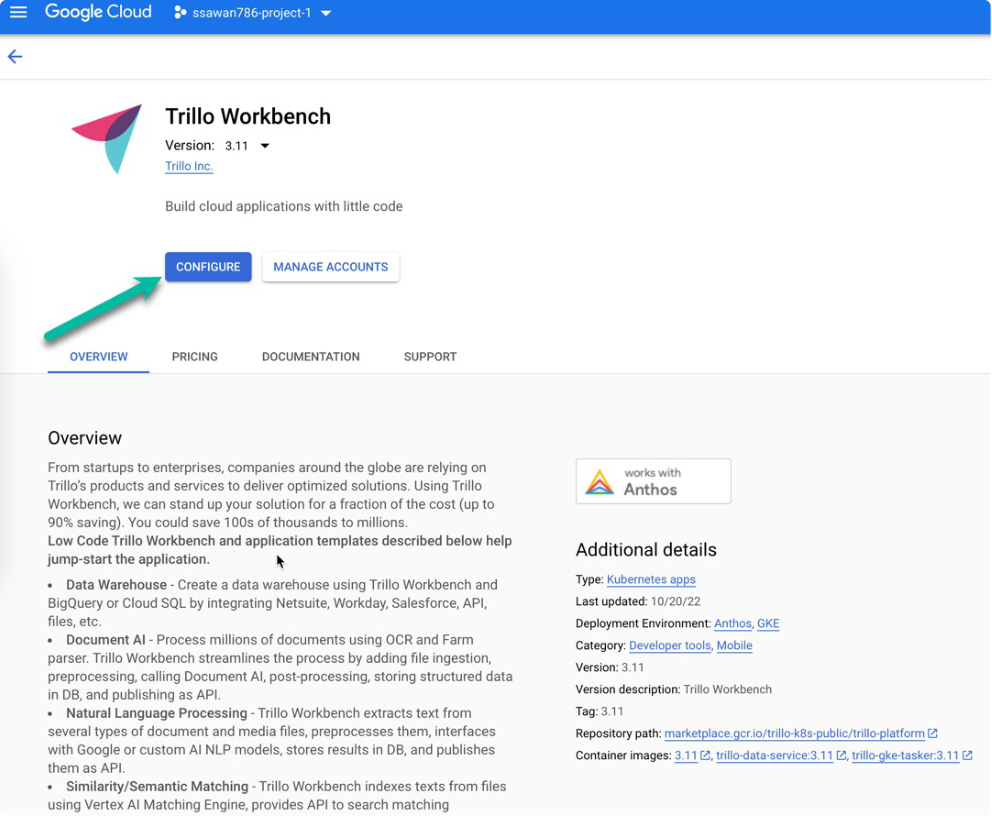
Switch to the following tab to deploy the license via command line. Click deployment license key to download the license file. Once download it rename it as license.yaml and proceed to the next page of this guide.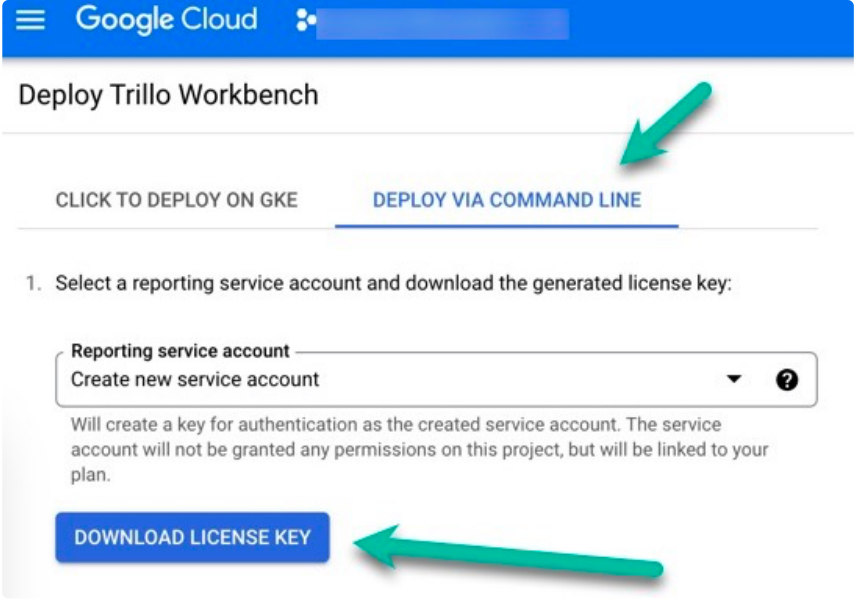
license key file from this page
Deploying DocAI Workbench
Currently, the marketplace-guided installation for DocAI Workbench is not available. To deploy DocAI Workbench in your GCP project, you'll need to trigger a manual install. Follow the steps outlined below. You only need the marketplace license file to run the DocAI Workbench application.
Major Steps
Create a new GCP project and associate it with your GCP billing account
Download GCP marketplace license
Get the deployment
Configure the workbench deployment
Install the workbench
Create a new GCP project
Go to the google cloud console (cloud.google.com) and create a new GCP project.
Make sure that the new project is associated with your billing account and it is not under evaluation. You will need to set it as a paid account
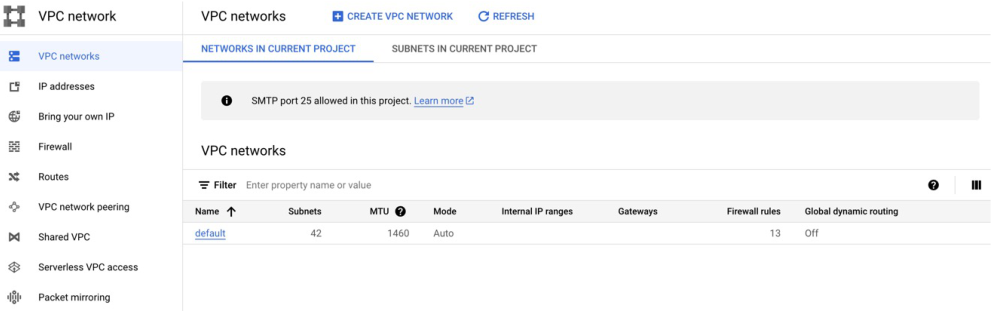
When you are inside the project then make sure you have at least one VPC network. If you see that a default network is created by the Google cloud then you are all set. Otherwise create a network and name it as a default.
Download marketplace license
Follow the steps provided in this online documentation link - - - - - -
https://trillo.gitbook.io/deploying trillo workbench in google cloud
Rename the downloaded file as license.yaml (For enterprise license, please contact support@trillo.io)
Get the deployment
Contact support@trillo.io to request installation file - deployment.zip
Upload and unzip deployment.zip to your account under google cloud shell.
Configure the DocAI Workbench
The deployment configuration is provided in the shell script env_global.sh
You must provide the name of the server including the domain (eg: wb.domain)
Once the installation is complete then update the dns a records for the two names (eg: wb.domain and api.wb.domain)
Change the region and zones if needed. Everything will be created in the specific zone and the region afterwards.
If a default google cloud project is created, there is no need to change the network and subnetwork configurations.
The rest of it can be left as is for the successful installation of the workbench.
Variable Name Value Comment APPSERVER_UI_NAME docai.$APPSERVER_NAME Set app server UI name to server name APPSERVER_NAME api.$APPSERVER_NAME Set the app server name with the domain(eg:server.domain) REGION Set region ZONE Set primary zone ZONE2 Set secondary zone NETWORK_SHORT default Use default network name SUBNETWORK_SHORT default Use default subnetwork name OTHER_NETWORK_PROJECT $PROJECT_ID Use current project for network
Install the Workbench
Make sure you are ssh-ed into the deployer machine
Copy the license file from the home folder of the deployer machine to the deployment folder as follows
cd ~/deployment
cp ~/license.yaml ./4-gke
cd to the deployment folder (asabove) and run the script ./runall.sh
The installation will start the scripts and run for more than 15 mins. Itwill provision the followings
GCP services
Reserve ip addresses for the workbench front end and backend servers.
Create the bucket for file storage.
Provision mysql 8 server for data storage
Provision red is for caching
Optionally provision nodes for secure file transfer.
Finally, install all micro services in the ku bernet es cluster. It will provision the external load balancer for the front end and backend servers with managed secure certificates.
Once the installation is complete then the scripts and the configuration results are all copied to the newly provisioned cloud storage bucket. The configuration results include the default admin credentials.
The loadbalancer will take around another 15+ minutes to stabilize but notice that it will not be able to retrieve valid security certificates until unless the DNS records are updated. Therefore proceed to update your DNS A records by looking at the IP address reserved for the Workbench front end and backend servers. IP addresses are derived from the following page.
Keep checking the url (eg. wb.domain) inside the browser till the main login screen is observed. You can jump through the main URL and the login screen from the Google cloud console as below.
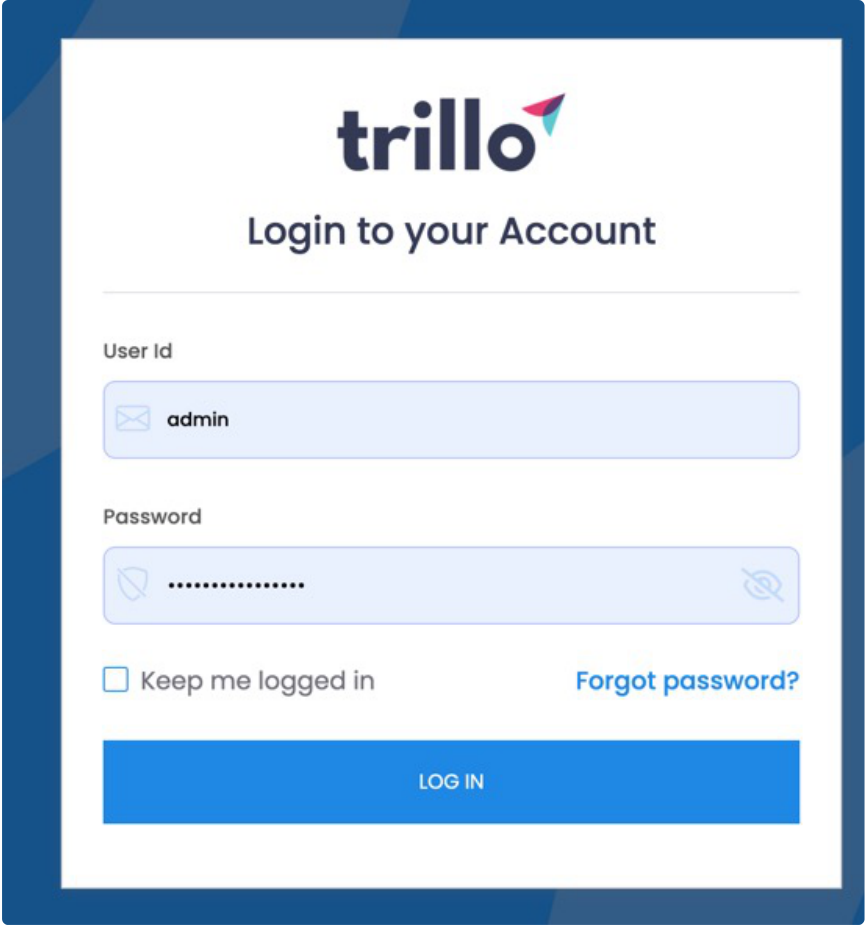
This is how the login screen looks like. The default admin credentials are provided on the last screen once the installation is complete.
Onceyou're inside the workbench then create a new user. Notice that the admin account is not meant to operate the workbench. The newly created users will be able to operate all functions of the workbench.
Additional notes
For terraform templates, please contact support@trillo.io
The installation of do cai workbench include:
Do cai manager
File manager
Maintenance
1. Keep SFTP OS Updated
- In order to keep the seller up to date with the latest badges it is advisable to keep it up-to-date. There are times when the clients are unable to connect to the server requiring a software update. Follow these instructions to keep the operating system up-to-date.
Update package information:
Run sudo apt update to refresh the list of available packages and their versions from the software repositories.
Upgrade packages:
Run sudo apt upgrade to download and install the latest versions of all the installed packages.
Reboot:
Depending on the updates, a reboot might be recommended. You will be prompted during the update process if needed. It is advised to reboot anyway once the steps are complete and the upgrade has happened.
FAQs
Marketplace subscription license
For a given project when you subscribe for workbench then the license is reported to a different internal GCP project. This is according to the internal mechanics of Google cloud platform. There is absolutely no need to delete that internal project otherwise the application will cease to function. Your monthly bill will highlight that it is a workbench license and the billing page may not show it simply because you haven't changed to that internal project. If you accidentally disabled the billing of subscription licensing project then get in touch with us to reenable it. The reporting of license usage requires an internal service account which has no other purpose and it is a designated by the Google cloud platform itself.