
Give your fence a beautiful and long-lasting finish with a DIY staining project.
With the right supplies and a bit of elbow grease, you can have a stunning fence that will last for years. In this article, you'll get the scoop on how to prepare the fence surface, choose the right products, apply the stain, and protect it afterwards.
Plus, we'll tell you how to troubleshoot common staining issues. Get ready to get your hands dirty and create a beautiful fence!
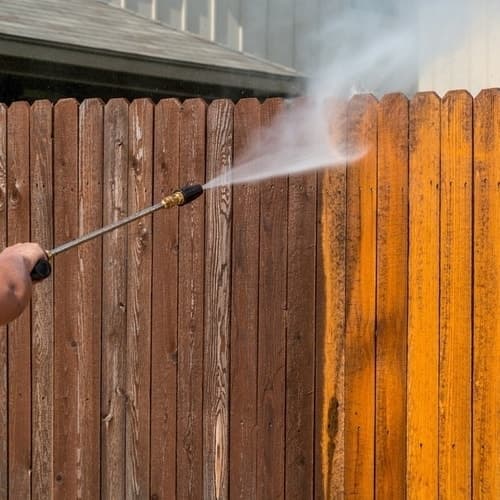
Before you start staining, you'll need to prepare the fence surface to ensure a beautiful and long-lasting finish. First, use a pressure washer to remove dirt, mold, and mildew. To ensure the fence is completely clean, you should scrub any remaining stubborn patches with a wire brush or stiff bristled brush.
Once the fence is clean, let it dry completely before proceeding with the staining. If the fence is new, you'll need to let it weather for about one month before staining. This will allow the wood to absorb the stain better and last longer.
Once the fence is ready, use painter's tape to cover any areas you don't want stained. Now you're ready to start staining and achieve that beautiful and long-lasting finish.
Choosing the right staining products is key to getting a great look that'll stand the test of time. When selecting a stain, you'll need to consider the type of wood your fence is made of. For example, if it's cedar, you'll want to go with a high-quality, oil-based stain that contains a mildewcide. For pine and other softwoods, an acrylic-based stain is best.
You can also choose a semi-transparent stain, which will slightly darken the wood while still allowing the grain to show. Be sure to read the label and select a product that's designed for outdoor use and offers UV protection.
Also, don't forget to purchase a quality brush and protective gloves to make the job easier. With the right product, you'll be able to achieve a beautiful, long-lasting finish.
Once you have the right products, you'll need to apply the stain to your fence. You should start at the top of the fence and work your way down, using a brush or paint roller. Make sure to cover the entire surface, including the slats, posts, and rails.
Be careful to avoid runs and drips, as they can leave an uneven finish. When you're done, you should let the fence dry for 24 hours before you apply a second coat. After each coat, you'll need to wait 24 hours before applying the next one. This will ensure a nice, even finish. Make sure to keep a wet edge as you go, so that the stain doesn't dry too quickly.
Don't forget to stain the inside of the fence, as well as the outside. This will give you a long-lasting, beautiful finish. Once you're done, you should wait at least 48 hours before you use the fence.
Now that you've finished staining your fence, it's important to protect it so that it looks great for years to come. To do this, you should apply a sealer or polyurethane finish.
These protective coatings help to repel water and dirt, and prevent UV damage and fading. For best results, apply two coats of sealer or polyurethane, allowing each one to dry completely before applying the next. For an even longer-lasting finish, you can apply a third coat.
Be sure to follow the sealer manufacturer's instructions for drying and curing times, and use a brush or roller to apply the sealer. You should also make sure to wear protective gloves and eye wear when applying the sealer. Once the sealer has dried, you can enjoy your beautifully stained fence for years to come.

If you're having trouble getting the results you want from staining your fence, there are a few common issues you can troubleshoot. If the stain isn't taking to the wood properly, or if it's blotchy, make sure you use the right type of stain for the wood and that you've sanded it thoroughly.
The temperature can also affect the outcome; if it's too hot or too cold, wait for a better day to stain. You may also need to use a brush or roller to ensure an even coverage. If the stain is running or dripping, use fewer coats and be sure to keep the stain wet.
Lastly, make sure you allow enough time between coats and that you're applying the stain in the right direction. With these tips, you can enjoy a beautiful and long-lasting finish on your fence.
By maintaining your stained fence regularly, you can keep it looking great for years to come. To keep your fence in top condition, you'll need to clean it annually. A power washer can help remove dirt and debris, while a mild detergent can help remove any mildew or mold.
After washing, you'll need to recoat the fence every two to three years, depending on the product you use. If you use a water-based stain, you should plan to reapply every other year.
Oil-based stains will last a bit longer, but you'll still need to reapply every three years or so. If you live in an area with extreme weather, you may need to recoat more often. To further protect your fence from the elements, consider applying a sealer after staining. Doing so will help keep your fence looking great for many years.
It typically takes about 8-24 hours for the stain to dry, depending on the temperature and humidity of the environment. You'll want to wait until the fence is completely dry before you coat it with another layer of stain. Keep in mind that warm, dry conditions will help the stain dry faster, while cooler, more humid conditions will take longer. If it's raining or very humid out, you may want to wait to apply the stain until the weather improves.
Yes, a sealant is necessary after staining your fence. Applying a sealant helps protect the stain from sun, rain, and other environmental elements. It also helps to extend the life of your fence stain and ensure that your fence remains looking its best for longer. Sealants come in a variety of types and finishes, so you can choose one that best suits your needs and budget. Be sure to read the manufacturer's instructions carefully before applying the sealant to your fence.
Yes, the type of wood does affect the staining process. Different types of wood may absorb stain differently, which can affect the look of your fence. Hardwoods, like oak or maple, tend to absorb stain more evenly and result in a richer, more vibrant color. Softer woods, like pine or cedar, may require more coats of stain to get the desired color. Additionally, the type of wood may determine the type of stain that should be used. Make sure to select the right type of stain for the type of wood you're working with.