Веб-карты Leaflet с помощью qgis2leaf
Предупреждение
qgis2leaf plugin is no longer in active development. The functionality of this plugin is folded into a new plugin called qgis2web.
See Веб картография с QGIS2Web tutorial for an updated version of this tutorial.
Leaflet - это популярная библиотека Javascript с открытым исходным кодом для разработки картографических веб-приложений. Модуль qgis2leaf предоставляет простой способ экспортировать вашу карту QGIS в действующую веб-карту, основанную на Leaflet.
Обзор задачи
Мы создадим веб-карту Leaflet со всеми аэропортами мира.
Вы научитесь также
использовать условные SQL-выражения со словом
CASEв калькуляторе полей для создания новых значений полей, основанных на различных условиях.Размещение и использование пользовательских SVG-иконок в QGIS.
Получение данных
We will use the Airports dataset from Natural Earth.
Download the Airports shapefile.
Источник данных: [NATURALEARTH]
Методика
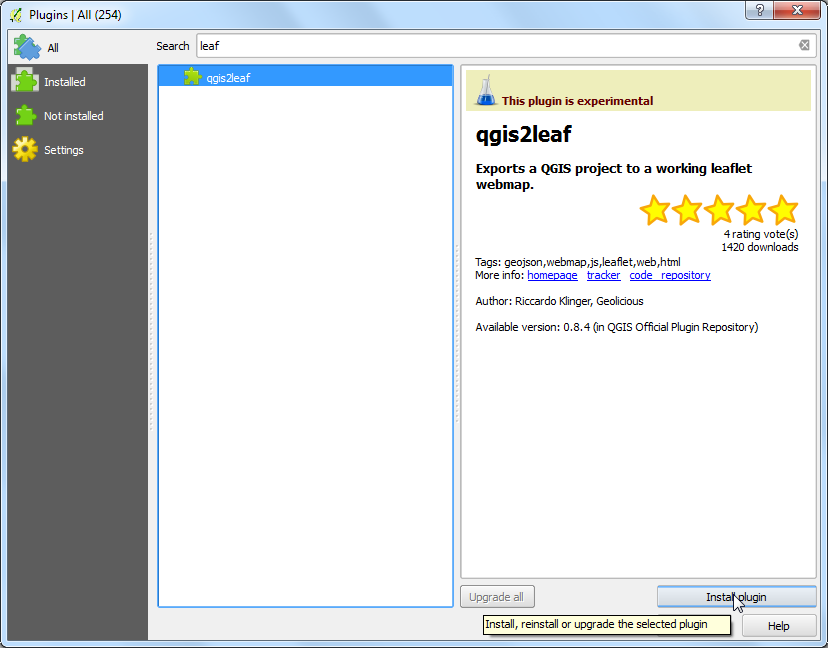
Install the
qgis2leafplugin by going to . Note that the plugin is currently marked experimental, so you will need to check Show also experimental plugins in Plugin Settings. (See Использование модулей расширения for more details on installing plugins in QGIS)
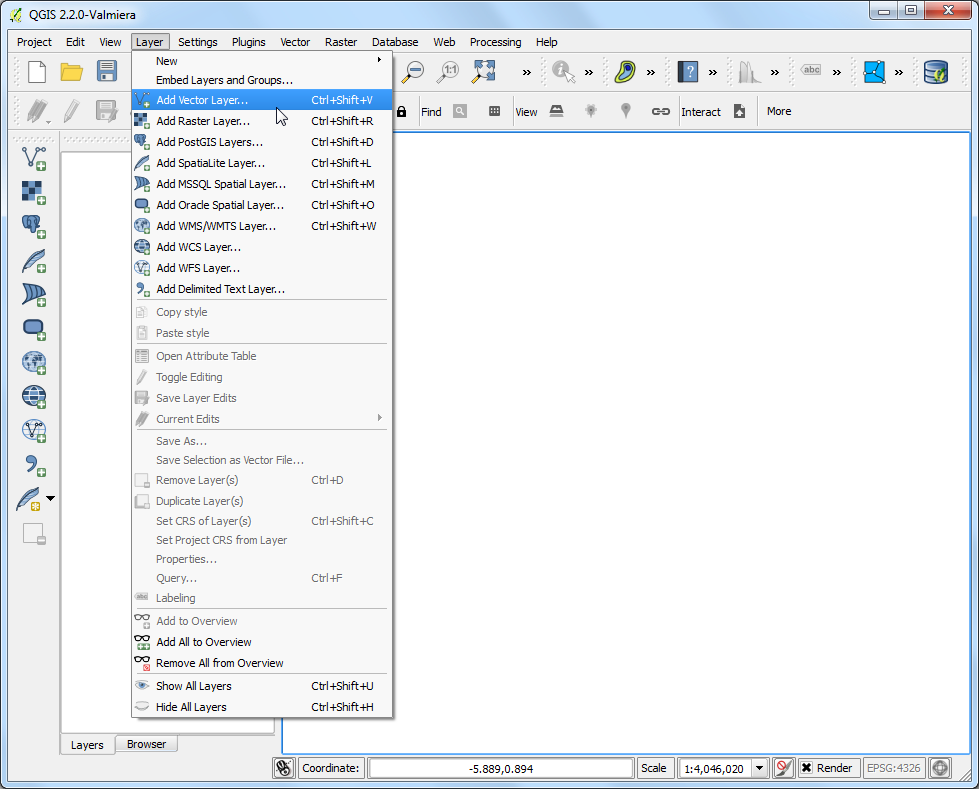
Unzip the downloaded
ne_10m_airports.zipfile. Open QGIS and go to . Browse to the location when the files were extracted and selectne_10m_airports.shp. Click OK.
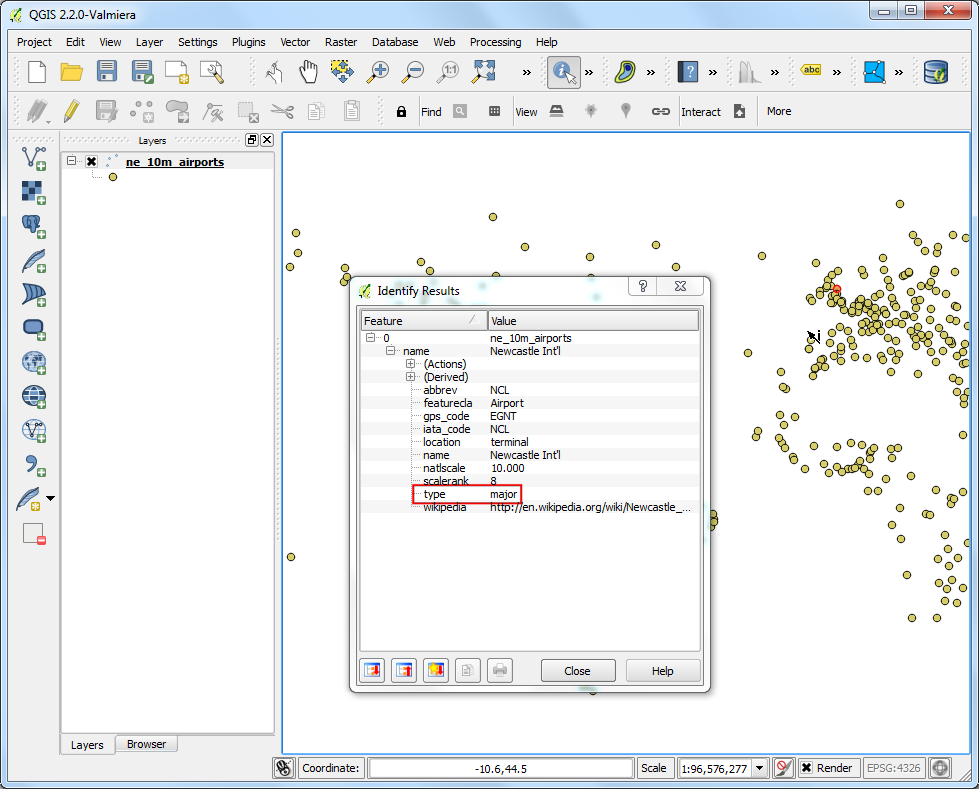
Once the
ne_10m_airportslayer is loaded, use the Identify tool to click on any feature and look at the attributes. We will create an airport map where we classify the airports into 3 categories. The attributetypewill be useful when classifying the features.
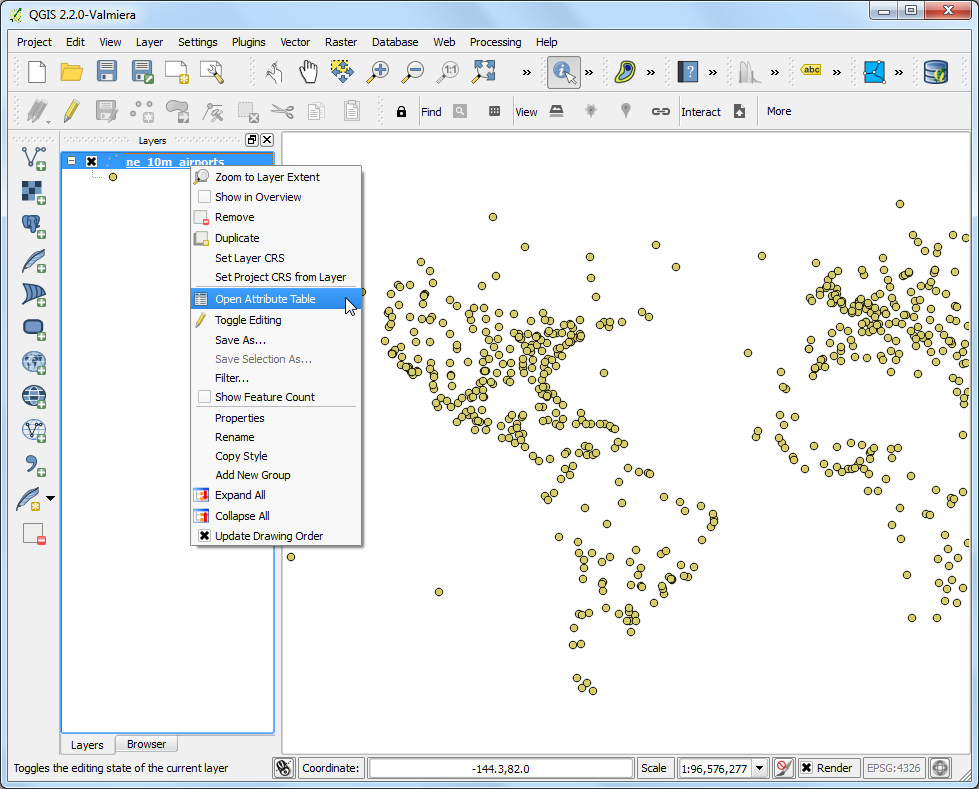
Right-click the
ne_10m_airportslayer and select Open Attribute Table.
In the attribute table dialog, click the Toggle Editing button. Once the layer is in editing mode, click the Open Field Calculator button.
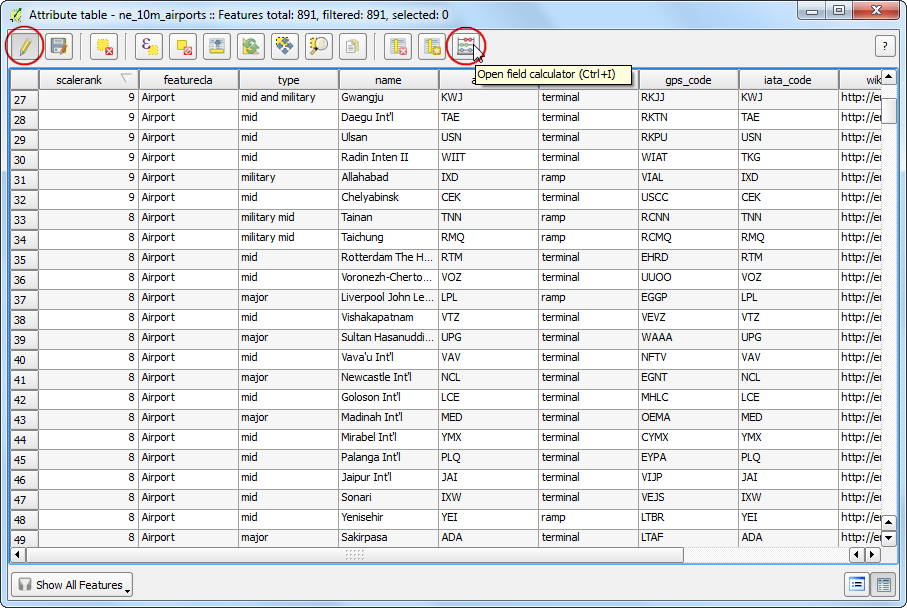
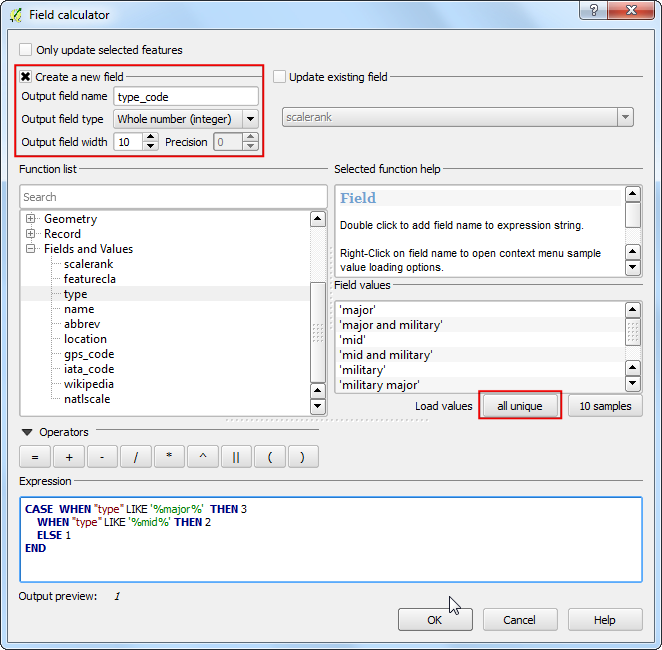
We want to create a new attribute called
type_codewhere we give major airports a value of 3, mid-sized airports a value of 2 and all others a value of 1. We can use the CASE statement and write an expression that will look at the value oftypeattribute and create atype_codeattribute based on the condition. Check the Create a new field box and entertype_codeas the Output field name. Select Whole number (integer) as the Output field type. In the Expression window, enter the following text.
CASE  WHEN "type" LIKE '%major%'  THEN 3
 WHEN "type" LIKE '%mid%' THEN 2
 ELSE 1
END
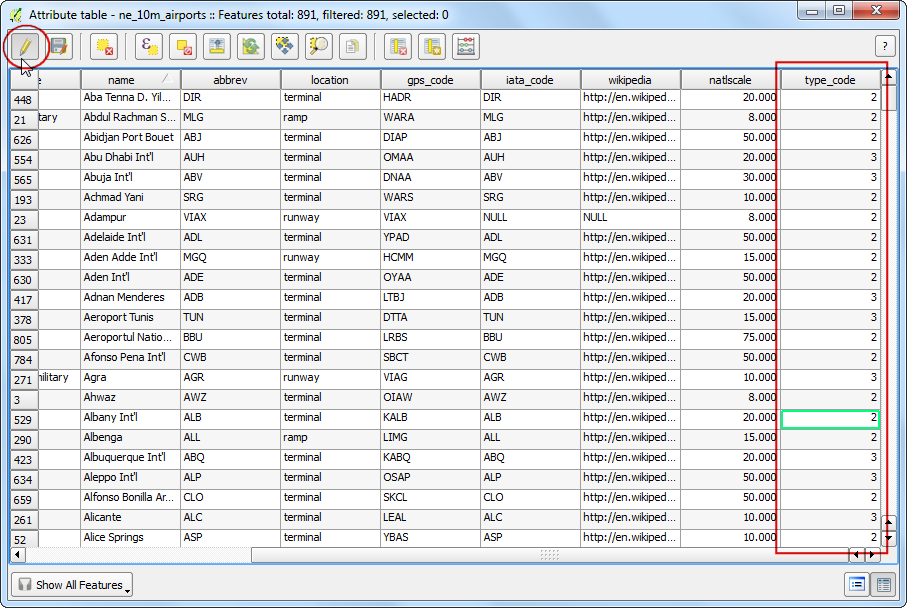
Back in the Attribute Table window, you will see a new column at the end. Verify that your expression worked correctly and click the Toggle Editing button to save the changes.
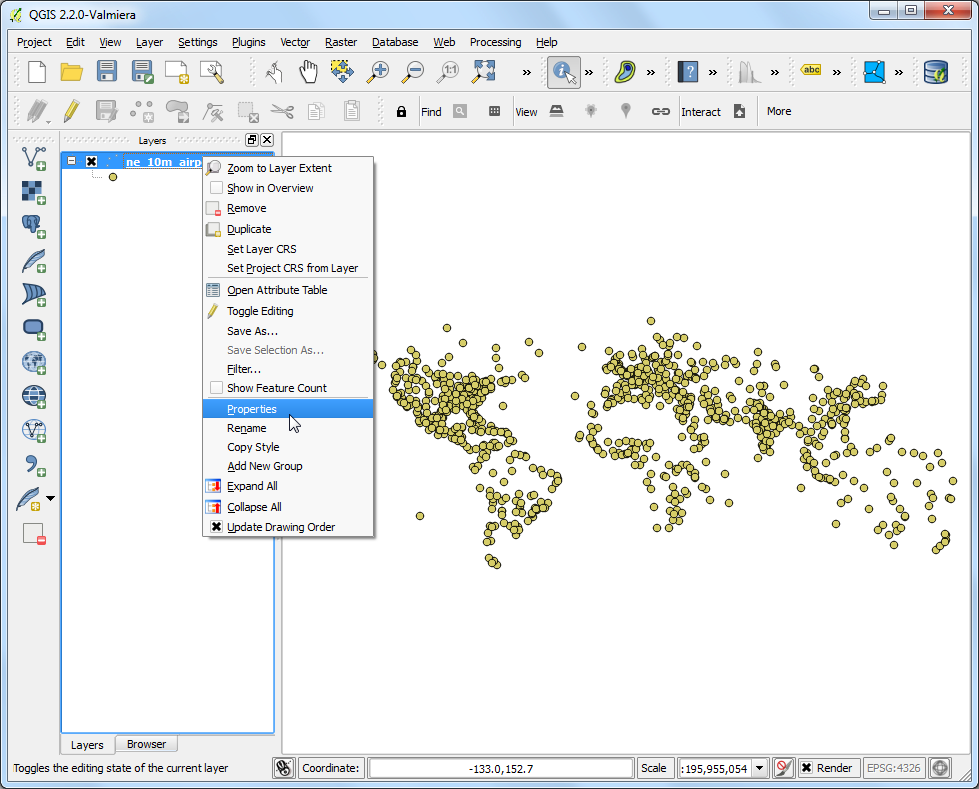
Now we will style the airports layer using the newly created
type_codeattribute. Right-click thene_10m_airportslayer and select Properties.
Select the Style tab in the Layer Properties dialog. Select Categorized style from the drop-down menu and choose
type_codeas the Column. Choose a color ramp of your choice and click Classify. Click OK to go back to the main QGIS window.
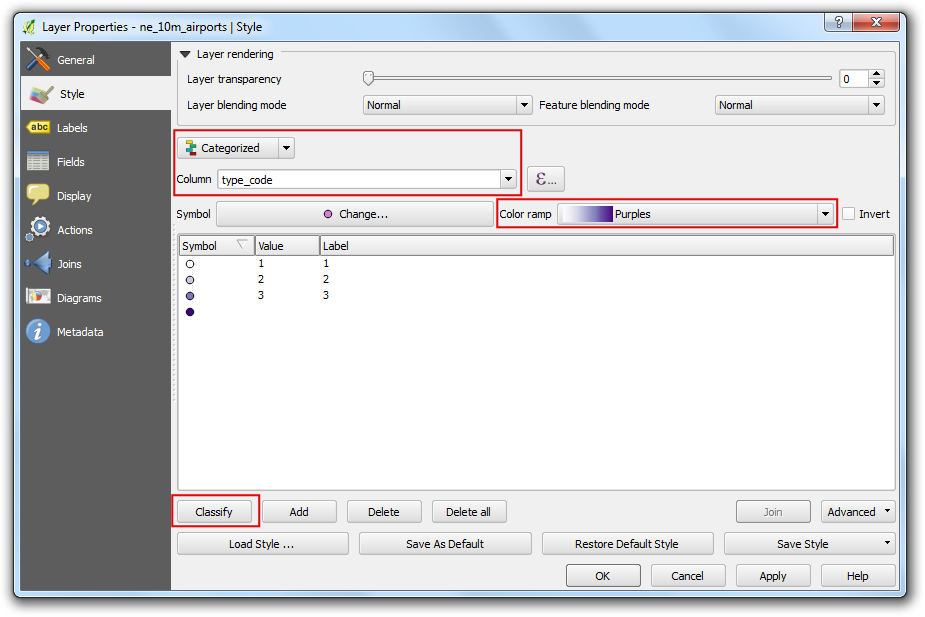
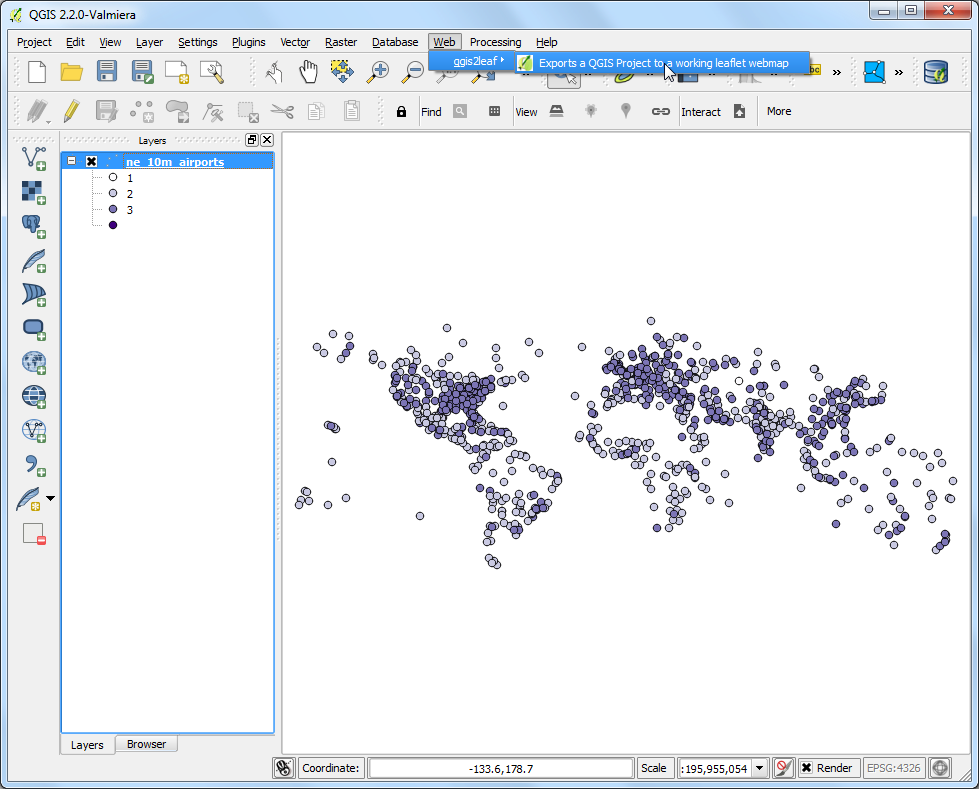
Here you will see a nicely styled airport map. Let’s export this to create an interactive web map. Go to .
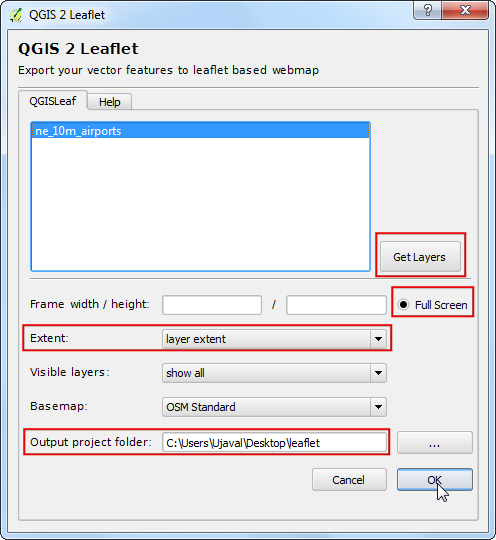
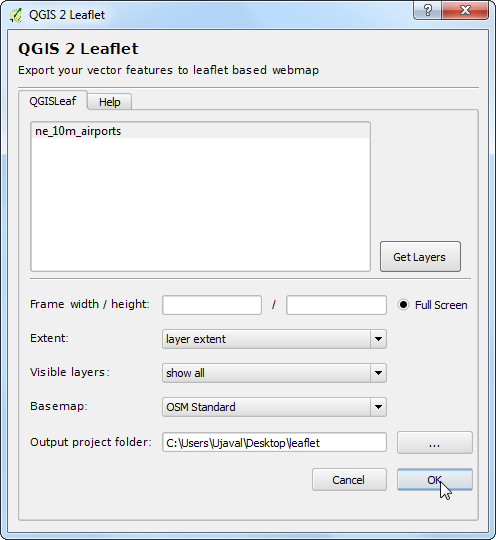
In the QGIS 2 Leaflet dialog, click Get Layers to get the refreshed layer list. Select the Full screen option to have a full screen web map. Choose layer extent as the Extent of the exported map. Choose a Output project folder on your system where the plugin will write the output files. Click OK.
Once the export process finishes, locate the output folder on your disk. Open the
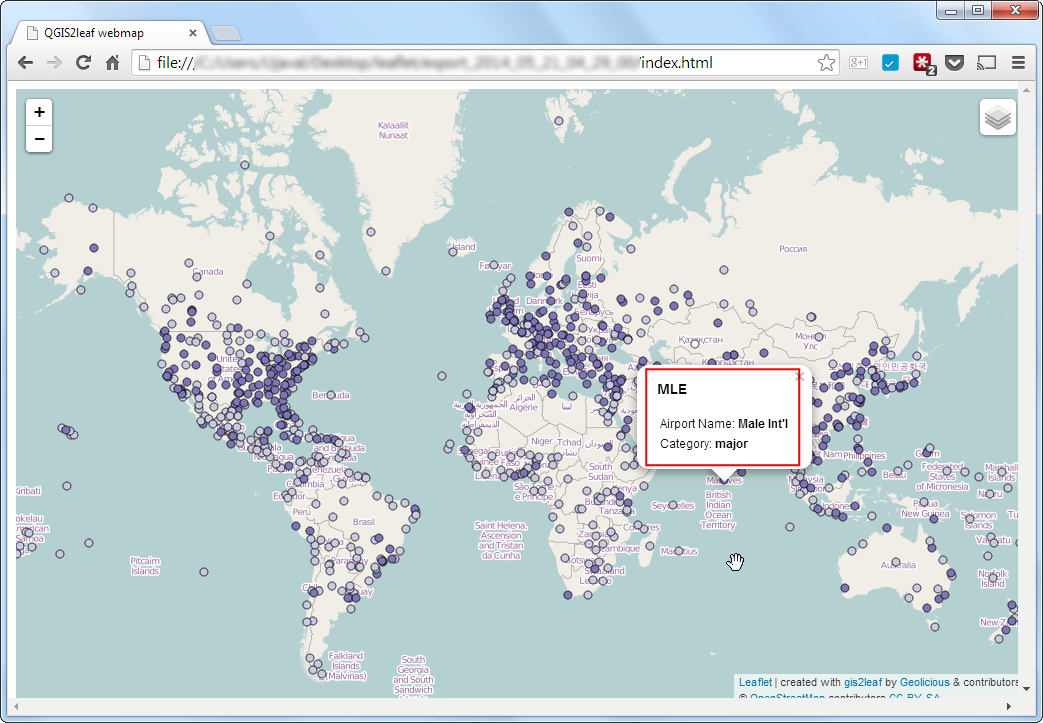
index.htmlfile in a browser. You will see an interactive web map that is a replica of the QGIS map. You can zoom and pan around the map and also click on any feature to get an popup window with attribute information. You can copy the contents of this folder to a web server to have a full featured web map.
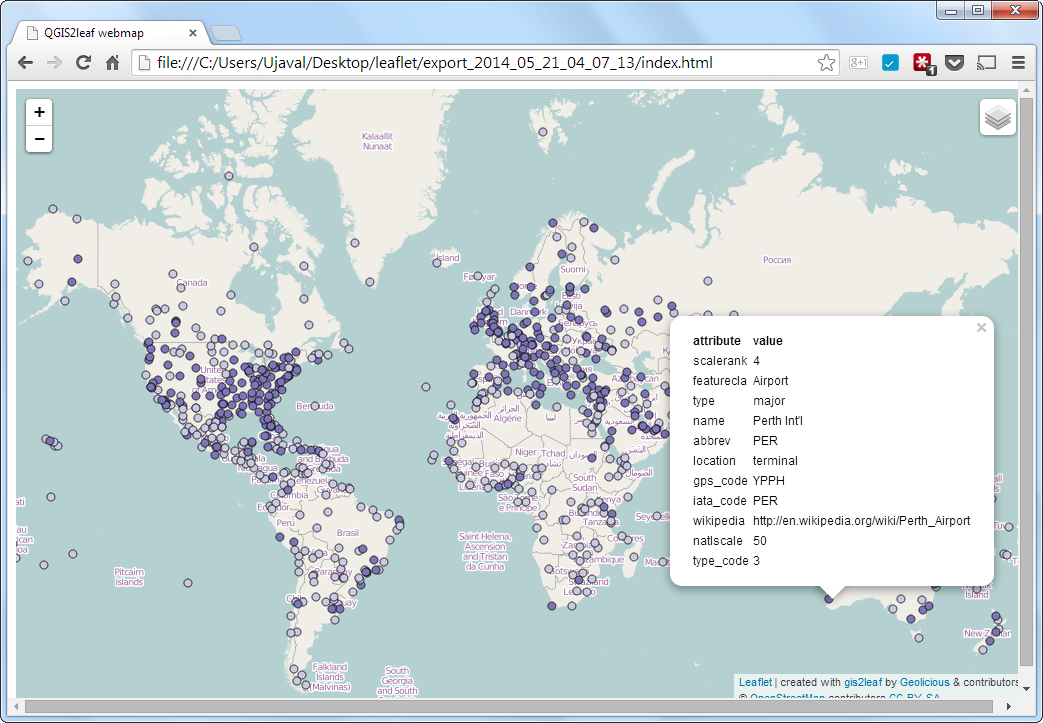
Now we will explore some advanced features of this plugin that will allow you to customize the map further. If you noticed, the popup contained all the attributes of the feature. Some attributes are not very useful and overall the pop up looks ugly. We can replace the default popup with our own custom HTML to make it much better. This is achieved by added the custom HTML in a column named
html_exp. Right-click thene_10m_airportslayer and select Open Attribute Table.
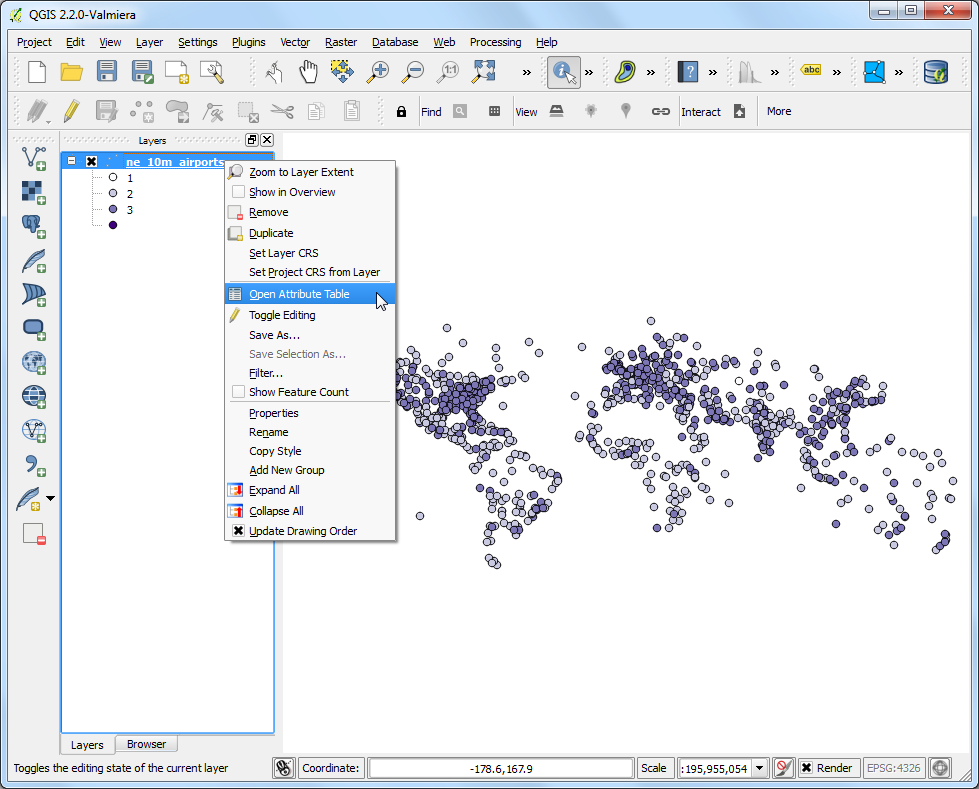
In the attribute table dialog, click the Toggle Editing button. Once the layer is in editing mode, click the Open Field Calculator button.
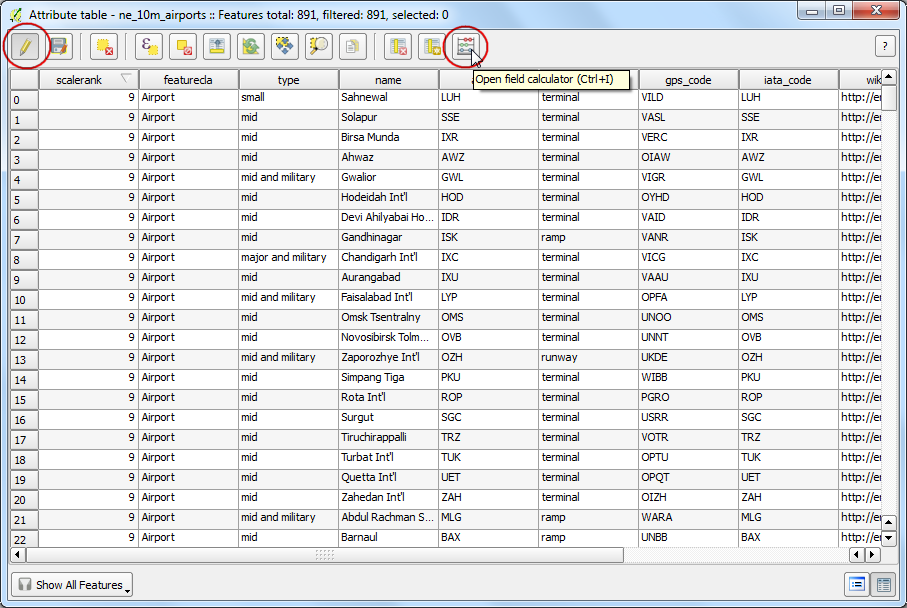
Check the Create a new field box and enter
html_expas the Output field name. Choose Text (string) as the Output field type. Since we will be creating a long HTML string, choose200as the Output field width. Enter the following expression in the Expression area. The complex-looking expression simply defines a HTML table and substitutes cell values from attributesiata_code,nameandtype. Check the Output preview to ensure the expression is correct.
concat('<h3>', "iata_code", '</h3><table>', '<tr><td>Airport Name: <b> ',
"name", '</b></td></tr><tr><td>Category: <b> ', "type",
'</b></td></tr></table>')
Примечание
The shapefile format can contain a maximum of 254 characters in a field. If you want to store longer text in the field, choose another format.
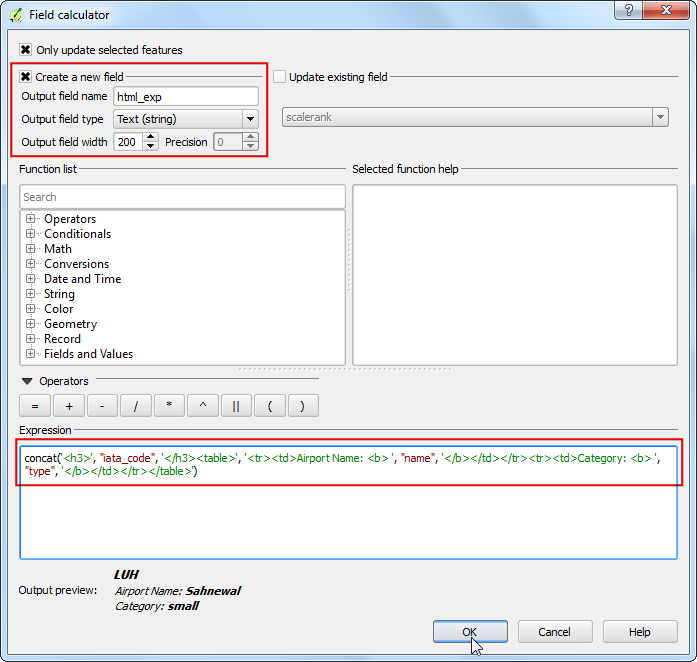
Back in the Attribute Table window, you will see a new column at the end. Verify that your expression worked correctly and click the Toggle Editing button to save the changes.
Now export the map again using .
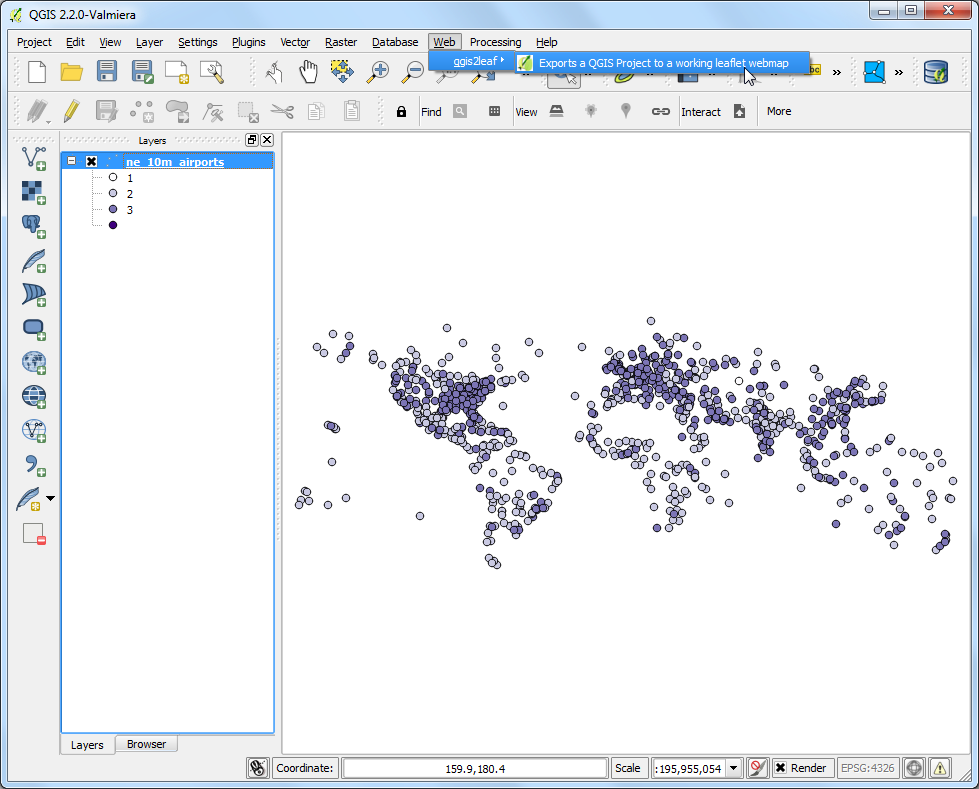
Choose the options as before.
Go to the output folder once the export process finishes. You will have a subfolder with the present timestamp. Locate the
index.htmlfile inside it and open it in a browser. Click on any feature and look at the popup. You will notice that it looks a lot cleaner and informative.
Another useful feature of the
qgis2leafplugin is the ability to specify a custom icon to use with the web map. This is accomplished by specifying the path to the custom icon in a field calledicon_exp. We will create a new layer containing only the major airports and style using a custom SVG icon. Locate the Select features using an expression tool from the toolbar.
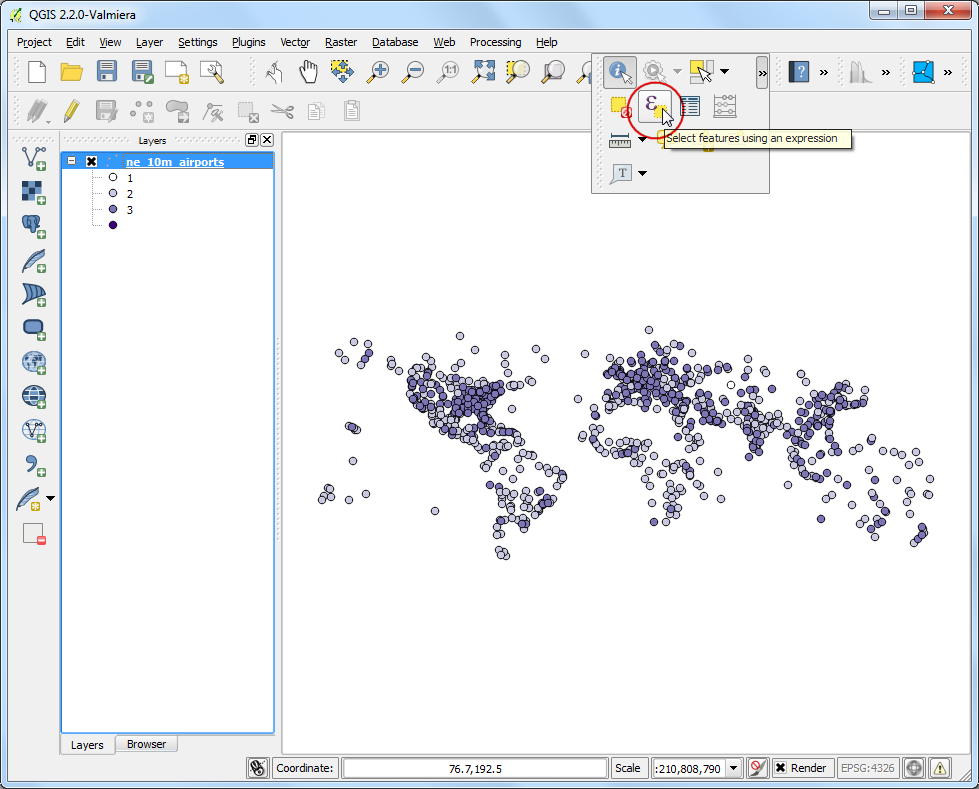
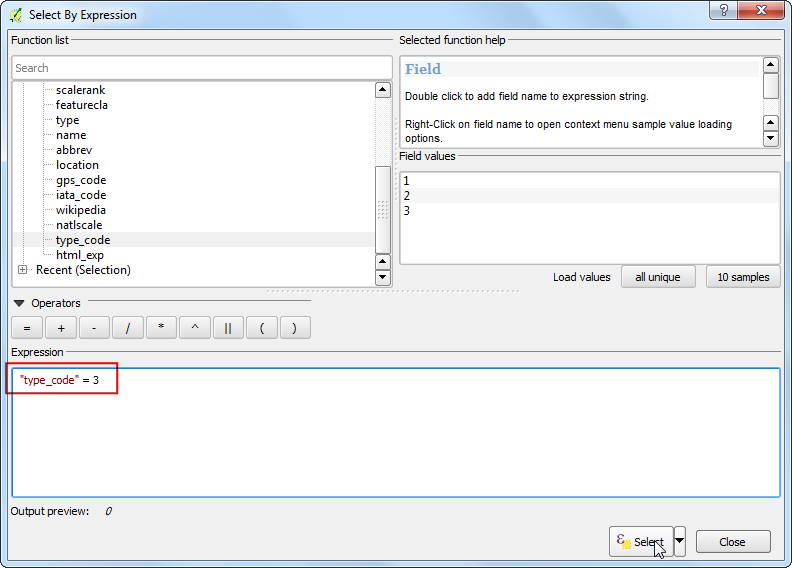
Enter the expression below and press Select to select all major airports.
"type_code" = 3
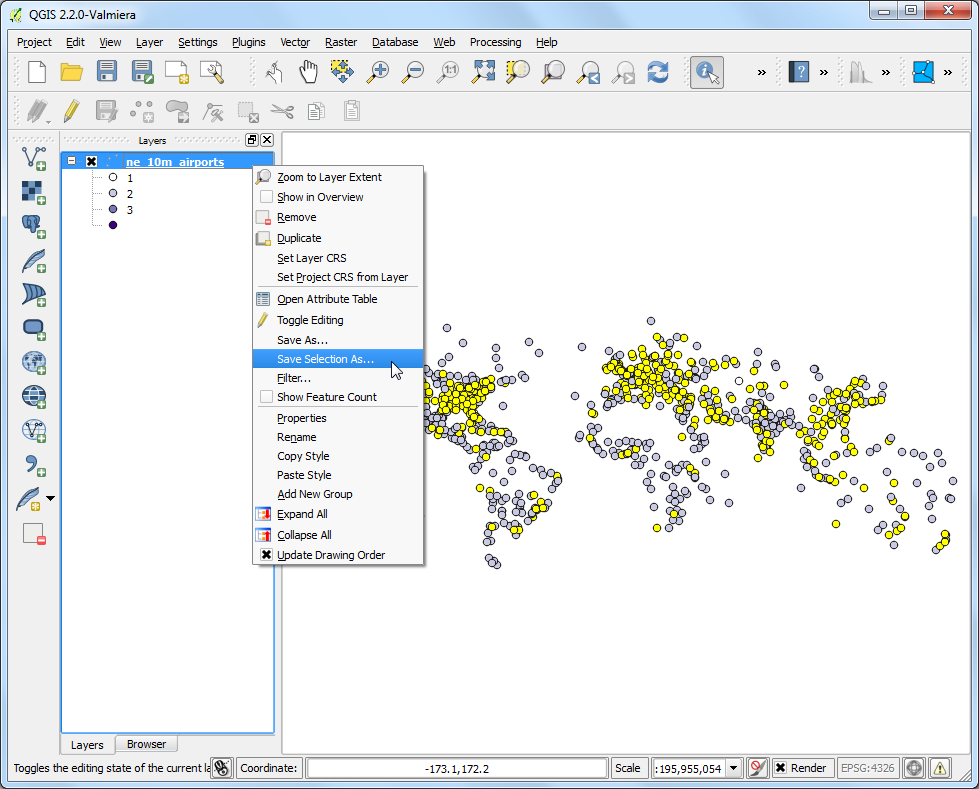
Right-click the
ne_10m_airportsairports and select Save Selection As….
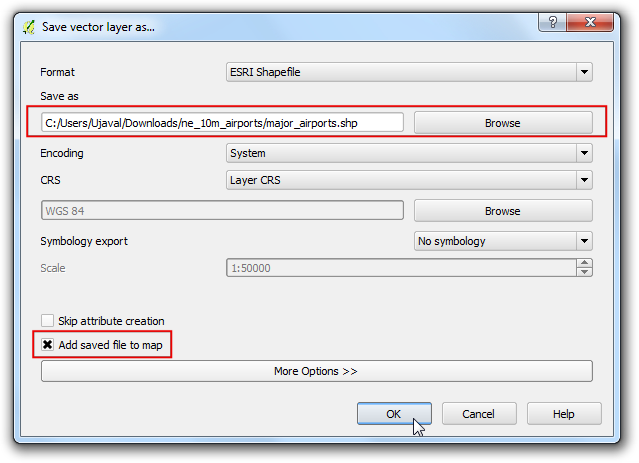
In the Save vector layer as… dialog, name the output file as
major_airports.shp. Check the Add saved file to map and click OK.
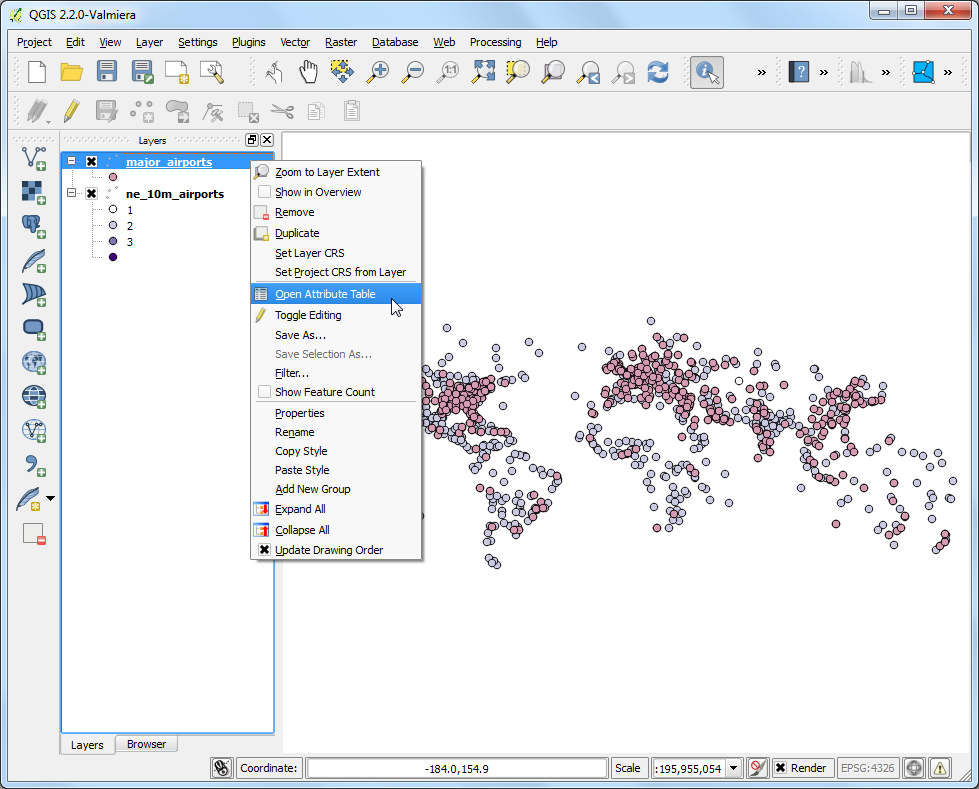
Once the
major_airportslayer is loaded in QGIS, right-click it and select Open Attribute Table.
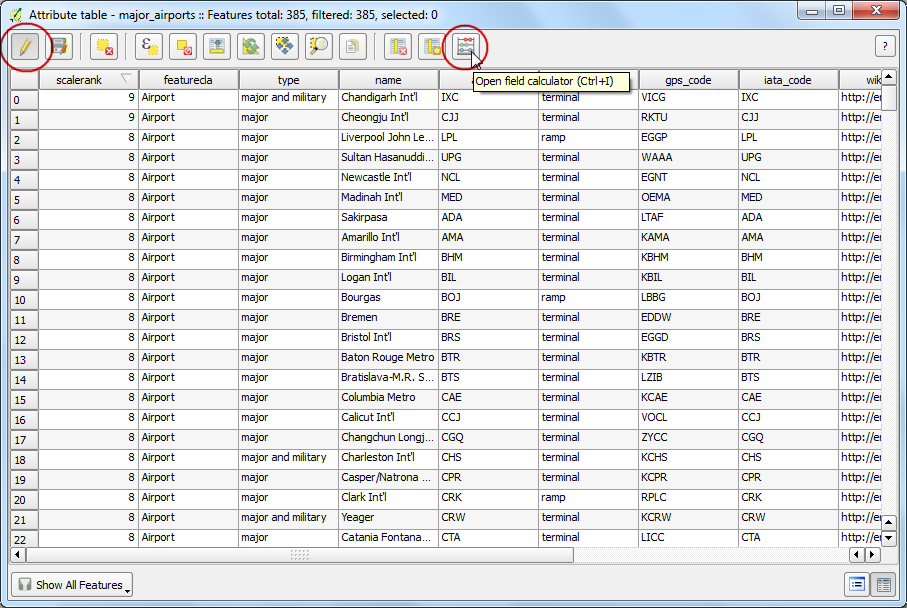
In the attribute table dialog, click the Toggle Editing button. Once the layer is in editing mode, click the Open Field Calculator button.
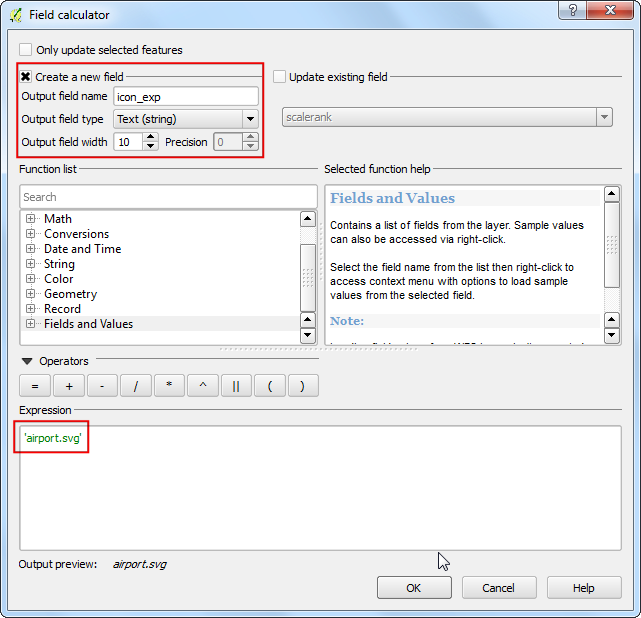
In Field Calculator dialog, enter
icon_expas the Output field name. Make it a Text (string) type. In the Expression area, enter the following expression.
'airport.svg'
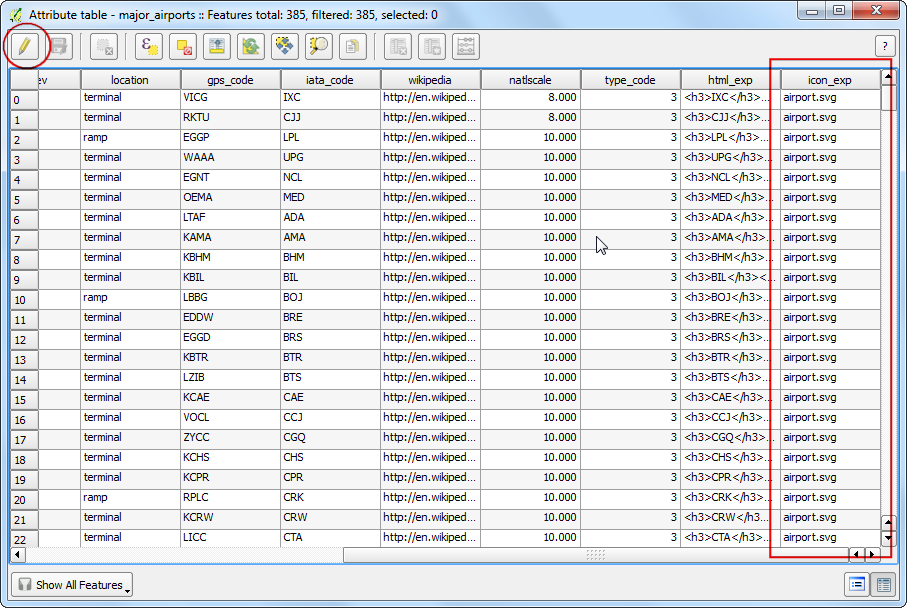
Save your edits by clicking the Toggle Editing button in the Attribute Table.
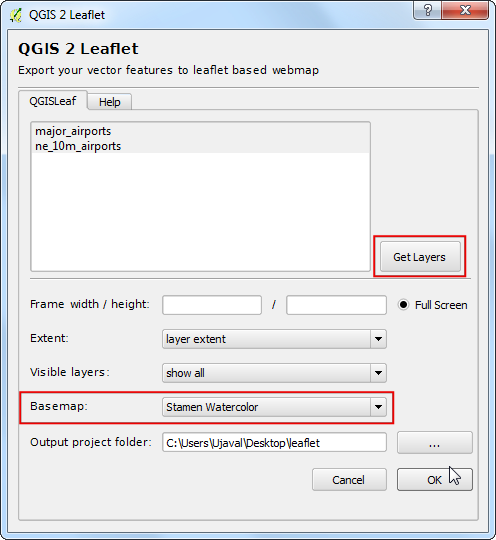
Open the
qgis2leafplugin from . Click Get Layers button to fetch both the layers from QGIS. There are many different pre-made tile layers availalbe for basemaps. In this map, we can try something different and load the Stamen Watercolor as the Basemap. Click OK.
If you remember we specified
airport.svgas the icon for the airports. We need to add that icon manually to the output directory. QGIS comes with a large collection of icons. On Windows, these icons are located at . The path may differ depending on your platform and install type. Locate that directory and choose an icon you like. For our map, we can try theamenity=airport.svgicon located undertransportcategory.
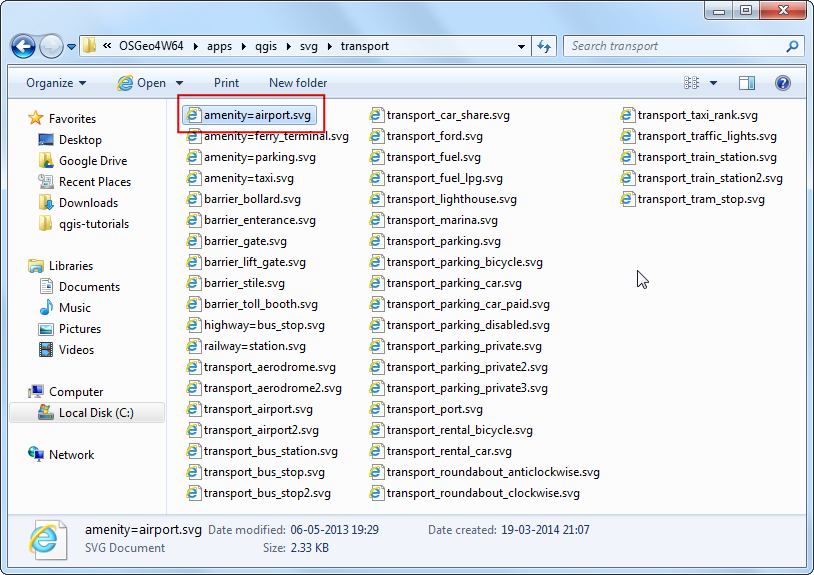
Copy and paste this icon in the output directory you had specified when exporting the map. Rename it as
airport.svg.
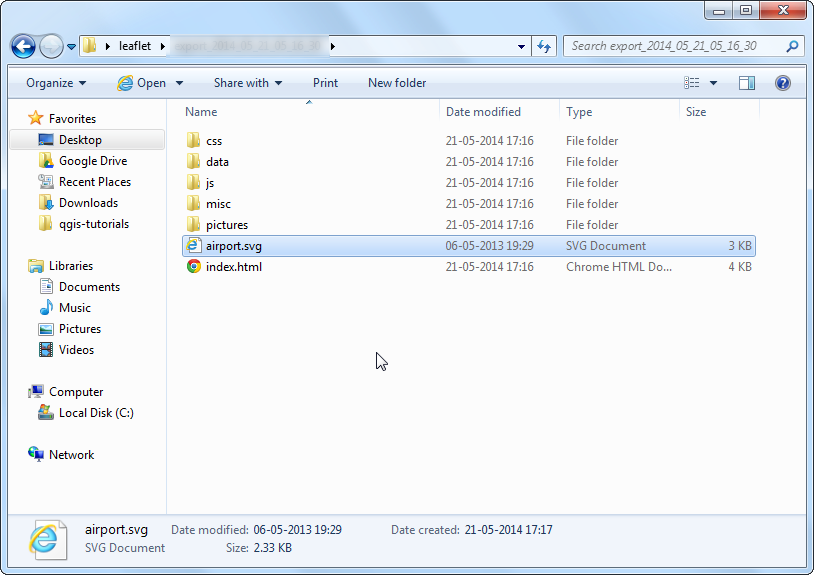
Now open the
index.htmlfile located in the folder. You will see a beautiful basemap with our custom icons for the major airports. Also notice the layer panel at top-right corner which has layer display control for both the layers.
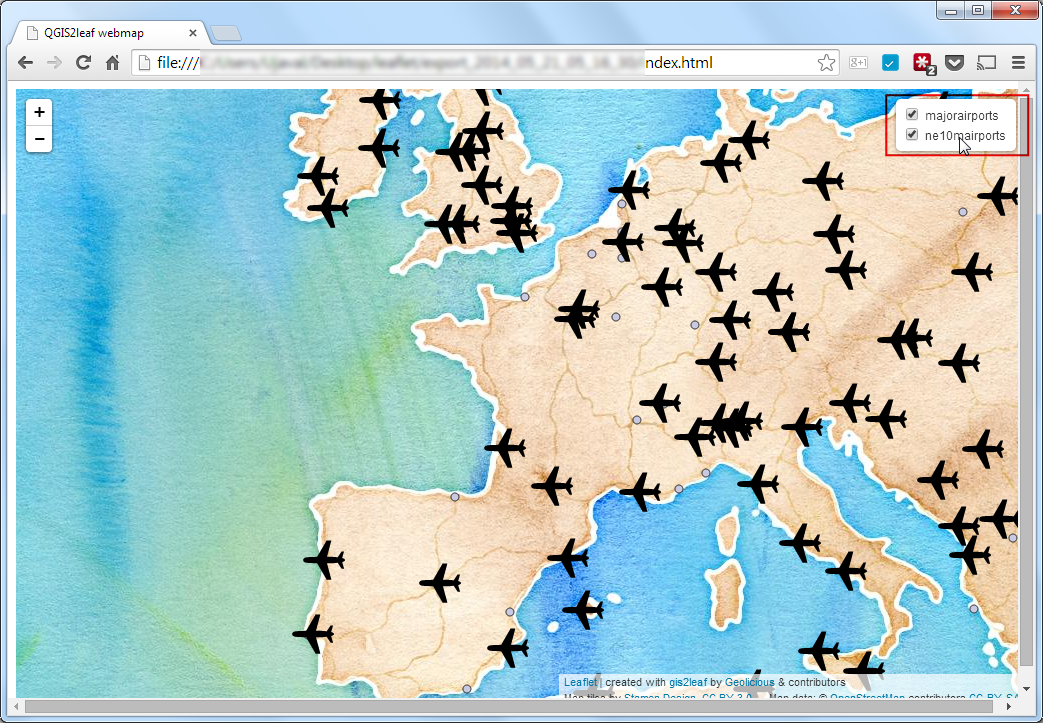
Hope this tutorial gives you a head start in creating web maps. Below is the live interactive map created for this tutorial.
If you want to report any issues with this tutorial, please comment below. (requires GitHub account)