To ensure you have the right amount of
gutter
material and proper placement of downspouts, start by measuring your roof's dimensions. Measure the length of each roof edge where gutters will be installed, noting any corners or angles.
 Also, identify locations for downspouts, typically near corners and at least every 40 feet along the gutter run.
How can you install sectional gutters properly? plan your installation: before assembling your gutters, carefully plan the layout to minimize seams. Fewer seams mean fewer potential leak points, so planning is crucial. Plan downspout locations: choose downspout positions where water can be directed safely away from the foundation of the house. Avoid locations that require working around obstacles. Gather materials: collect the required gutter sections and mounting hardware before beginning your installation. Cut gutters to size: use tin snips to cut the gutters to the appropriate lengths. Cut notches for connections: when joining gutter sections, cut a 2-inch notch for inside or outside corner pieces, and a 4-inch notch for splicing two straight sections together.
Fig. A (below) shows an example of a rain gutter system for a typical house. Record the length of the rain gutter runs and mark the downspout locations. Then count up the inside and outside corners and end caps (note whether they are right or left ends). Measure the height of downspouts and add four feet to each for the extension away from the house at the bottom. Each downspout requires three elbows. There are two types of elbows that turn either to the front or side of the downspout. Most installations require only front elbows, but occasionally you may need a side elbow, usually to turn the downspout extension sideways.
4. Attach end caps
Cut your gutter sections to size using tin snips or a hacksaw.
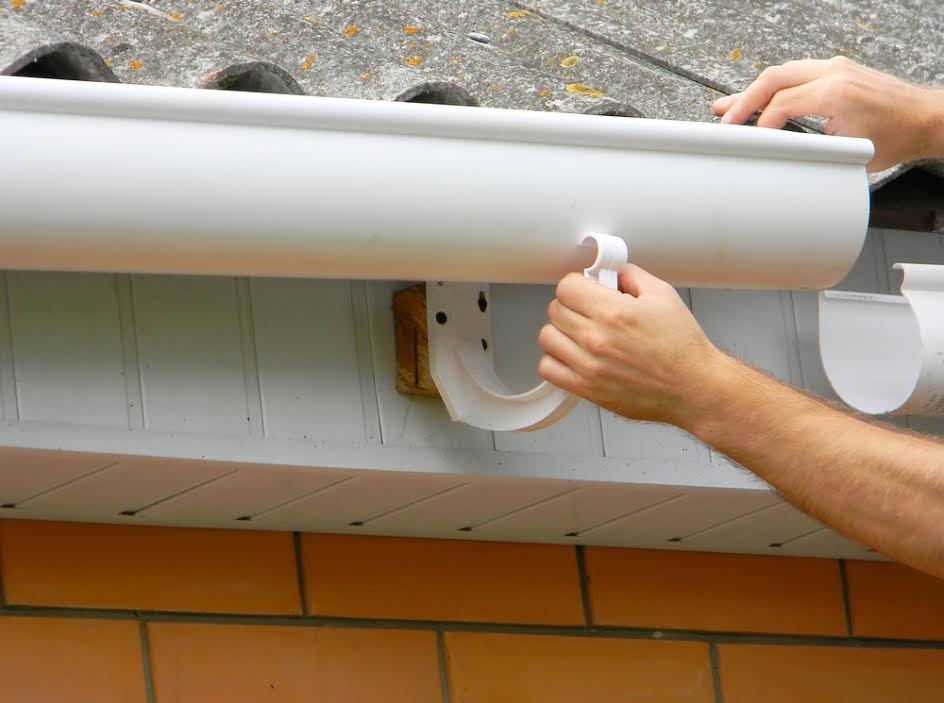
Attach end caps to the ends and dry-fit everything before securing.
Now, it’s time to attach your downspout outlet and caps. First, you have to turn the gutter face down and make the positions of the outlets. Next, create a small hole using a hammer and chisel; cut and remove this hole using tin snips. Then, use an electric drill to drill two ⅛ inch holes for your rivets. Apply silicone gutter sealant around the opening of these holes, insert the outlet, and secure them with your rivets. Place the end cap on the gutter and secure it with a sheet metal screw as you drill a hole. Finally, replace this screw with a pop rivet and apply silicone glue along the seam for waterproofing.
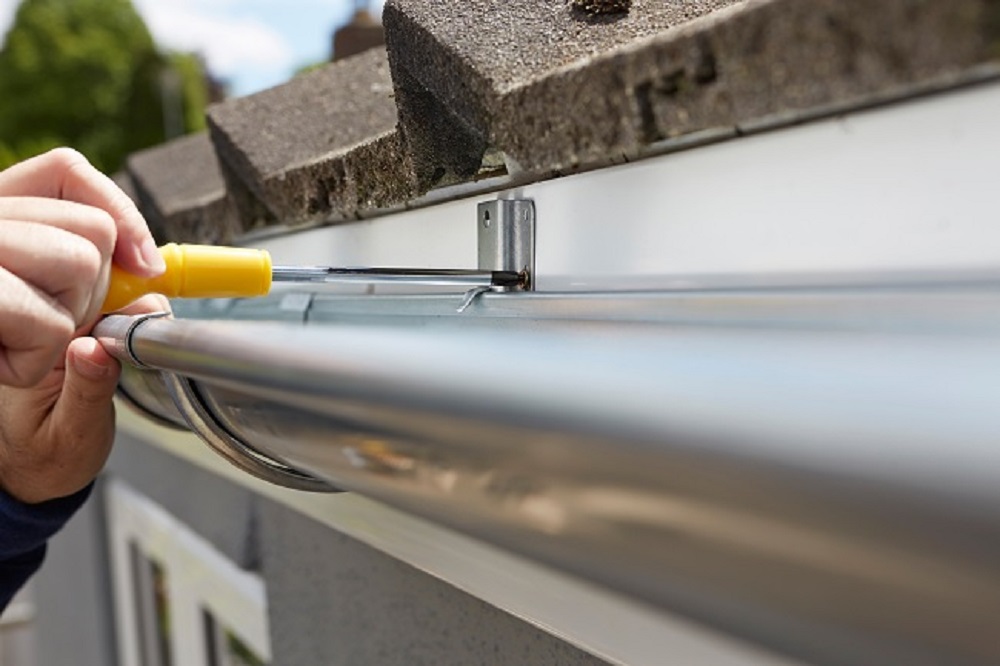
Installing gutters is a manageable project for those with diy skills. Follow these steps for a successful installation: step 1: gather tools and materials tools needed: ladder, measuring tape, hacksaw, drill, level, chalk line, tin snips, caulking gun, and safety equipment. Materials needed: gutters, brackets, downspouts, end caps, gutter sealant, screws, and splash blocks. Step 2: prepare the area safety first: ensure the ladder is stable and placed on a flat surface. Wear safety gear. Clean the roofline: remove any debris from the roofline to ensure a clean surface for attaching the gutters. Step 3: install gutter brackets mark the slope: use a chalk line to mark the slope of the gutters.
5. Cut downspout holes
While the gutter is still on the ground, turn the whole thing upside down to make holes for downspouts. Place a downspout outlet on top of the gutter where you want to cut your downspout. Ideally, this cut should be at the low end of the slope. Trace the inside of the outlet and mark the downspout hole on your gutter. Drill an ¼ inch-diameter hole at the center of your marked outline. Turn over the gutter and cut the downspout hole with your drill and a 4-inch hole saw bit. Set the downspout outlet in this hole and seal it carefully with a gutter sealant.
The downspouts are the last piece of the system to be installed for seamless guttering. Since your gutter installation pro will have pre-cut holes for each downspout, the installation won’t take too much time, but it is critical. Your downspouts are responsible for carrying precipitation down and away from your home, where it can’t damage your foundation or flood your basement. Make sure your roofer installs downspouts and elbows that are appropriately directing water and precipitation out and away from your home to prevent future problems.
Before putting the gutters on the home, mark, cut, and rivet the downspout holes. When you did your gutter planning, the route and path water takes from the roof to the ground should have been carefully considered. Double-check your measurements and that there are no obstructions that would make it impossible to place the downspout. Then follow this process: mark the center of your downspout on the bottom edge of the gutter place your downspout outlet on the gutter and trace around the inside edge use a chisel and tin snaps to carefully create the downspout holes
to successfully install gutters, gather the necessary tools and materials. A sturdy ladder, measuring tape, drill, level, hacksaw or tin snips, gutter sections, hangers, downspouts, elbows, connectors, and sealant are essential components. Don’t forget to prioritize safety by wearing safety glasses, gloves, and non-slip shoes to prevent accidents and injuries during the installation process.
Install adequately sized gutters and downspouts. Connect the downspouts to piping that will carry the water to a sloping final grade ≥ 5 ft. From the foundation or to an underground catchment system ≥ 10 ft. From the foundation that is not connected with the foundation drain system ( epa indoor airplus ). Or, install a rainwater harvesting system that includes a drainage system to handle overflow. Or, construct a grade-level rock bed with a waterproof liner and drain pipe to collect water that drains from the roof. Energy star does not require gutters for homes that have a slab-on-grade foundation or are in a dry climate.
A downspout is a roof drain pipe that’s intended to divert water from the gutter to the ground level. Downspouts are installed vertically and are connected with an outlet that penetrates the gutter and attaches to the downspout. The purpose of the downspout is to control where the water from your roof drains so that you don’t damage the foundation of your home.