Part 3: Understanding Dependencies and Dependency Management
Learn the basics of Project dependencies and Gradle’s dependency management.
Step 1. Understanding Project Dependencies
Gradle provides excellent support for dependency management and automation.
Let’s take another look at our build script (the gradle.build file), specifically the following section:
repositories {
    // Use Maven Central for resolving dependencies.
    mavenCentral()
}

dependencies {
    // Use JUnit test framework.
    testImplementation("junit:junit:4.13.2")

    // This dependency is used by the application.
    implementation("com.google.guava:guava:31.1-jre")
}
Some key concepts in Gradle dependency management include:
- Repositories
-
The source of dependencies -
mavenCentral()
Maven Central is a collection of jar files, plugins, and libraries provided by the Maven community. - Dependencies
-
Dependencies declared via configuration types -
junitandguava
JUnit is a unit testing framework and Guava is a suite of core and expanded libraries from Google.
Gradle needs specific information to find a dependency.
Let’s look at com.google.guava:guava:31.1-jre and junit:junit:4.13.2; they are broken down as follows:
| Description | com.google.guava:guava:31.1-jre | junit:junit:4.13.2 | |
|---|---|---|---|
Group |
identifier of an organization |
|
|
Name |
dependency identifier |
|
|
Version |
version # to import |
|
|
Step 2. Using Build Scan
To view dependencies in our app, run the build task with an optional --scan flag.
In the tutorial directory, enter the command below and follow the prompt to accept the terms:
$ ./gradlew build --scan
BUILD SUCCESSFUL in 423ms
7 actionable tasks: 7 up-to-date
Publishing a build scan to scans.gradle.com requires accepting the Gradle Terms of Service defined at https://gradle.com/terms-of-service. Do you accept these terms? [yes, no] yes
Gradle Terms of Service accepted.
Publishing build scan...
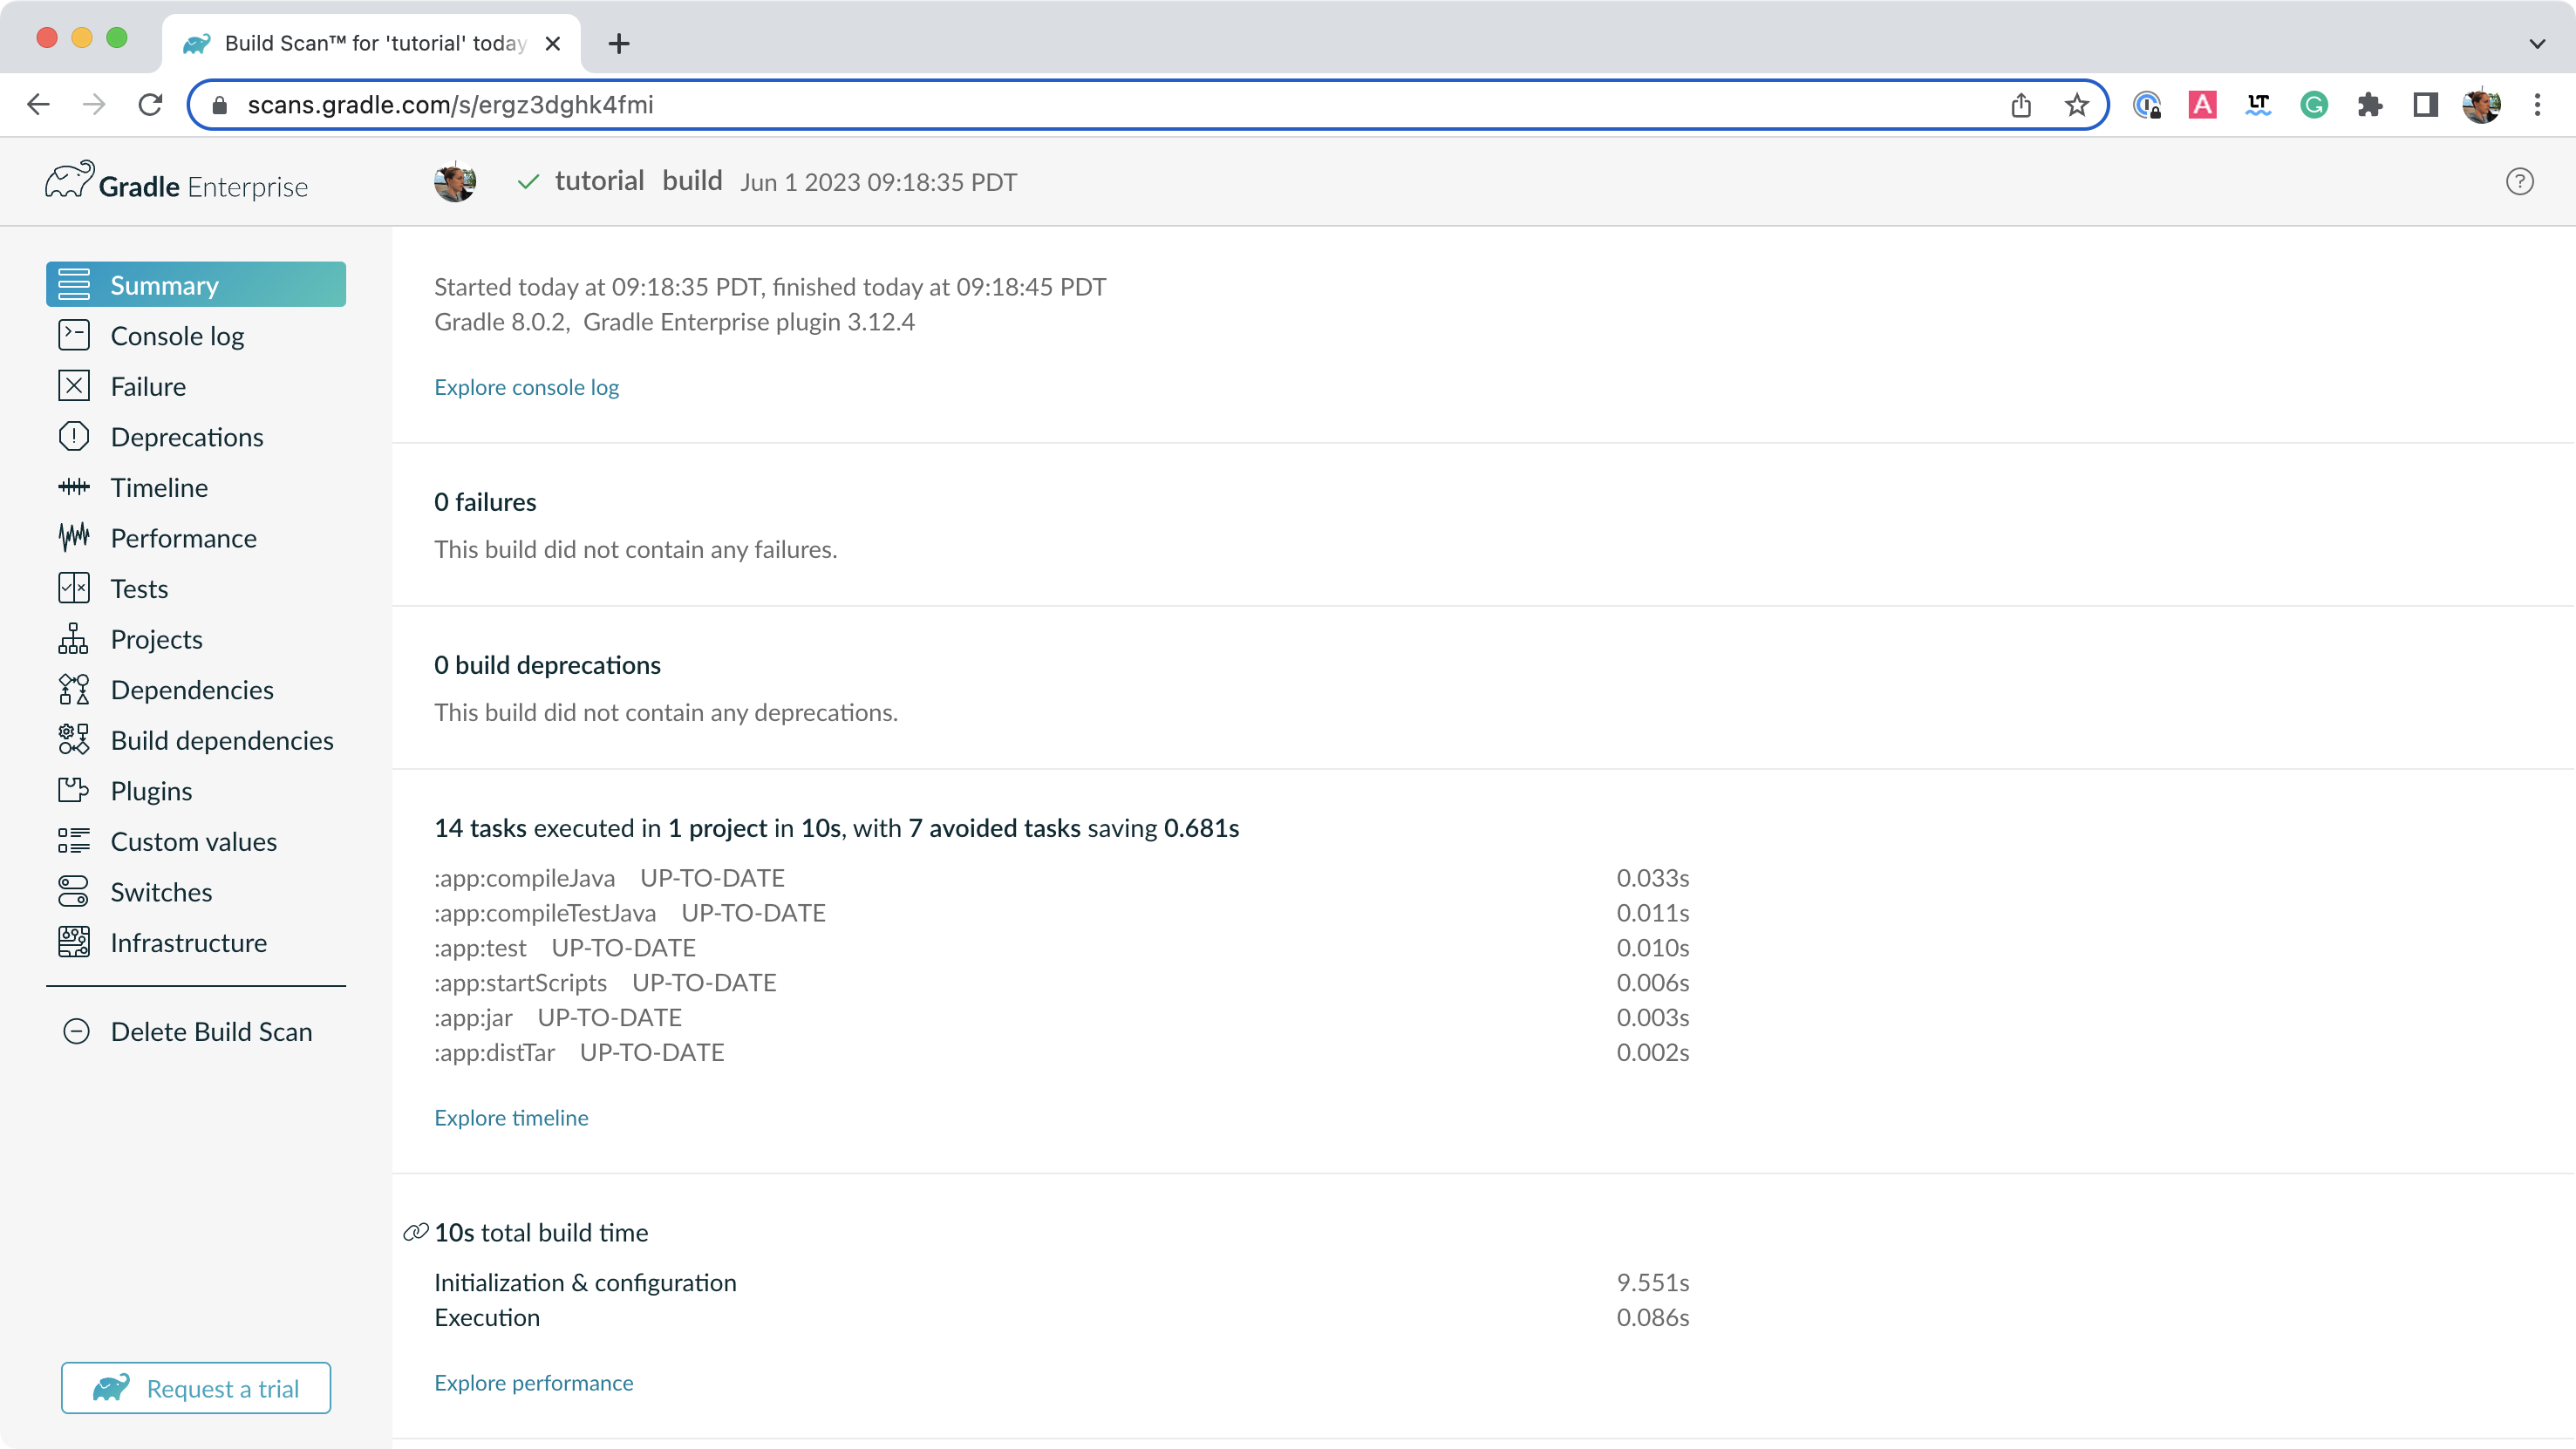
https://gradle.com/s/linkA Build Scan is a shareable and centralized record of a build and is available as a free service from Gradle.
Click the link provided in the prompt: https://gradle.com/s/link.
| You will have to accept the terms of service to use Build Scans. |
You will need to activate the Build Scan by using your email:

You will receive the final link to the scan in your inbox which should look as follows:
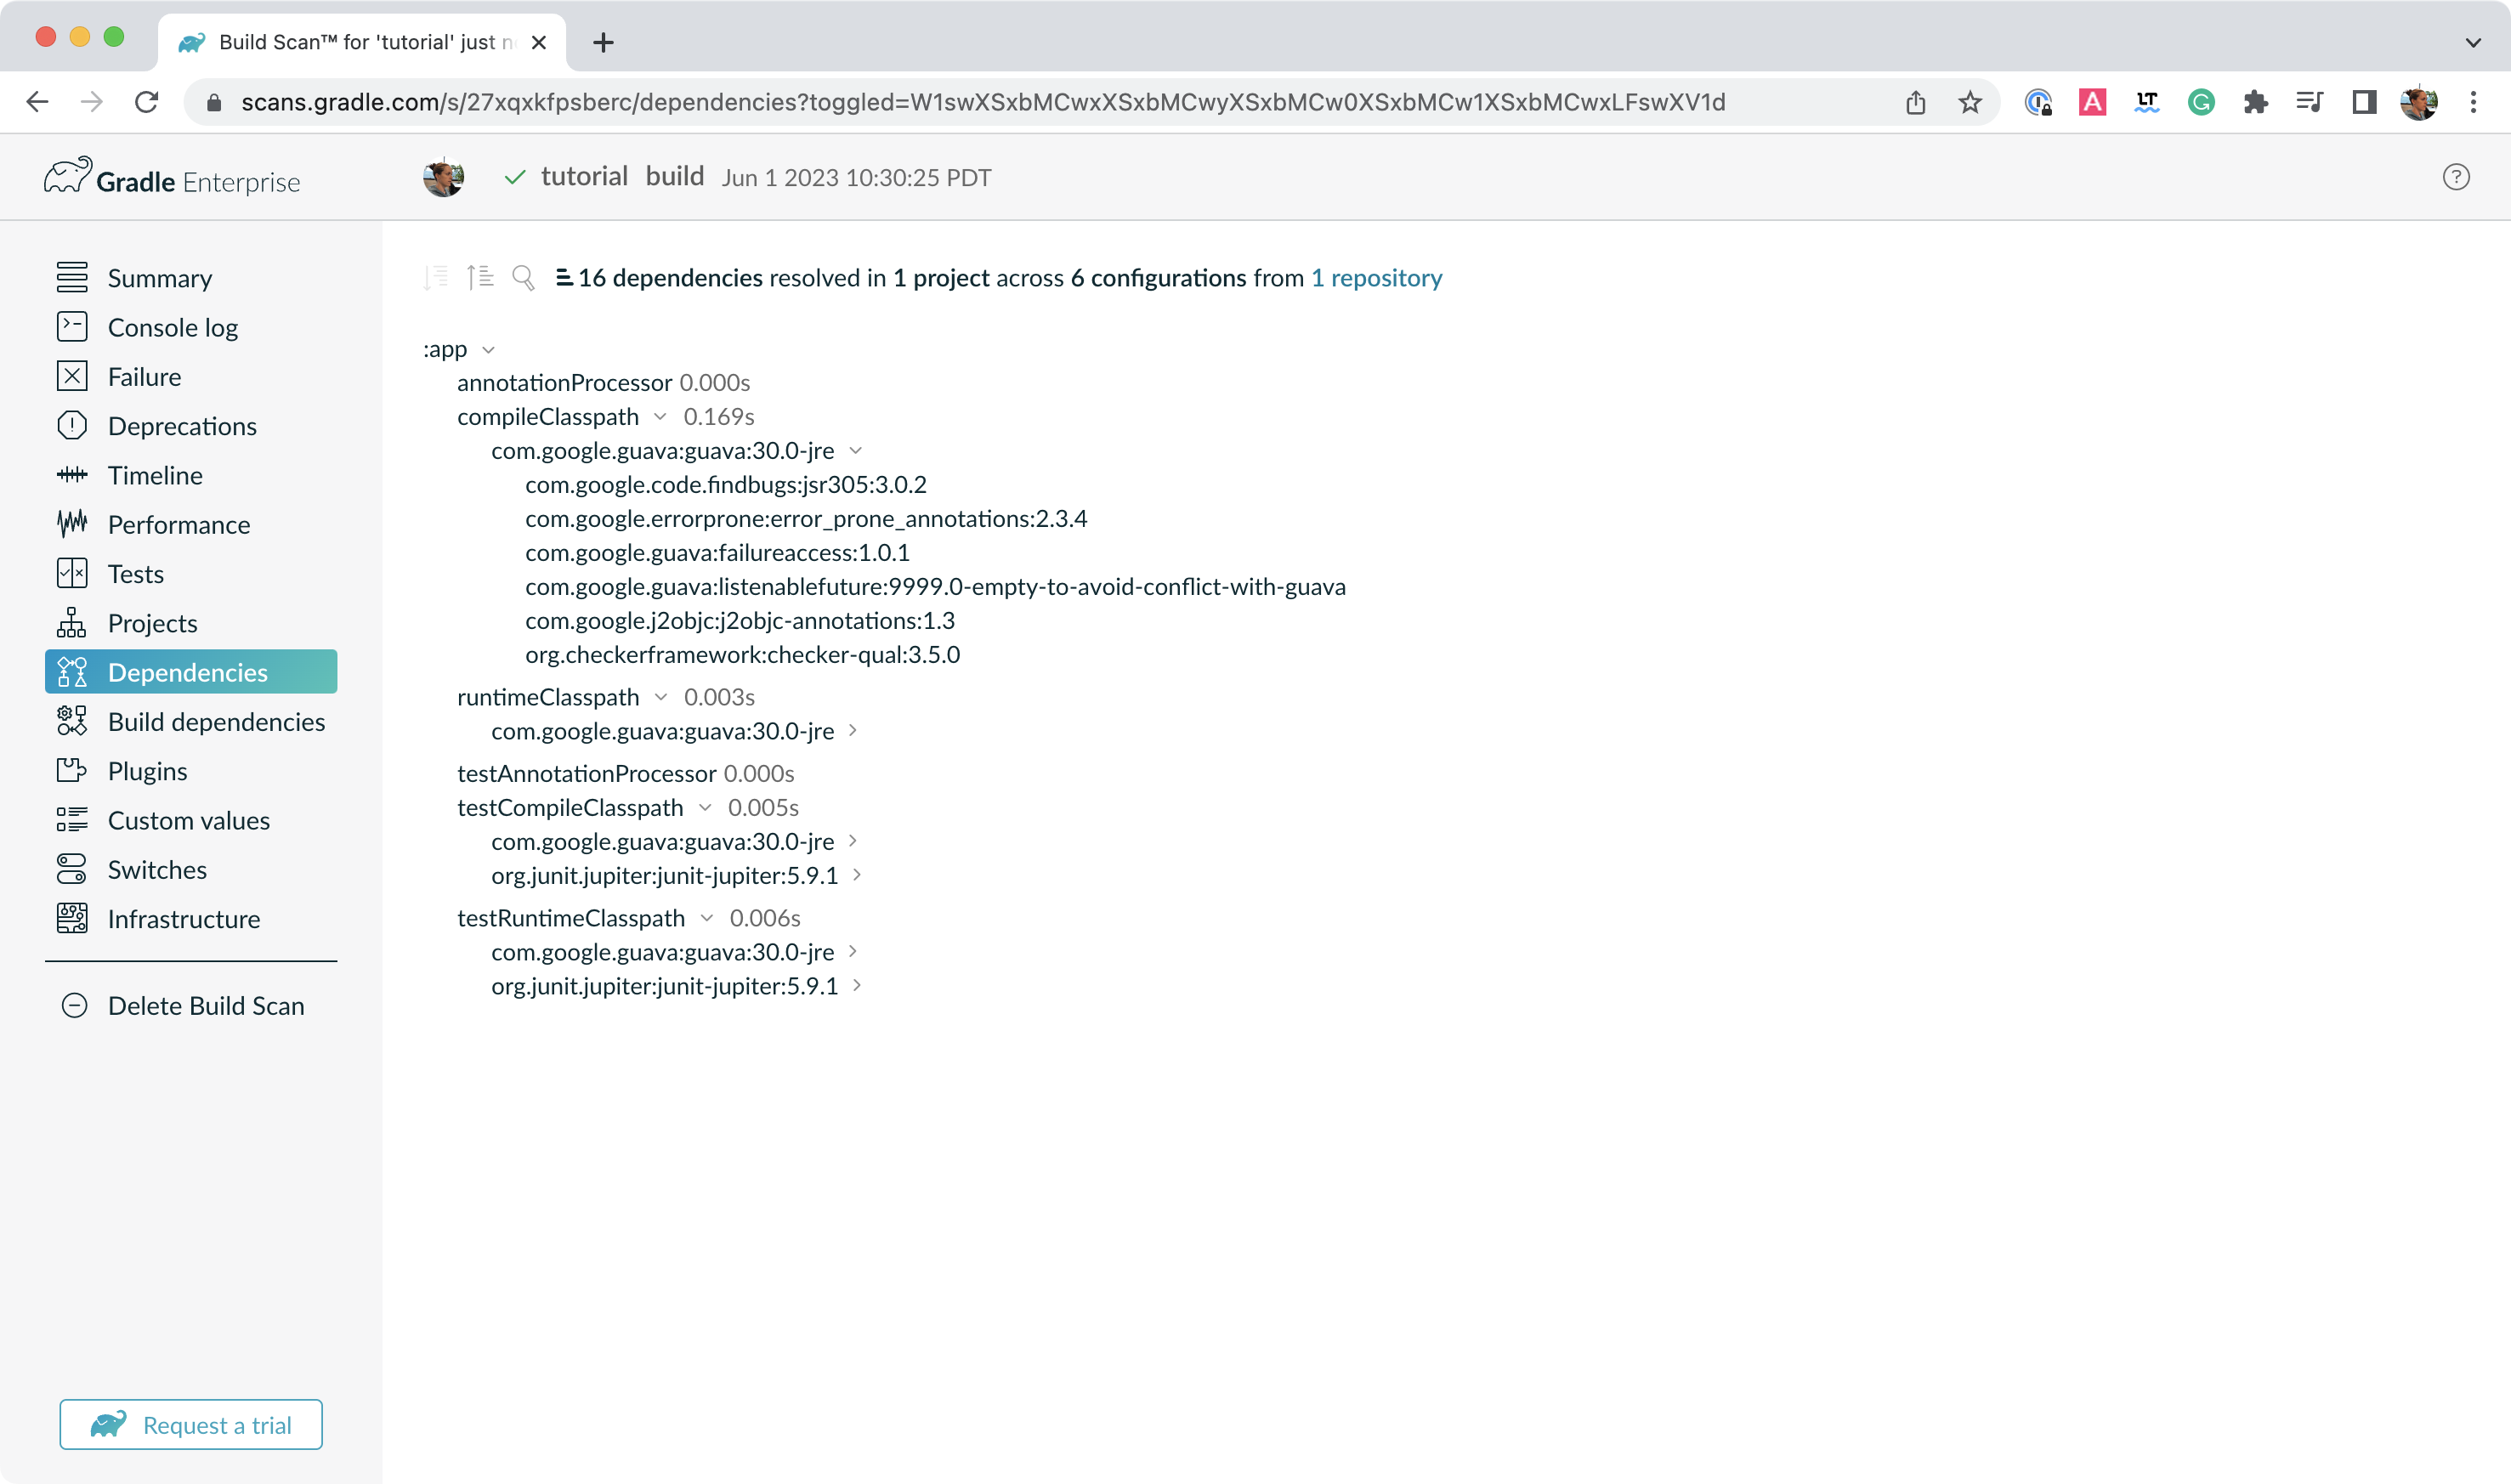
Open the Dependencies tab in the menu and expand compileClasspath, runtimeClasspath, testCompileClasspath, and testRuntimeClasspath:
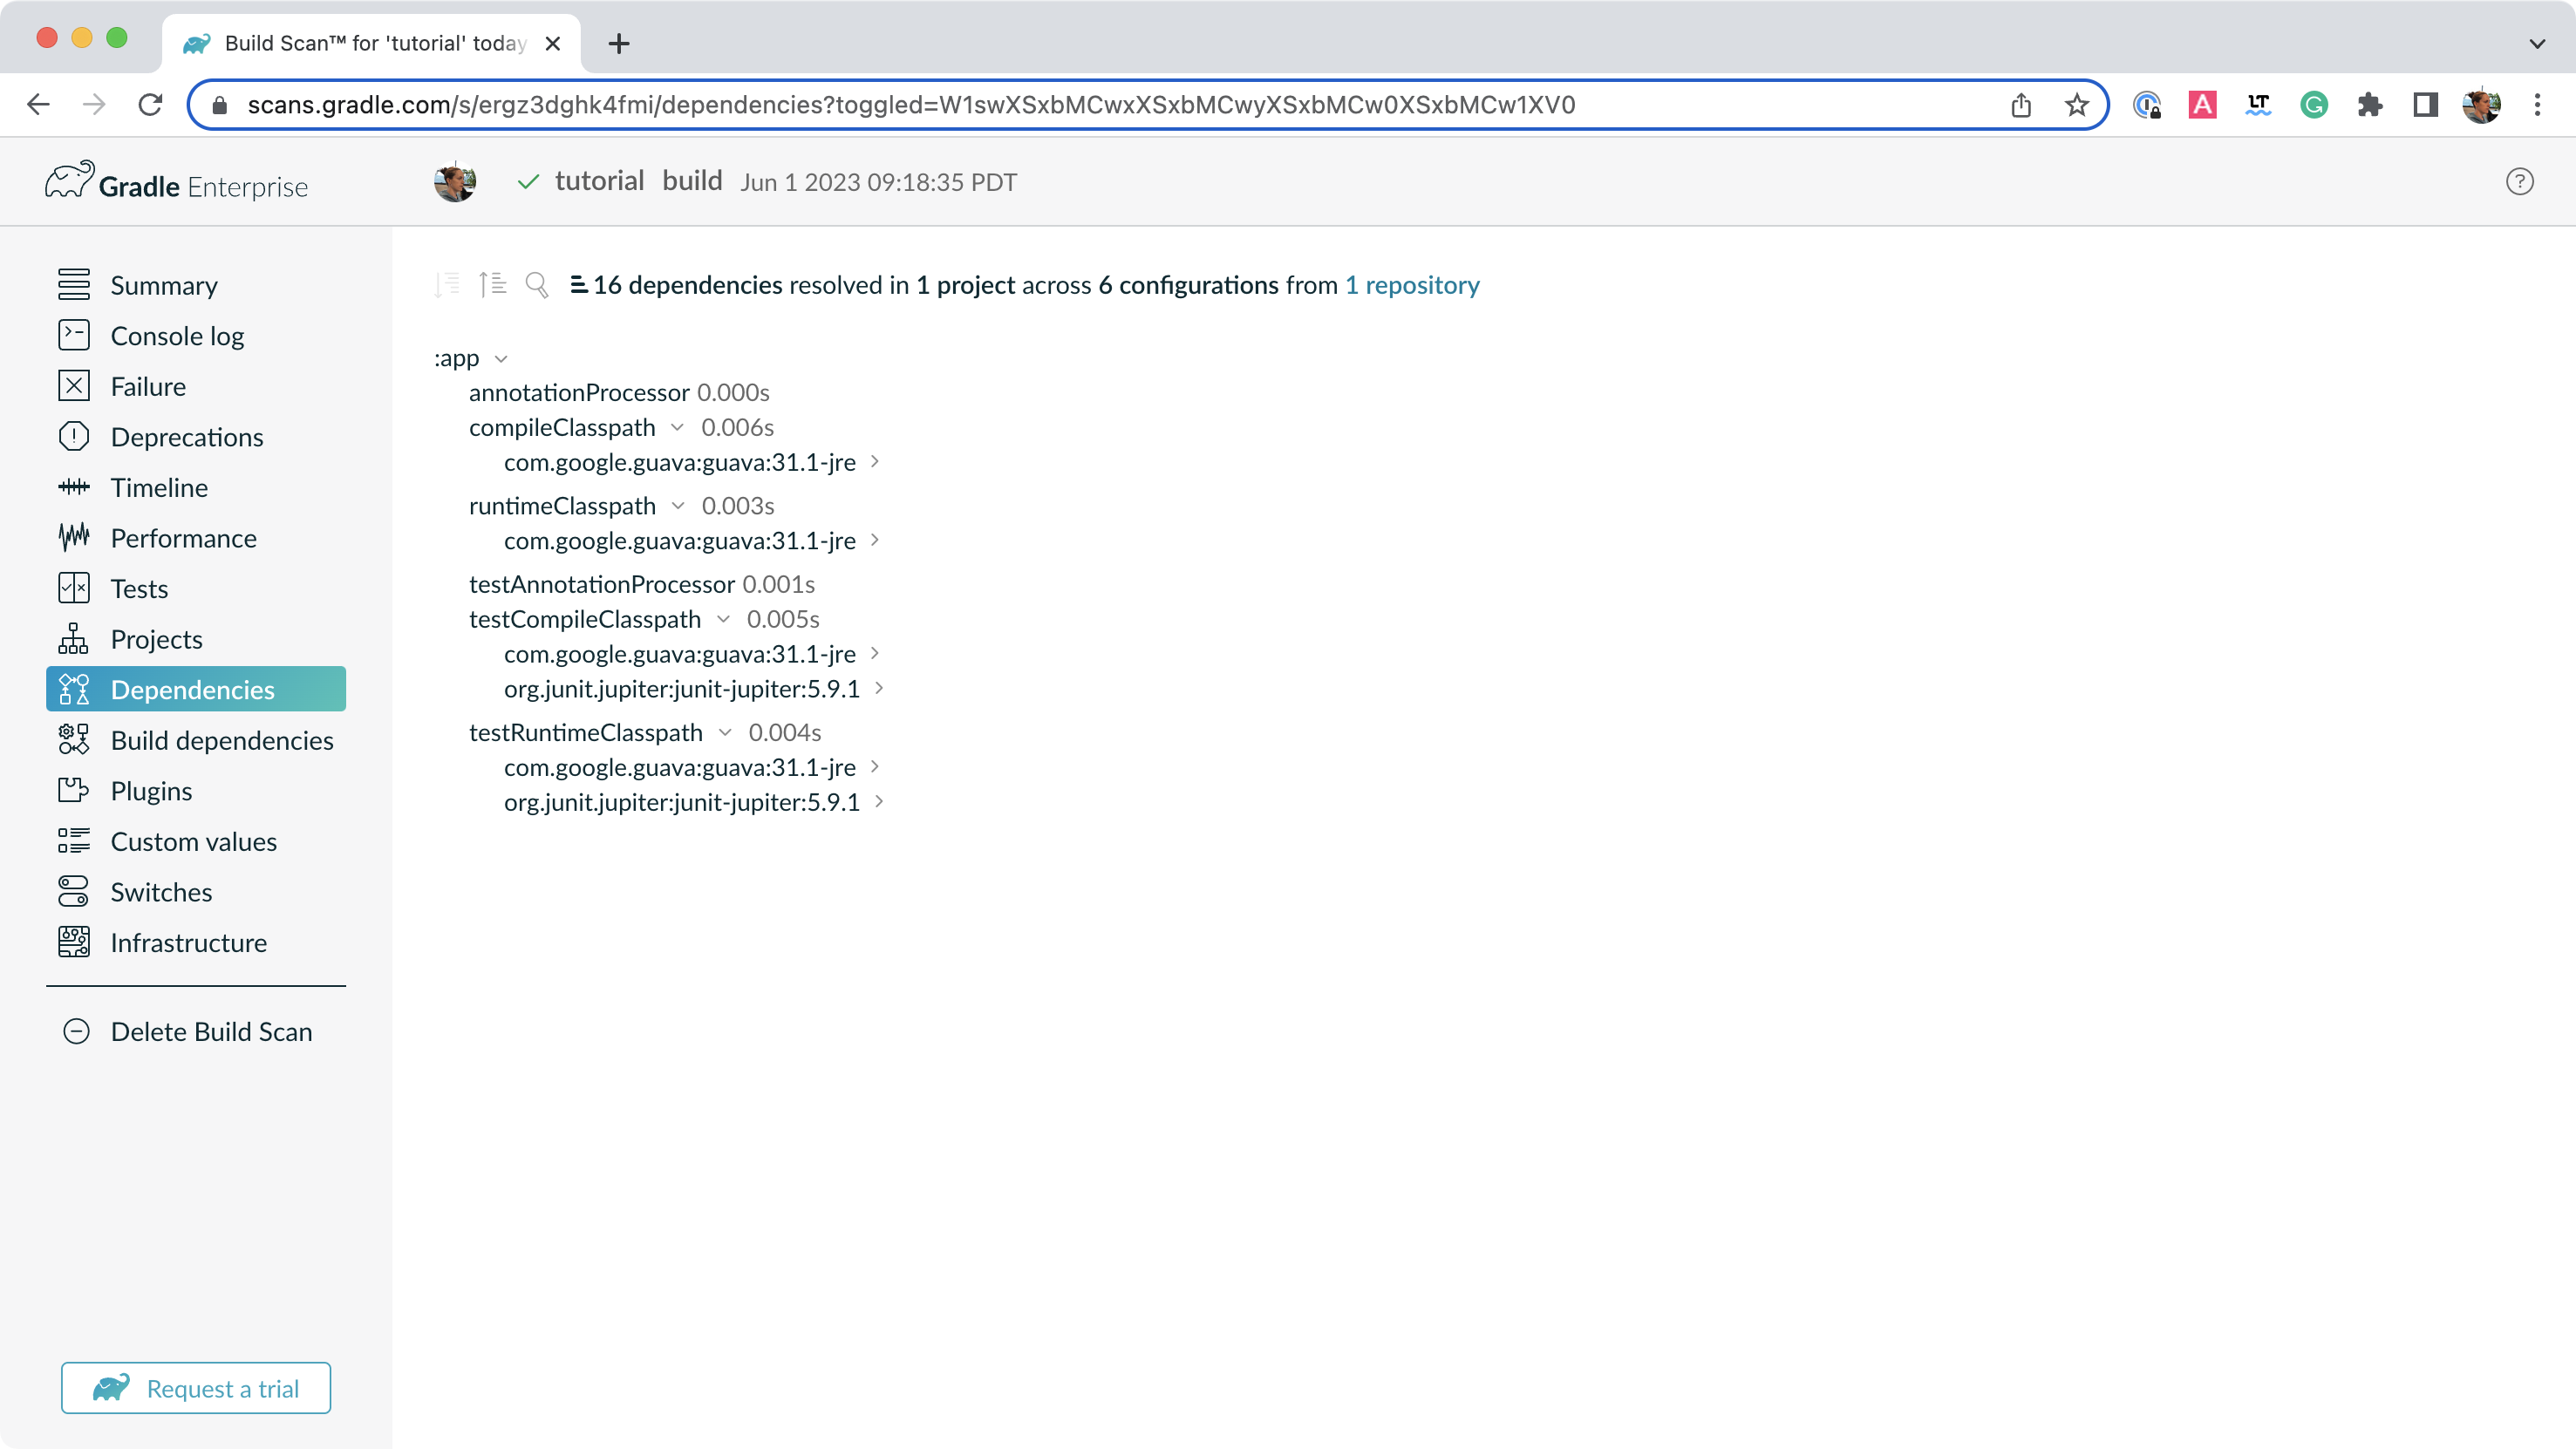
As expected, we can see the declared dependencies junit and guava are used by Gradle to compile, run, and test the app.
Step 3. Understanding Transitive Dependencies
Expand com.google.guava:guava:31.1-jre and org.junit.jupiter:junit-jupiter:5.9.1 in the window:
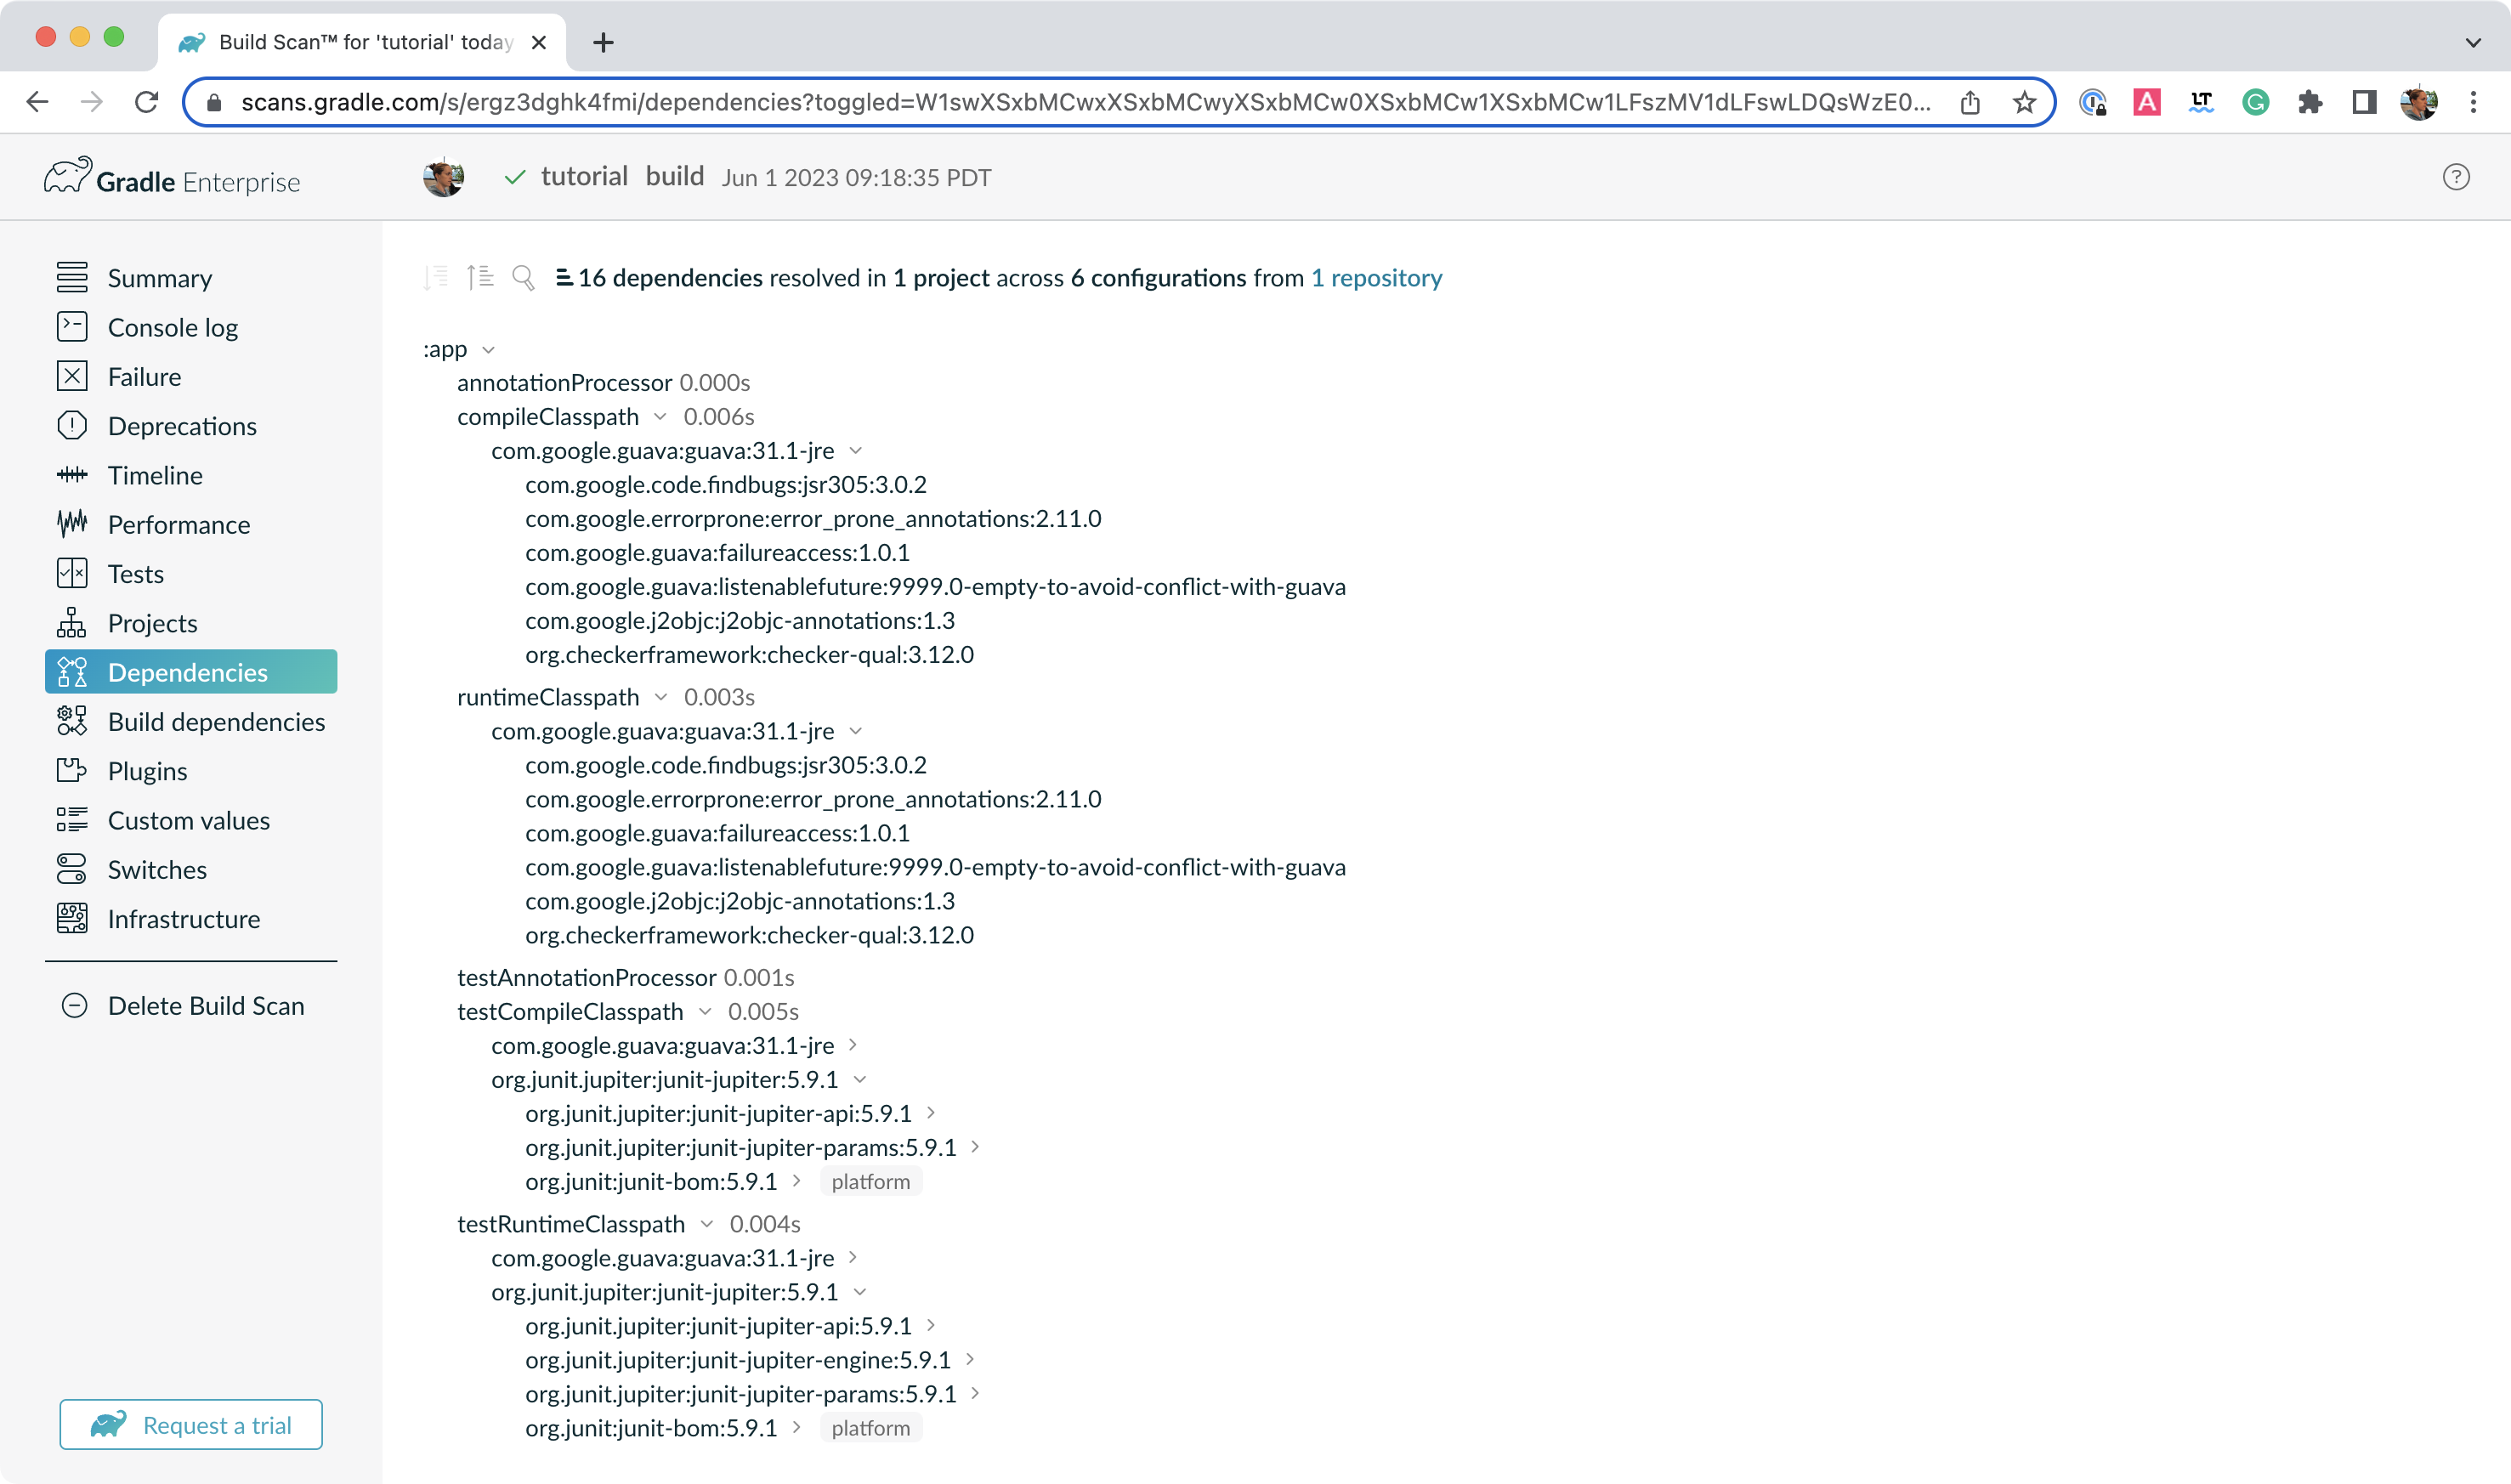
There are several dependencies under junit and guava which are called transitive dependencies.
Transitive dependencies are the dependencies junit and guava need to work.
A transitive dependency is a dependency of a dependency.
For example, the com.google.code.findbugs:jsr305:3.0.2 transitive dependency comes from the com.google.guava:guava:31.1-jre dependency.
Step 4. Viewing Project Dependencies
You can also view your dependency tree in the terminal using the ./gradlew :app:dependencies command:
$ ./gradlew :app:dependencies

> Task :app:dependencies

------------------------------------------------------------
Project ':app'
------------------------------------------------------------

annotationProcessor - Annotation processors and their dependencies for source set 'main'.
No dependencies

compileClasspath - Compile classpath for source set 'main'.
\--- com.google.guava:guava:31.1-jre
+--- com.google.guava:failureaccess:1.0.1
+--- com.google.guava:listenablefuture:9999.0-empty-to-avoid-conflict-with-guava
+--- com.google.code.findbugs:jsr305:3.0.2
+--- org.checkerframework:checker-qual:3.12.0
+--- com.google.errorprone:error_prone_annotations:2.11.0
\--- com.google.j2objc:j2objc-annotations:1.3

...
Step 4. Updating Project Dependencies
Adding and changing dependencies is done in the build file.
Let’s change the junit version and look at how this affects the dependency tree.
Change the junit dependency to the gradle.build.kts file to:
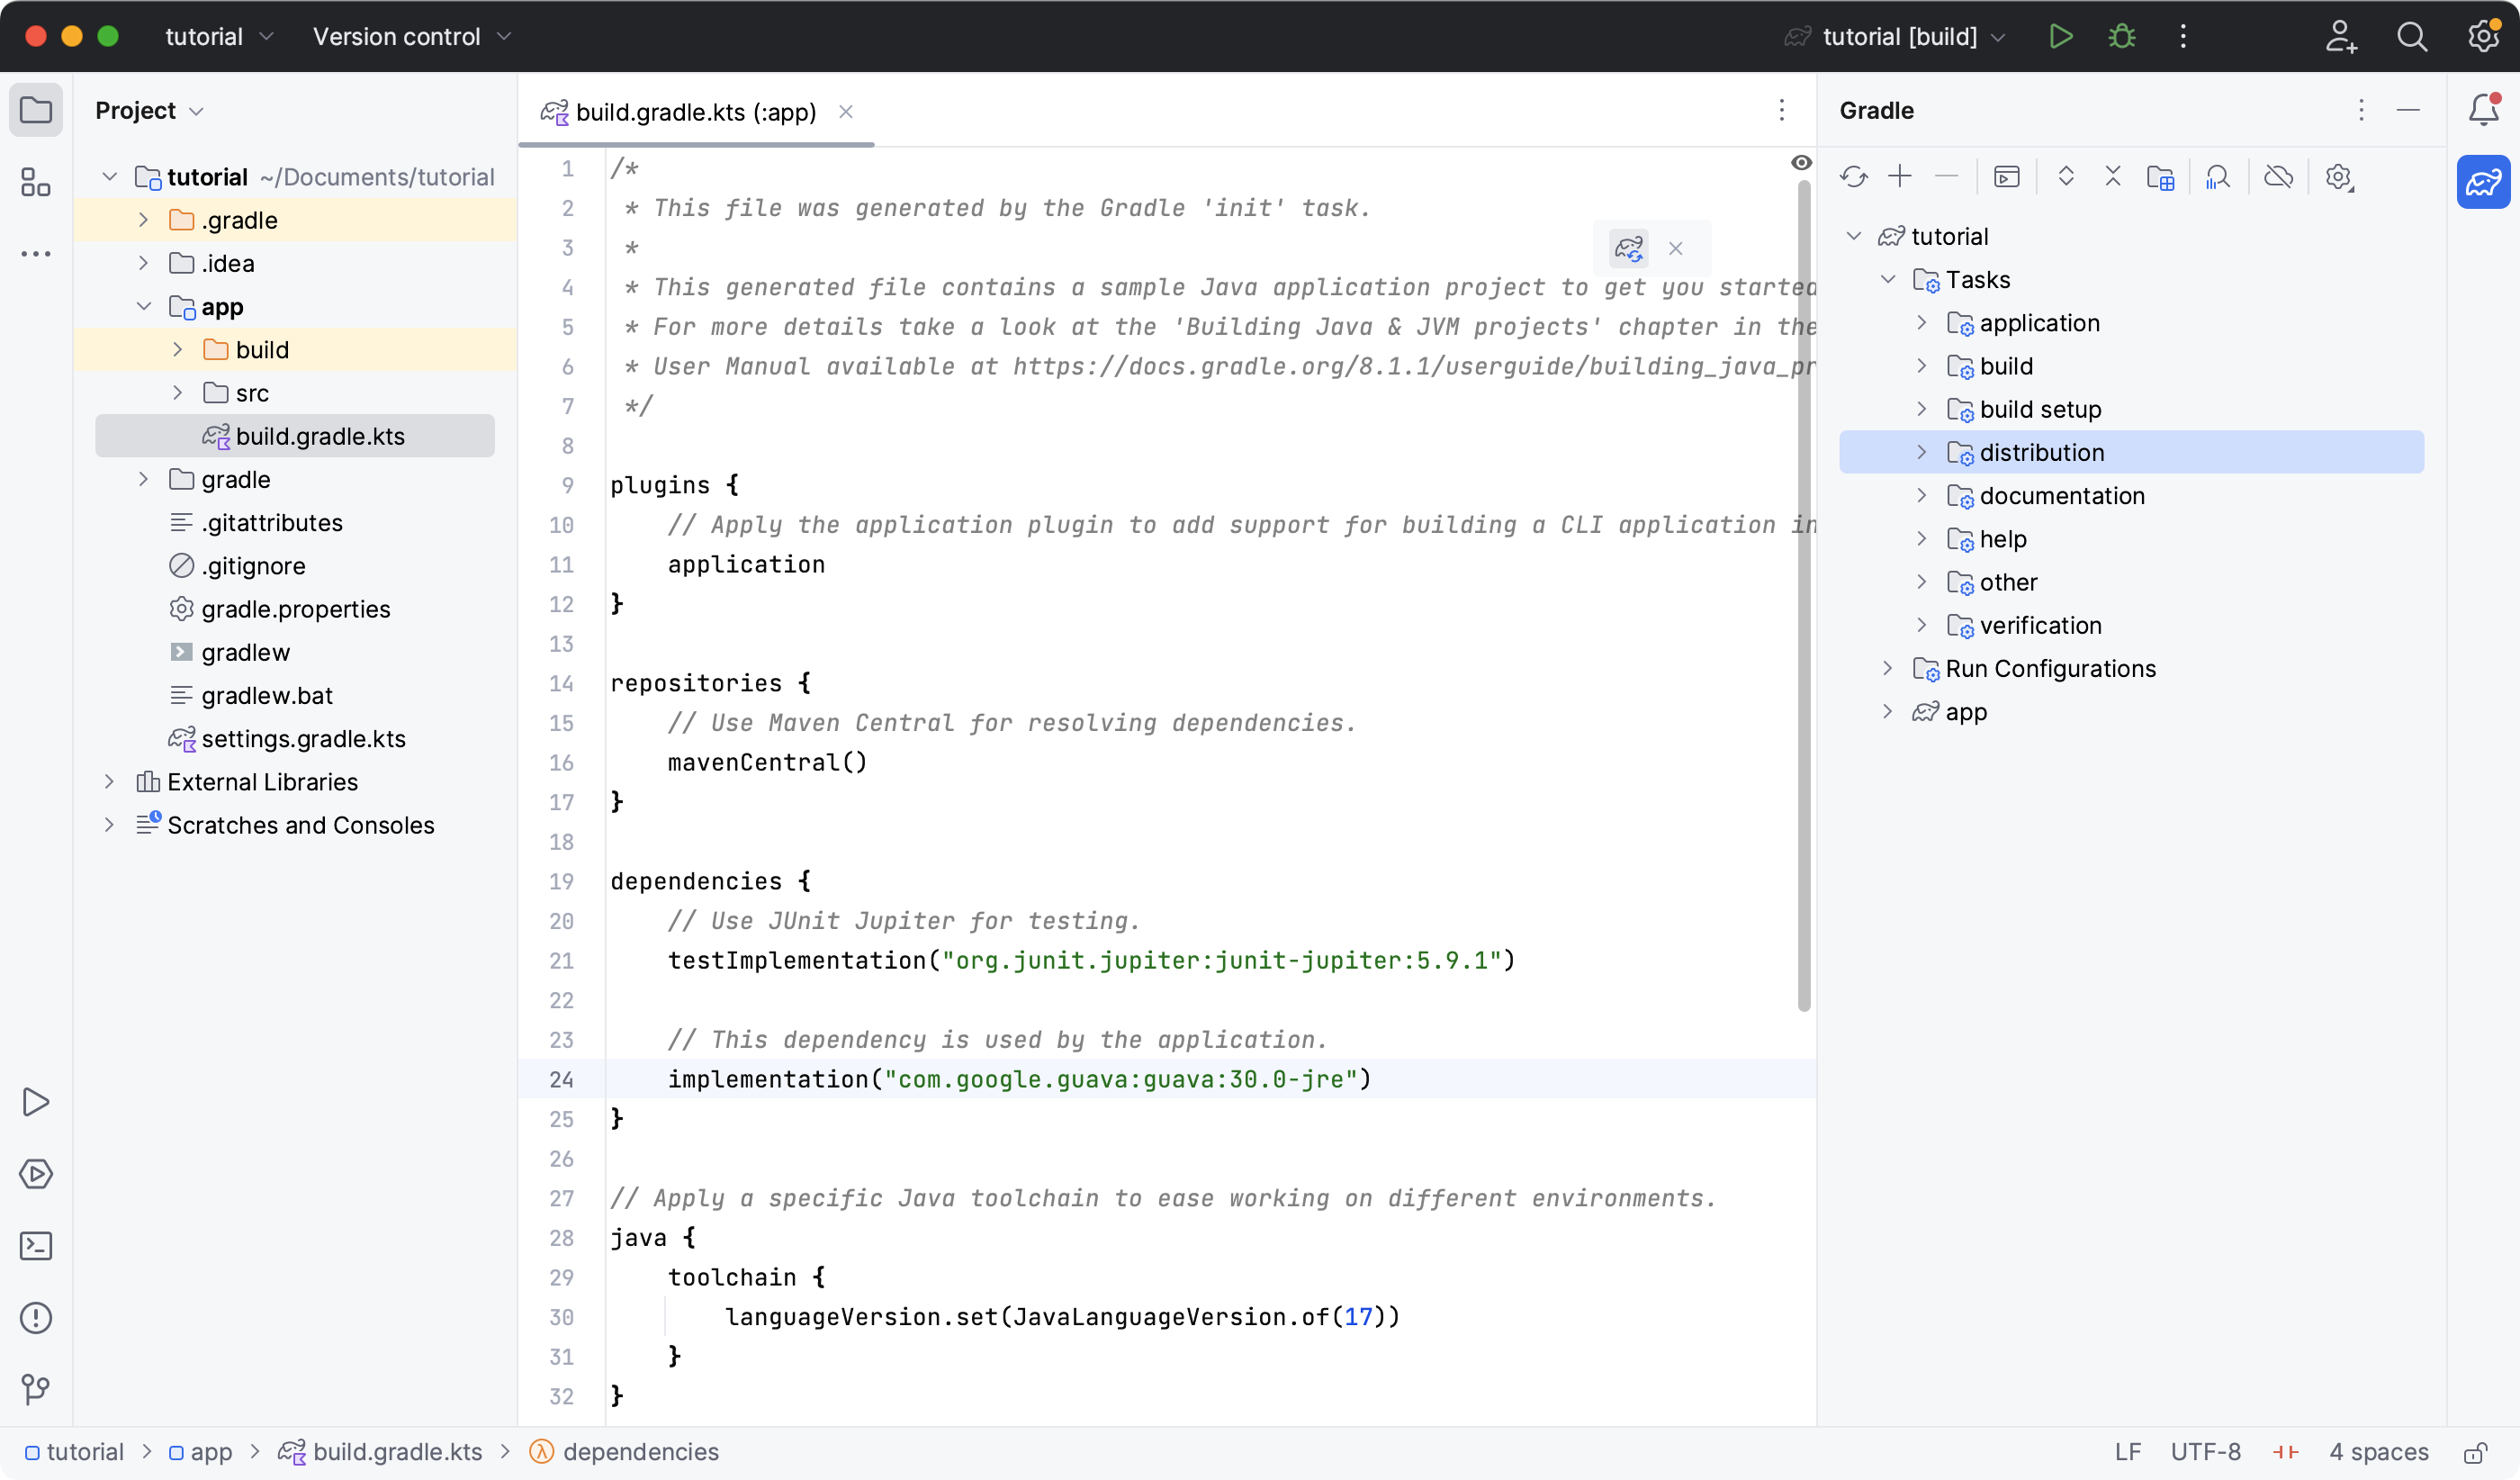
implementation("com.google.guava:guava:30.0-jre")If you change the file using IntelliJ, don’t forget to click the sync Gradle button:
Run ./gradlew build --scan and view the Build Scan results:
Run ./gradlew :app:dependencies in the terminal to check the changes in the dependency tree:
compileClasspath - Compile classpath for source set 'main'.
\--- com.google.guava:guava:30.0-jre
     +--- com.google.guava:failureaccess:1.0.1
     +--- com.google.guava:listenablefuture:9999.0-empty-to-avoid-conflict-with-guava
     +--- com.google.code.findbugs:jsr305:3.0.2
     +--- org.checkerframework:checker-qual:3.5.0
     +--- com.google.errorprone:error_prone_annotations:2.3.4
     \--- com.google.j2objc:j2objc-annotations:1.3

...
It is clear the guava dependency has been updated to version 30.0 and the transitive dependencies have changed as well.
Next Step: Applying Plugins >>