Last Updated: 2021-11-22
Koivu.Cloud is a low-code platform that provides a fast and easy way to create database apps, and the foundation of these apps are the cloud tables. In Excel a table is a range of cells, in columns and rows, that makes it easier to manage and analyze a group of related data. In Koivu.Cloud a cloud table is the representation of an Excel table in Koivu's cloud database. The following sections explain how you can transform an Excel table into a cloud table. For simplicity's sake, we'll use the default solution for our tutorial.
What you'll learn
In this tutorial we'll go through cloud tables with the Koivu.Cloud Excel add-in. You'll learn how to:
- Create a table in Excel
- Define columns for the cloud table
- Save data to a cloud database from Excel
- Prepare an Excel worksheet for an end user
What you'll need
Creating a cloud table is a relatively easy task, however, you should at least have the following:
- Koivu.Cloud account
- Basic knowledge of the Koivu.Cloud Excel add-in
- Working knowledge of Excel, including tables
Before going through this tutorial, you might want to view the following video.
Creating a cloud table (partly outdated):
Everything starts from the data. For example, you could have a simple spreadsheet about travel packages:
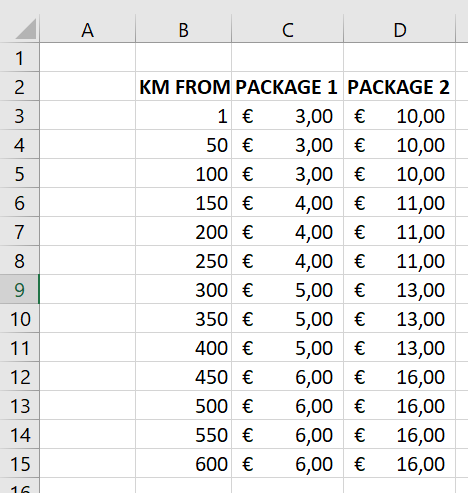
The first column tells the distance, and the second and third columns contain the pricing information for the given distance. To convert this into a cloud table, you need to:
- Create a table and give a name to it.
- Define columns for the cloud table
- Save the data
Create a table
First, you need to convert your data into a table in Excel in order to transform it into a cloud table. To create an Excel table:
- Select all of the cells that contain your data, including the headers.
- Select Insert > Table. The Create Table dialog box opens.
- Check that the cell range is correct, and make sure that the My table has headers checkbox is selected. Click OK. The cells are now converted into a table.
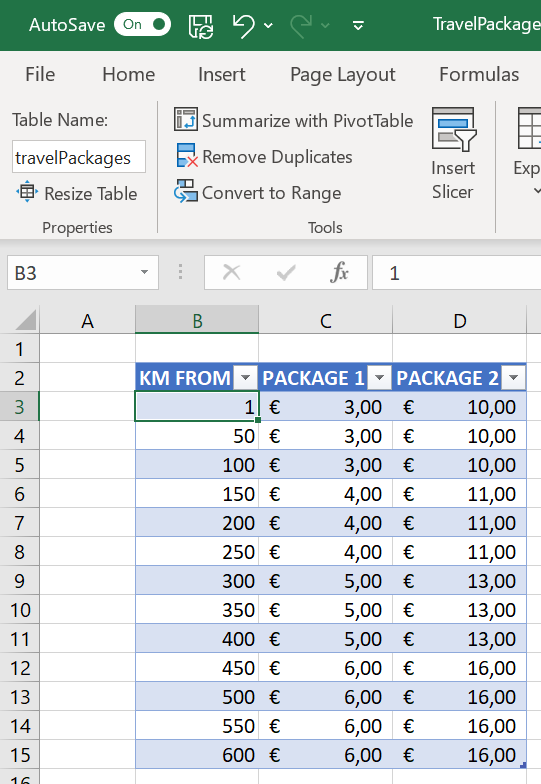
- Select a cell in the table, and select the Table Design > Table Name field (or on a Mac, in the Table > Table Name field), highlight the table name, and enter a new name for the table. When you create a table, Excel gives a default name to it. However, you should always name your tables in a meaningful way because this name is used as the name of the cloud table.
Define columns for the cloud table
After you've converted your data into a table, you need to transform it into a cloud table. The first step is to define the columns of your cloud table. For this you need to select a key column, that is, a column that identifies each row uniquely.
In our example table, the column that uniquely identifies a row is KM FROM, and we'll set it as the key column of the table.
To create column definitions:
- Select a cell in the
KM FROMcolumn. It doesn't matter which row you'll choose - the main thing is that the cell you've selected is in this column. For example, in the image above, the first row in theKM FROMcolumn is selected. - In the Koivu.Cloud Excel add-in, select Tools > Development Tools > Create Cloud Table. The add-in creates a new sheet,
Column Definitions. This sheet lists the column of the cloud table. Note that you haven't saved any data yet, we are simply defining its columns.

Note that the column definitions table lists the columns of the table. That is, you can imagine that the headings row of the original Excel table has been tilted on its side, and the first column is the first row of this table. You could also edit the values, but this time we don't need to modify anything.
- In the Koivu.Cloud pane, click Save to save the data and create the column definitions for your cloud table. This opens a new sheet titled
Change Sheet. Here you can verify the data that is saved into the cloud. As all of the rows are generated by the system, there is not much to verify:
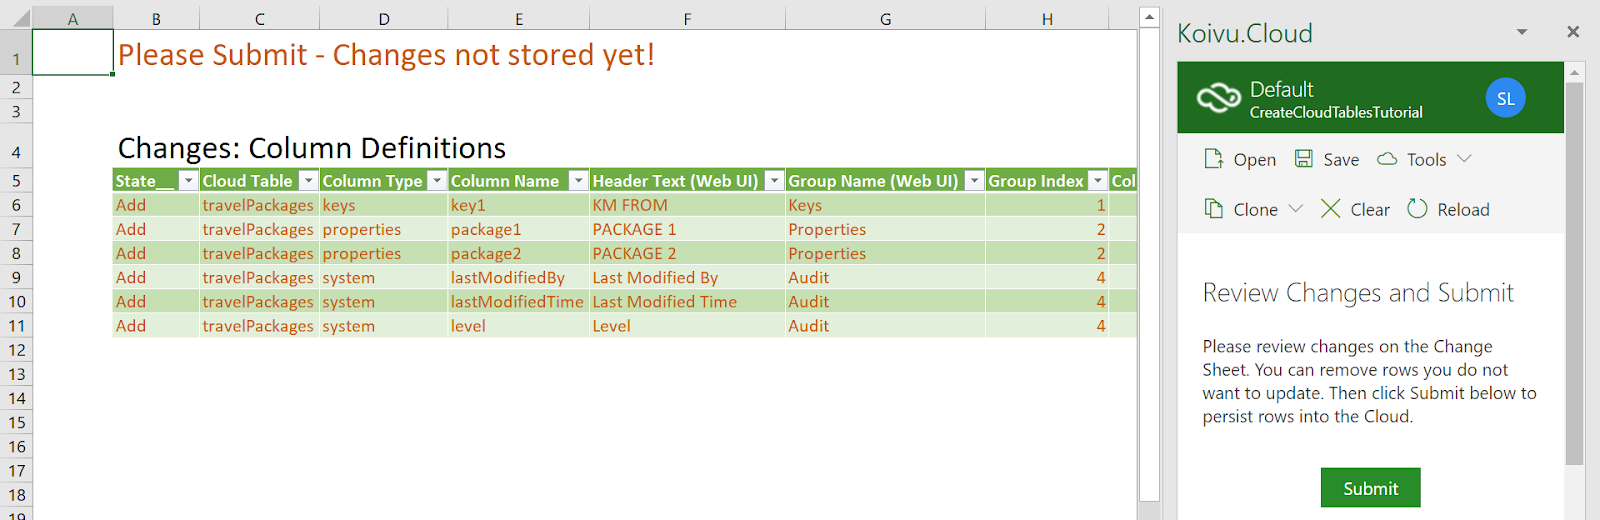
- Click Submit to create the column definitions.
- Click Close and Go to Original Sheet. This is a button that appears in the Koivu.Cloud pane after you have submitted your data. The original sheet is the one that has your data.
Note that the cloud table does not fully exist until you have also saved its data. Therefore, it is very important to remember to save the data.
You should now be back in your original worksheet. You've now created the column definitions and the cloud database is ready for this table. However, the cloud table does not yet have any data, and the next step is to save your data into the cloud table.
To save your data into the cloud:
- In the Koivu.Cloud pane, click Save to save the data. If you want to review what data will be saved, click Show Changes to display the Change sheet which lists the rows that are going to be added into the cloud table.
- If the Change sheet opens, click Save in the Koivu.Cloud Pane.
Your data is now in the cloud! You can verify this by clicking Close And Refresh in the Koivu.Cloud pane. This will close the Change Sheet and open the data sheet.
The Koivu.Cloud Web app is the home page for your solutions, where you can view and edit your data. The screen is divided into sections, and you can use the navigation pane on the left to access your profile information, and the cloud table data. At the top of the main section you'll find which Organization, Solution, Business and a possible Scenario is active. The navigation pane on the left lists the cloud tables of the selected solution. You can click a cloud table to explore and manage its data.
To see the table you just created, access the web app. The left pane lists your tables under Cloud Data Tables. Click the name of the table.
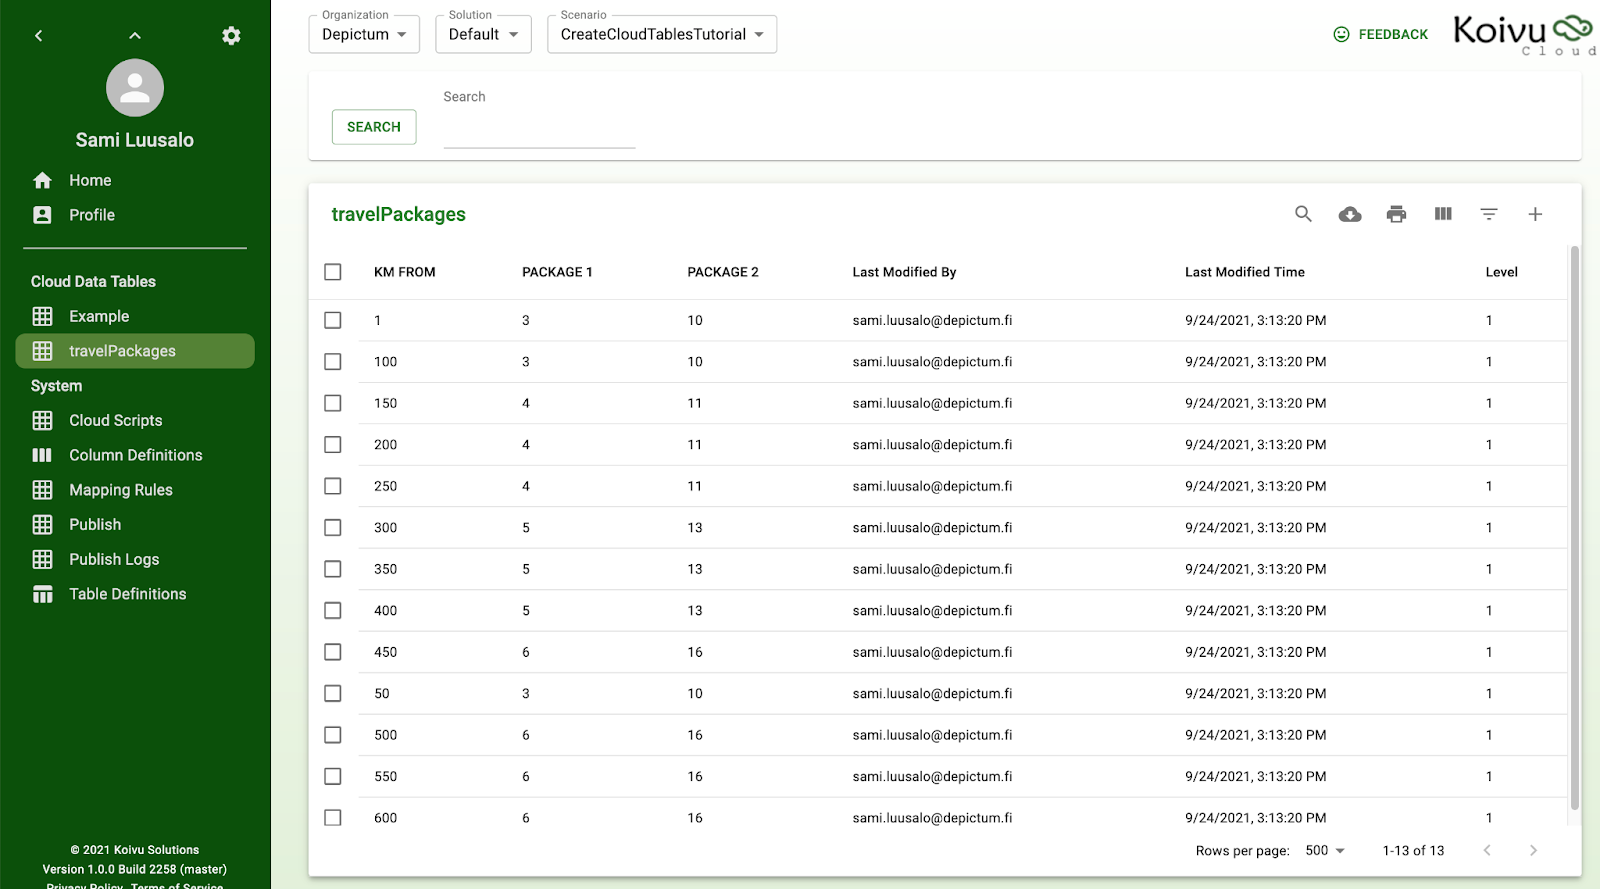
You can see the same exact data, and you can make changes, if needed. To edit the data, click on the row that contains the data you wish to change:
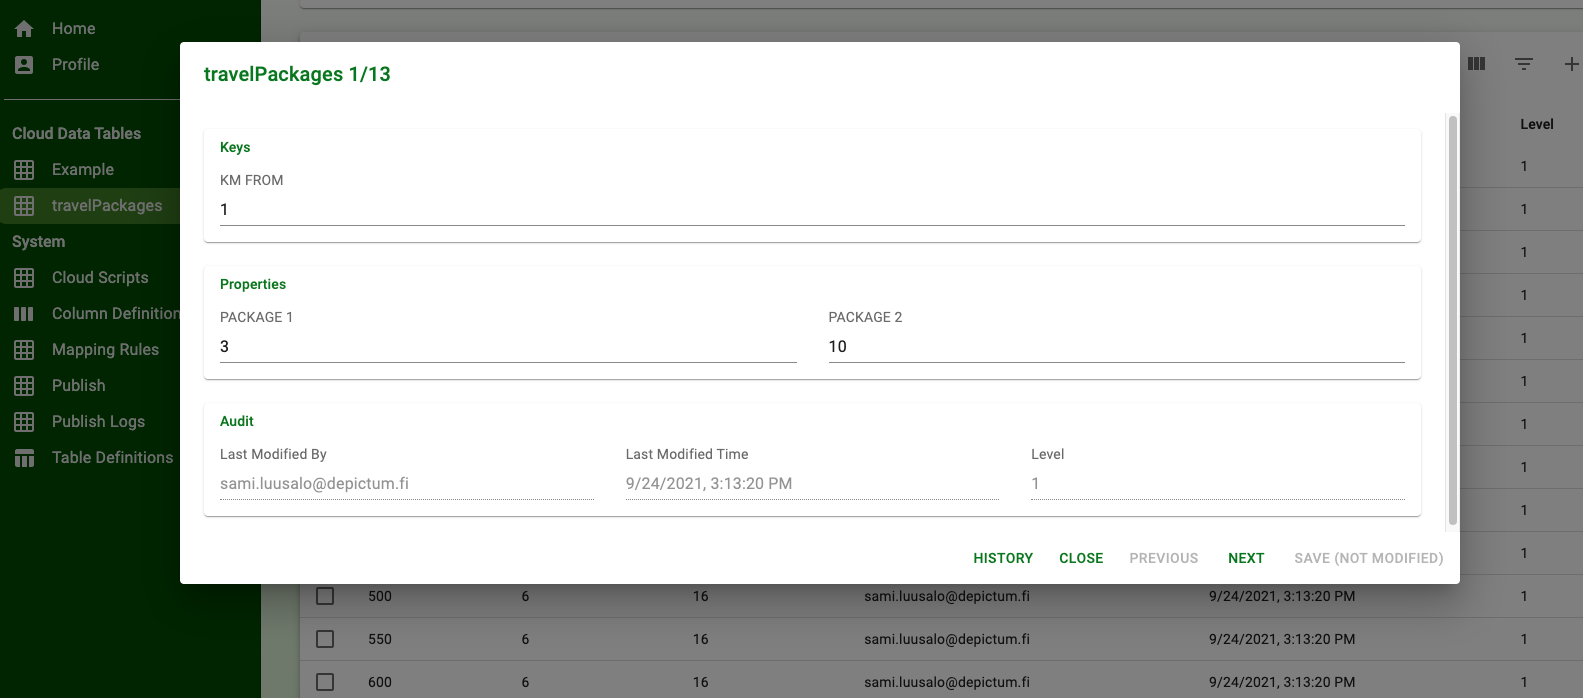
Additionally, you can create new rows for your cloud table, and view the audit history.
Even though your data is now in the cloud, the original workbook is still useful; you can transform it into a user interface (UI) for your data.
To enhance the usability of your spreadsheets, you should follow certain best practices:
- Clean the data from the spreadsheet tables, so that it does not confuse users. See below for more information.
- Test that the data opens correctly by searching it with the Koivu.Cloud add-in.
- Turn off AutoSave in Excel, since data is saved into the cloud with the add-in. Therefore, if you save data directly into the workbook, it can confuse the user.
- Add titles and formatting that clarify the content of the spreadsheet.
- Clean the spreadsheet, and save it as a new 'view' to the data. For more information, see the next topic.
- Extend it to pivot tables, charts, and whatever else you need for your data.
Finally you can publish and share the workbook. These guidelines are also discussed further in other tutorials.
Cleaning the spreadsheet
As your data is now stored in the cloud database, and the spreadsheet functions as the UI, the next step is to remove the original data from the spreadsheet. This procedure is important because you do not want to have several versions of the same data in various spreadsheets, in addition to the cloud table.
To clean the workbook:
- Open the spreadsheet that contains your table and the data.
- Select all table cells excluding the headers. For example, select any cell in the table and press
Ctrl+A. - Delete the selected rows. For example, right-click on the selected cells and select Delete > Table Rows. Now you have an empty table.
- You can add titles and other formatting as needed.
- In the Koivu.Cloud pane select Tools > Development Tools > Clear All Sheets. This will empty all your tables in the Workbook, and delete any system sheets (hidden Base Copies).
- Save the workbook file in the regular way using the Excel's Save operation.
Now you have a clean sheet that the users can use to query data from Koivu.Cloud.
You can extend the spreadsheet with Excel's features, for example, you can create pivot tables and dashboards. We will not discuss Excel's features in this tutorial, however, you can use them if you want to, because Koivu.Cloud does not restrict your Excel use in any manner.
Congratulations, you now know how to create a cloud table with the Koivu.Cloud Excel add-in! Also, you now know the basic functionality of the Koivu.Cloud add-in, and know how to search, modify and save data. The next step is to design a complete solution.
Additional training material
Explore these tutorials to learn more about what you can do with Koivu.Cloud:
- Introduction to Koivu.Cloud Excel add-in
- Design a Solution - Part 1
- Design a Solution - Part 2
- Design a Solution - Part 3
Note that these tutorials are meant to be read in order, so begin with the first one.
Further information
Make sure to visit our community site and learn more about Koivu.Cloud.