Last Updated: 2022-6-13
This is the first part of a tutorial that guides you through the process of building a Koivu Cloud database app. As it's always helpful to focus on a concrete example, we'll build an app for sales personnel who need a tool to create quotes. The other parts of this tutorial series are:
Creating a full solution in Koivu Cloud is a straightforward process, and you can use your existing Excel sheets as a starting point. However, before you can begin designing a complete solution, you need to understand the principles of the data model. Also, the first thing is to understand the workflow or process that you're about to translate into a solution.
What you'll learn
In this tutorial we'll create a full Solution with the Koivu Cloud Excel add-in. You'll learn how to:
- Create cloud tables for your data
- Configure search fields
- Create data validations
What you'll need
Creating a Koivu Cloud solution is a relatively easy task, however, you should at least have the following:
- Koivu Cloud account
- Basic knowledge of the Koivu Cloud Excel add-in
- Working knowledge of Excel, including tables
- You know what cloud tables are and can create one
Before going through this tutorial, you might want to view the tutorial videos at the Koivu Cloud support pages.
When we begin to design a solution, the first thing we need to know is the what and the how. That is, we need to define the goal of our workflow, and once we know what the goal is, we can identify the workflow and outline the steps we need to take to accomplish our goal. And in fact, this is much more demanding than actually creating the Solution. However, in this tutorial, we already know what we need to design - a quote builder.

What is a Solution?
A Koivu solution is simply a database-driven app that you can create using the Koivu Cloud platform. Unlike a conventional spreadsheet, Koivu Cloud provides you with the ability to both connect a spreadsheet to a database, and the tools to design a workflow that suits your needs. A solution includes a database that contains all of the cloud tables that store the information required by your application. Also, as each solution has its own set of tables and logic, it is considered a best practice to create your own Excel Workbook (template) files for each solution. Together with the Koivu Cloud Excel add-in, these function as the UI for your solution.
An example of a quote builder solution in Excel with a sample quote:
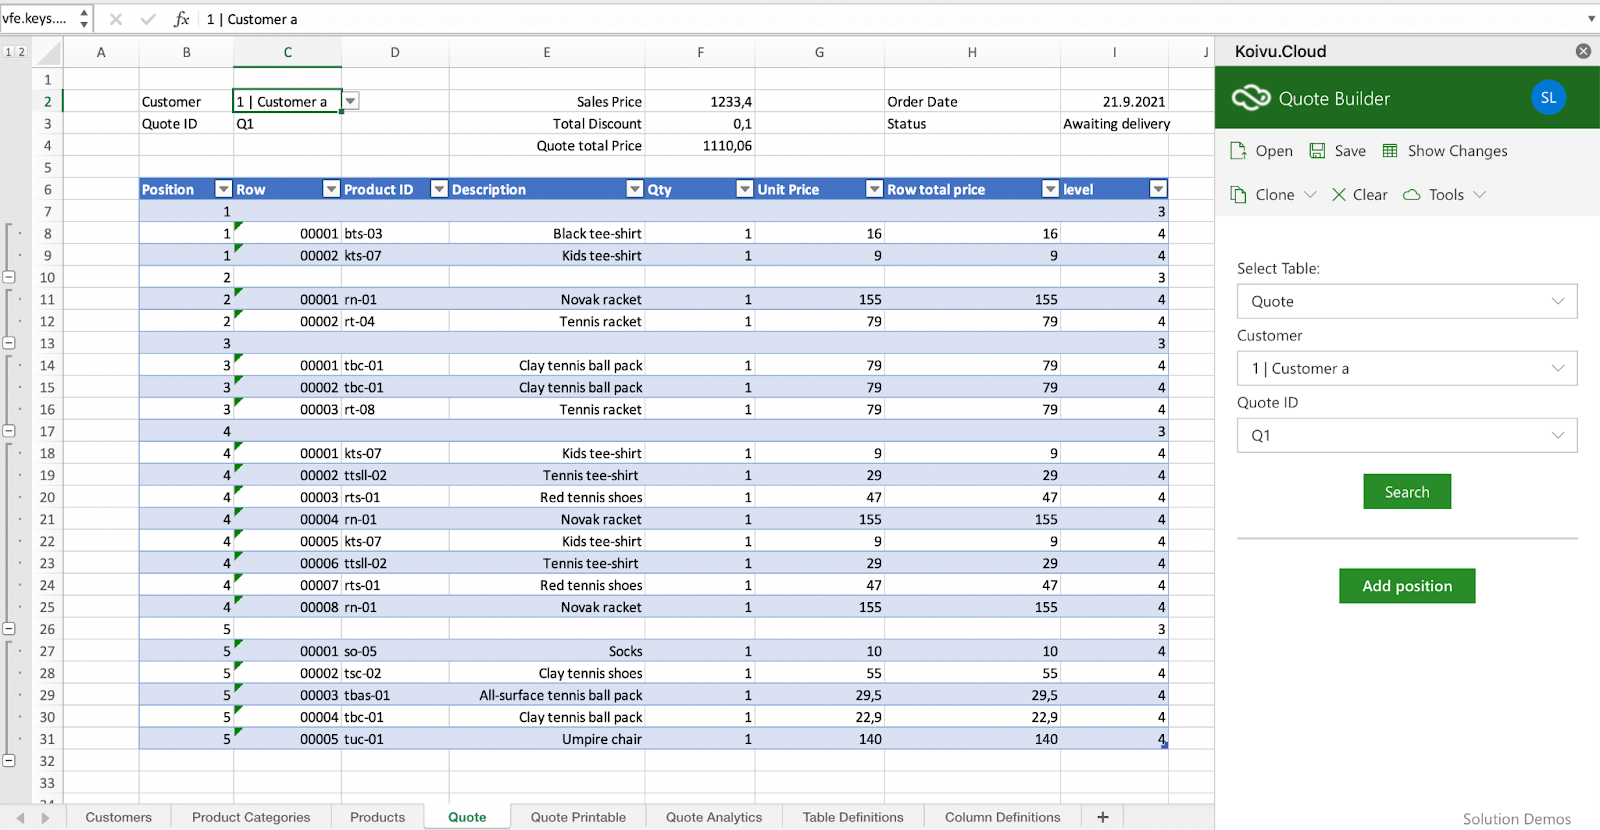
Note that the workbook above contains several sheets, such as Customer and Products. Each sheet contains a single cloud table. For example, the Quote sheet above lists a quote from the Quote cloud table; the name of the table and its search criteria (Customer and Quote ID) is visible in the add-in on the right. Using this solution, a sales rep could add products to the quote on the Products sheet, and then manage the quote on the Quote sheet. Finally, they could print it on the Quote Printable sheet, which is another view to the quote table, but has been specifically formatted for printing. Additionally, the add-in will have different search fields and additional functionality in each sheet, such as a button for adding products on the Products sheet.
In the end, you can use the quote builder to select customers, and add products from different product categories to their quote. You can also save the quotes into the cloud, and use a customized view to print the quote. The following animations illustrate some of the tasks that you can do with the solution.
Search and add products to a quote:
Search saved quotes:
Open the same quote into a different table view for printing:
While the various sheets and tables might seem overwhelming at first sight, we'll go through the details step by step, and make sure that at the end you'll have a thorough understanding of how you can build something similar.
Create a Solution
First of all, you'll need a solution, and you can create one with the Excel add-in. Note that the title of the currently active solution is displayed at the top of the Excel add-in. You can change between different solutions from the add-in by selecting Tools > Switch Solution.
We'll start by creating a solution with the Koivu Cloud Excel add-in.
To create a solution:
- In Excel, make sure you have the Koivu Cloud Excel add-in and that you have logged in.
- Select Tools > Development Tools > Solutions. The Create Solution dialog opens.
- Enter the Solution ID and the Solution name.
- You can choose Set as default solution, to set this new Solution to be the default solution.
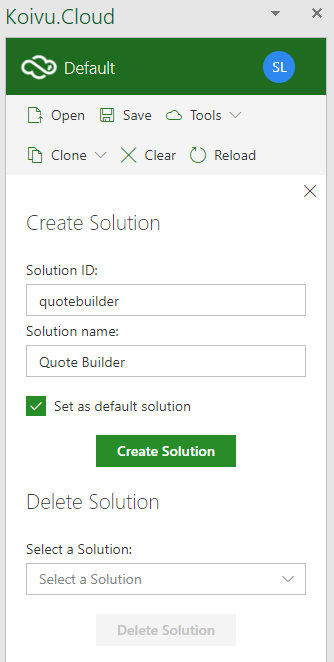
- Click Create Solution.
- By default, the new solution is set as active, and it has one cloud table, Example, that you can view by selecting Open > Select Table > Example.
- To delete a Solution, select Tools > Development Tools > Solutions, and under Delete Solution, select a solution from the dropdown. Click Delete Solution to remove it. Note that you cannot delete a solution that is currently active.
What data do you need
First, you need some data, and the best way to begin is to use a traditional spreadsheet as a starting point. Each solution is made up of cloud tables, which contain a specific type of information. In our example, we've identified that we need tables at least for customers, product categories and products. For this tutorial, you can download a sample workbook that has all the necessary values and sheets:
However, before we go further into cloud tables, we need to think, how and what information we'll search, when we use the solution.
One benefit of using a cloud database is that out of possibly millions of rows, you can query only a small subset into Excel, where you can further drill down into your data. However, in order to search data, you'll need some way to enter search criteria. By default the system turns the first key column, which you define while creating a cloud table, into a search field. As a result, you can type search criteria into this field in the Excel add-in, and the system returns the matching rows. Also, other key columns can function as search fields. This means that you need to know your search needs while creating the cloud tables.
Let's now go ahead and create our first cloud tables and define their search fields.
Customers
Before we can build any kind of quotes we of course need customers. Therefore, We'll begin our project by creating a cloud table of customers. For simplicity's sake, we'll use only referential information. You can either start from a blank Excel workbook, or use our sample workbook that has all the necessary values and sheets:
The above image displays a table that has been transformed into a cloud table. It has two columns; one for customer ID and a second one for the name of the customer.
In summary, to transform Excel data into a cloud table you first convert the cells into a table in Excel:
- Select all of the cells that contain your data, including the headers. For example, if you're following along with the sample workbook, on the Customers sheet, select all cells from the ID and the Name columns.
- Select Insert > Table. In the Create Table dialog box, make sure that My table has headers is selected, and click OK.
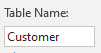
- Enter a name for the table in the Table Design > Table Name field. For example,
Customer.

Secondly, you convert the Excel table into a cloud table. At this point, you need to select a key column (or some combination of columns) which uniquely identifies the rows of the cloud table. For this reason, the values must be different in each column, and consequently no two rows can be identical. In our customer example, the key column is the one titled ID, as it is unique for each customer.
Next, to create the cloud table:
- Select the key column, which in our example means that you need to select a cell from the ID column of the table. This is also used as the default search field.
- Select Tools > Development Tools > Create Cloud Table, which opens the
Column Definitions.
- Click Save to save your table data. Alternatively, you can click Show Changes to open the
Change Sheet. Click Save to submit it with the default column values. - Click Close and Go to Original Sheet to return to your original sheet.
- Click Save to save the data, once you're back at the main sheet, and the column definitions have been submitted. And as before, you can alternatively use Show Changes to view the
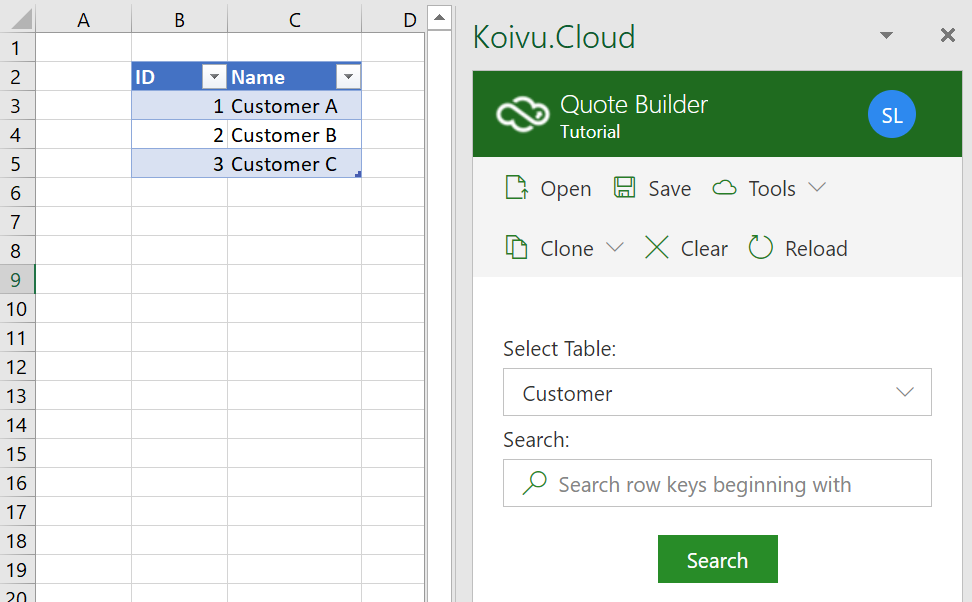
Change Sheet. Click Save to submit the data. - Click Close and Refresh to return to your original sheet. The data in your Customer table has now been retrieved from Koivu Cloud. You can see the new cloud table in the Select Table list:
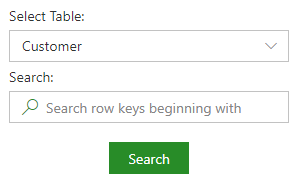
If you now click Search in the add-in, the system retrieves all values from the Customer cloud table and populates these values into the table on the Customer sheet. You can also enter search criteria into the default Search field. However, the aim here is only to illustrate how you can create a simple cloud table for customer data. At this point we're done with our Customer cloud table, and we'll continue to create the other cloud tables that we'll need in our solution.
We'll continue to work with our sample template, and move on to the Products sheet that lists the products that we'll use in the quote builder solution. Our aim is to create another cloud table for the products and configure its search fields.
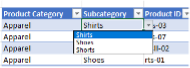
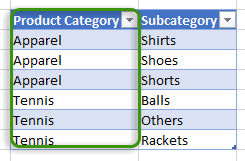
The product data consist of five columns: Product Category, Subcategory, Product ID, Description and Price. The first thing to note is that the product data has been divided into a main product category and a subcategory:

Therefore, it would be a good idea to create search fields based on these columns; the user can first choose a product category and then a subcategory to easily find the appropriate products. For this reason, we'll choose them to be the key columns of this cloud table together with the Product ID column, which we'll use later on for another purpose.
As before, we'll need to create a table and then transform it into a cloud table:
- On the Products sheet, select the cells, and select Insert > Table. Also, a quick way to create a table is hitting Ctrl-T after selecting the cells.
- Give a name to your table,
Productsin our example.
Next, turn your table into a cloud table:
- This time we'll choose three key columns: Product Category, Subcategory and Product ID. Go ahead and select a cell from each column. We'll choose these columns because later on we'll use them to configure the search.
- Select Tools > Developer Tools > Create a Cloud Table.
- Save and submit first the column definitions and then your data. Again, refer back to previous sections to remind yourself how this is done. In the end, you should have a cloud table that looks something like the below:
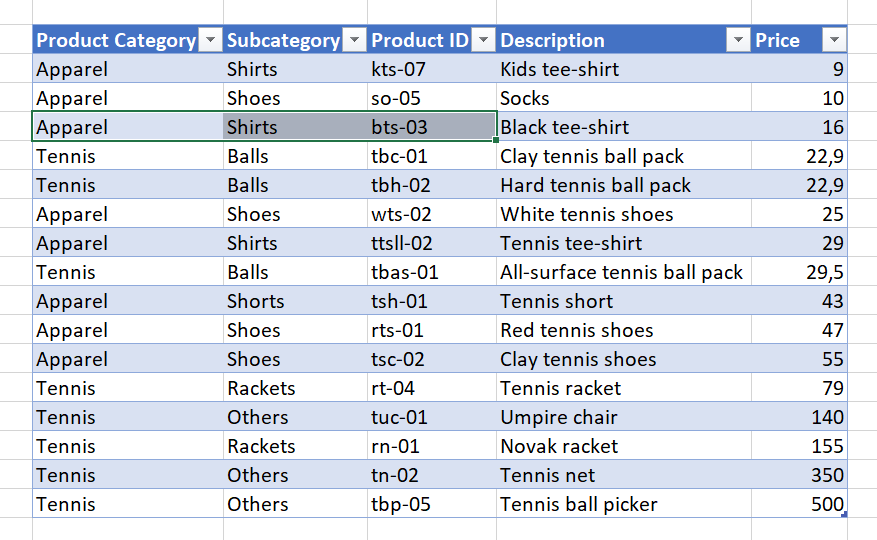
Note again that the three first columns function as keys, and the other two as properties. We chose to use three key columns because we need them later, when we define more functionality for our cloud tables.
Search fields
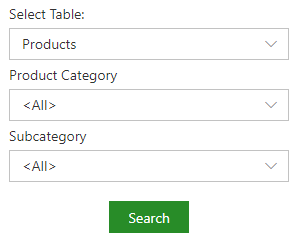
The add-in displays a default search field under the Select Table dropdown list. However, a convenient way to search products that have been divided into hierarchical categories and subcategories is to create a cascading drop-down list, where the selection of items is dependent on the previous selections. Therefore, in our quote builder we need to be able to search products by first selecting a product category, followed by a subcategory selection. For example, we begin to search products for our customer, and on the Products sheet of our quote builder workbook, we select Apparel as the product category in the Excel add-in. This selection would then limit our subcategory options to the rows which have Apparel as their product category. In other words, we need to create a traditional lookup; we have a value that we know, Apparel, which we use to look in a column and find a value from the same row in a second column, e.g. Shorts from the Subcategory column.
The result will look like this:
Luckily, our data has been designed in such a way that we can simply use the Search Field Builder, and the default values will produce exactly what we want - a cascading drop-down list, where the items of the Subcategory list are dependent on the Product Category selection. So, let's define the default search fields for the first two key columns, Product Category and Subcategory.
To configure the search fields for the Products cloud table:
- On the Products sheet of your workbook, make sure that the Table is set as Products in the add-in.
- Select Tools > Development Tools > Search Field Builder. By default the add-in creates dropdown lookup search fields for the first two key columns, Product Category and Subcategory. These function in the same way as the Product Category cloud table's search fields.
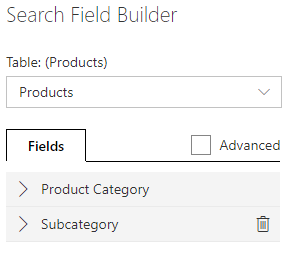
- Click Save to save the default search fields.
You should now have two drop-down search fields in the add-in for the Products cloud table. The end-users can use these search fields to find specific products from the cloud table and retrieve these to the Excel template. We'll dive deeper into search field configurations later on, but if you want, you can have a look at the detailed configuration settings in the Search Field Builder by selecting Advanced. Also, behind the scenes the search field configuration is actually a JSON snippet, and you can view this on the JSON tab of the Search field builder.
However, if someone adds more items to our Products table, and accidentally enters an incorrect product category or subcategory, the search may not function properly. We can create data validations to make sure our data stays consistent, which is what we'll be doing next.
Data validation enables you to restrict what users can enter into a cell, and as such it is an essential part of data safety. Generally this means that you create a dropdown that allows the user to pick a value from a predefined list, instead of freely entering values. Also, data validation makes sure that the data in the cloud is accurate and functional in automated business processes.
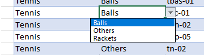
In Excel you define a data validation for a cell by selecting Data > Data Validation. However, in Koivu Cloud you define the data validation only with the Excel add-in. We've created a Products table into our quote builder, and now we want to make sure that if someone adds new items to the table, the product category and its subcategory remain consistent. Therefore, in our quote builder we want to restrict the choice of Product Category and Subcategory in the Products cloud table. That is, if you add a new product row, you can only choose from a list of predefined values. For example, if you have selected Tennis from the drop-down list in the Product Category column, you can only select its subcategories, as defined in the Product categories cloud table. In summary, this is our goal:
However, we need a lookup table that contains the values for the data validation, and for this we need to create another cloud table, Product Categories.
Product categories lookup table
Next we'll go ahead and create a cloud table for the product categories. The cloud table will be used as a lookup table in the Product table's data validation. As before, you need to turn your Excel data into a cloud table. Also, feel free to review how we made the previous cloud tables, or refer back to our other tutorials, such as Get your spreadsheet into a database - Cloud Tables.
Create the cloud table
The products have been divided into a main product category and a subcategory, and therefore we need a lookup table that includes columns only for these categories. Firstly, create an Excel table from your data, and enter a name for the table:
- If you're following along with the sample template, on the Product Categories sheet, select all cells from the Product Category and the Subcategory columns, choose Insert > Table, and name it as
ProductCategories.
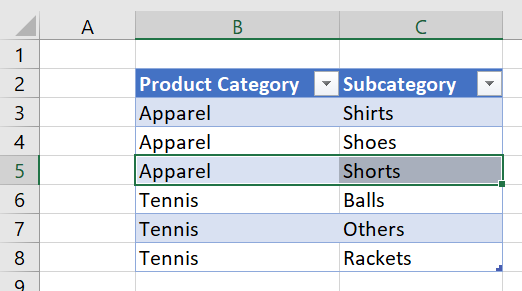
- Select the appropriate keys, and transform the table into a cloud table. However, this time we'll use two keys, and you need to select a cell from both columns, and choose Tools > Developer Tools > Create a Cloud Table.
Let's take a closer look at the Table Definitions. The table lists the columns of your table as rows. For example, the Product Category column is the first key column of the ProductsCategories cloud table:

- Again, we do not need to change anything, so you can click Save in the add-in to save the column definitions. Also, remember to click Save to save your data after saving the column definitions.
Create the data validation
Next, we'll use the Product Categories table to define the data validation. You can use the add-in's Data Validation Builder to define the data validations for the Products cloud table. Note that you need to go through the same workflow twice - once for each column. First, the Product Category column:
- Select the Products sheet in your Excel template file.
- In the Excel add-in, select Tools > Development Tools > Data Validation Builder. The Data Validation Builder opens. If you are familiar with Excel's data validations, this should be an easy task to perform. The end result should look something like this:
|
|
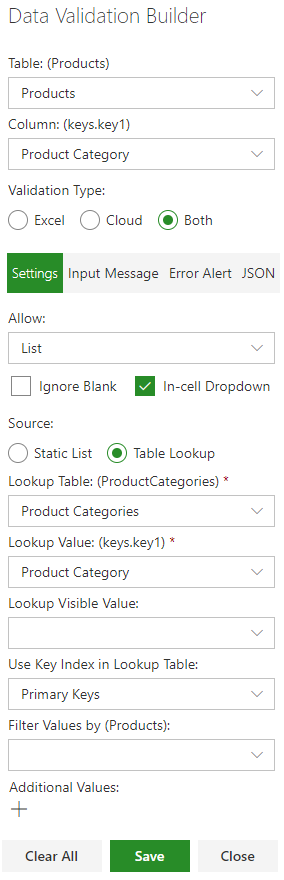
- From the Column list, select
Product Category, as we'll first build validations for this column. Also, make sure that the Table is set asProducts. - Under Validation Type, select Both to define validations for both Excel and Cloud.
The Settings, Input Message, Error Alert are similar to Excel's Data Validation dialog; you use Settings to define allowed values, such as a list, Input Message to define a message that is displayed to users when they input a value, and Error Alert to define a message that the users see if they enter a value that is not valid.
- From the Allow list, select List. This will create a dropdown for each cell in the selected column, and only the entries from this list can be set as the value.
- Select In-cell Dropdown, as we always want the cells to have a value, and we want the drop-down list inside the cell. Note that Ignore Blank should not be selected.
The Source section differs from Excel, where you would simply choose cells that would be used to populate the drop-down list. We want to use our Product Categories cloud table as the source for our data validation dropdown list. This makes sure that if we add more product categories, these will be added in the dropdown list without any additional work.
- Under Source, select Table Lookup. This enables us to select another cloud table as the source for our data validation drop-down list.
- From the Lookup Table, select the Product Categories cloud table. You can select from all of the cloud tables of the Solution.
- From the Lookup Value, select Product Category. Now the drop-down list will have all the values from the Product Category column of the Product Categories cloud table.
- From the Use Key Index in Lookup Table, select Primary keys.
- Finally, click Save to save your data validation, and refresh changed sheets.
If you now click a cell in the Product Category column of the Products cloud table, you see an arrow icon on the right side of the cell, where you can access the dropdown list.
Now let's define a data validation for the Subcategory column. This is done the same way as previously described, however, we need to filter the subcategory values based on the product category. In other words, you should only see subcategories from rows that match the selected Product Category.
To define data validations for the subcategories:
- Again, select Tools > Development Tools > Data Validation Builder, if it is not already open.
- Define the following values (see above for more information):
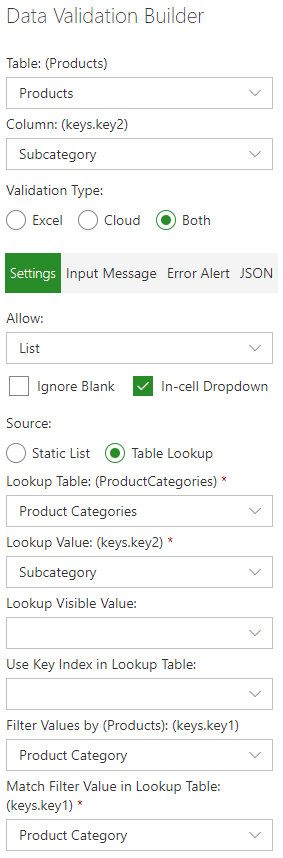
- Table:
Products - Column:
Subcategory - Validation Type:
Both - Allow:
List - Select In-cell Dropdown
- Source:
Table Lookup - Lookup Table:
ProductCategories - Lookup Value:
Subcategory. Now the drop-down list will have all the values from the Subcategory column of the Product Categories cloud table. - Filter Values by:
Product Category. Defines which values are used to filter the values. - Match Filter Value in Lookup Table:
Product Category. Filter the values of the lookup list based on the selected product category. That is, once you select that Product Category is used as the filter, you only see a subcategory value, if it matches the value defined in the Lookup table, ProductCategories. For example, if you selectApparelfrom the drop-down list in the Product Category column, the system looks into the ProductCategories cloud table, findsApparelfrom the Product Category column, and then looks which value is next to it in the Subcategory column, and populates this value, e.g. Shirts, into the drop-down list of the Subcategory column, next to the original cell, where you made your selection.
- Finally, click Save to save your data validation, and refresh changed sheets.
Later on, if you need to modify the data validations, simply choose Tools > Development Tools > Data Validation Builder, and make the necessary changes. Later, if you need to add product categories, you can add the new entries to the Product Categories table.
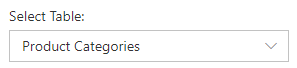
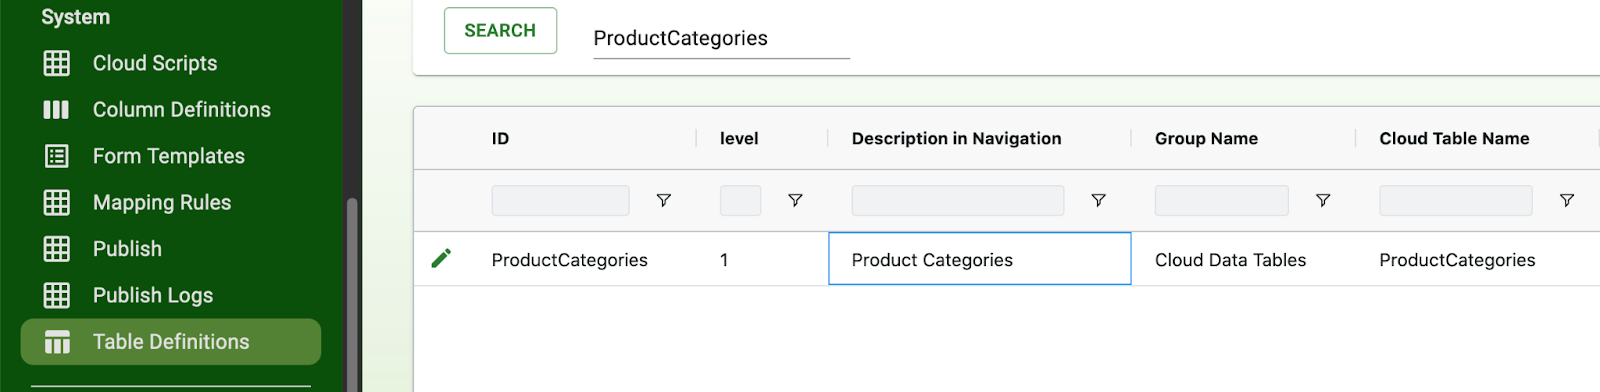
Whenever you create a cloud table its columns and their properties, such as the name and type of the column, are saved into a system table called Column Definitions. Similarly, information about the table itself, such as the table's name, is saved into another system table called Table Definitions. Later on, we'll use the Table Definitions table together with the Column Definitions table to configure the solution. As a first step, we could change the name that is displayed in the Select Table dropdown list for the Product Categories table, which now lists the name as "ProductCategories". Let's say we want to add a space between the words. You can edit the displayed texts in the Table Definitions table:
- In the sample workbook, open the Table Definitions sheet.
- In the add-in, select Open > Select Table: Table Definitions, and click Search.
- Edit the value in the Description in Navigation column for the ProductCategories cloud table:
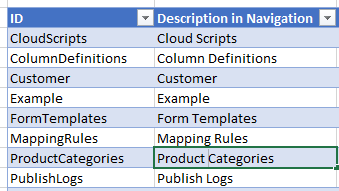
In the add-in, click Save. If you now go back to the Product Categories sheet, you can see that the dropdown has a new text:
Koivu Web UI displaying table definitions for the Product Categories table:
Please refer to the Koivu Cloud Configuration Sheets document for a detailed description about the table and column definitions.
Congratulations, you have now completed the first step in creating your own Koivu Cloud Solution!
You know how to create cloud tables, and create different search fields. You also learned how to create data validations. In the next part of this tutorial, we'll discuss how you can relocate elements outside of the table, and add functionality with cloud scripts.
Additional training material
Explore these tutorials to learn more about what you can do with Koivu Cloud:
- Introduction to Koivu Cloud Excel add-in
- Get your spreadsheet into a database - Cloud Tables
- Design a Solution - Part 2
- Design a Solution - Part 3
Further information
Make sure to visit our community site and learn more about Koivu Cloud.