Last Updated: 2022-2-3
What is Koivu.Cloud
Koivu.Cloud is a platform that lets you develop, deploy and run data-driven applications. The platform is built around the following central concepts:
- Solutions: database applications. Each solution is made up of cloud tables. A solution could, for example, manage quotes, prices or campaigns.
- Cloud tables: rows of similar data, such as customers, that are stored in the cloud - much like a spreadsheet. Cloud tables are the building blocks of Koivu.Cloud Solutions.
- Cloud scripts: the rules and logic of the solutions and their cloud tables.
- Views: a customized view of a cloud table. Each view can have, for example, its own layout and search fields.
Also, Koivu.Cloud is a spreadsheet-database hybrid that lets you choose between two interfaces: an Excel add-in or a browser app. The Koivu.Cloud Excel add-in enables you to manage data that is stored in a cloud database with Excel, while the Koivu Web app allows you to access the same data using a web browser.
Additionally, Koivu.Cloud can receive and send data through its REST APIs and provide further computation in the cloud. Using the full capabilities of Koivu.Cloud you can quickly and easily create new Excel and web-based applications that are driven by your data.
Koivu.Cloud integrates seamlessly with Excel, and thus transforms Excel into an interface for a low-code platform that enables you to create data-driven enterprise applications.
Koivu.Cloud Excel Add-in
The Koivu.Cloud Excel add-in enables you to manage data in Excel that is located in the cloud. With the add-in you can instantly get data into Excel from a database, make changes to the data, and save your changes. However, it's important to note that Koivu.Cloud only saves the data, not the actual Excel workbook. That is, the sheets in your workbook only function as the interface to the data.
What you'll learn
In this tutorial we'll go through the basic use of the Koivu.Cloud Excel add-in. You'll learn how to:
- Get the Koivu.Cloud add-in for Excel
- Access and login
- Search and load data from the Koivu.Cloud database into Excel
- Save data to the cloud database from Excel
What you'll need
Using the Koivu.Cloud add-in is not difficult, however, you should at least have the following:
- Koivu.Cloud account
- Working knowledge of Excel
To begin using the Koivu.Cloud Excel add-in, you have two options. You can either load a workbook from the Koivu Web App, which includes the add-in, or you can load the add-in from the Office store in Excel.
Get the add-in from the Web App
After you have registered and accessed the Koivu.Cloud Web App, you can see instructions on the Homepage that guide you through the add-in activation process. First, to make sure you're on the home screen of the Koivu.Cloud web, click Home from the navigation menu. Next, you'll need to download an Excel file that will automatically look for the add-in. The spreadsheet includes further guidance about the process. The home page displays buttons that you can use to download an Excel workbook, invite people to Koivu.Cloud or access the Koivu.Cloud community. Click Download to get the workbook.
Get the add-in from the Office Store
If you choose to use your own Excel workbook, you can install the add-in from the Office Store. First, open a workbook in Excel.
To get the add-in from the Office Store:
- Select Insert > Get Add-ins.
- Search for
Koivu. - Click Add next to the Koivu.Cloud add-in in the result list.
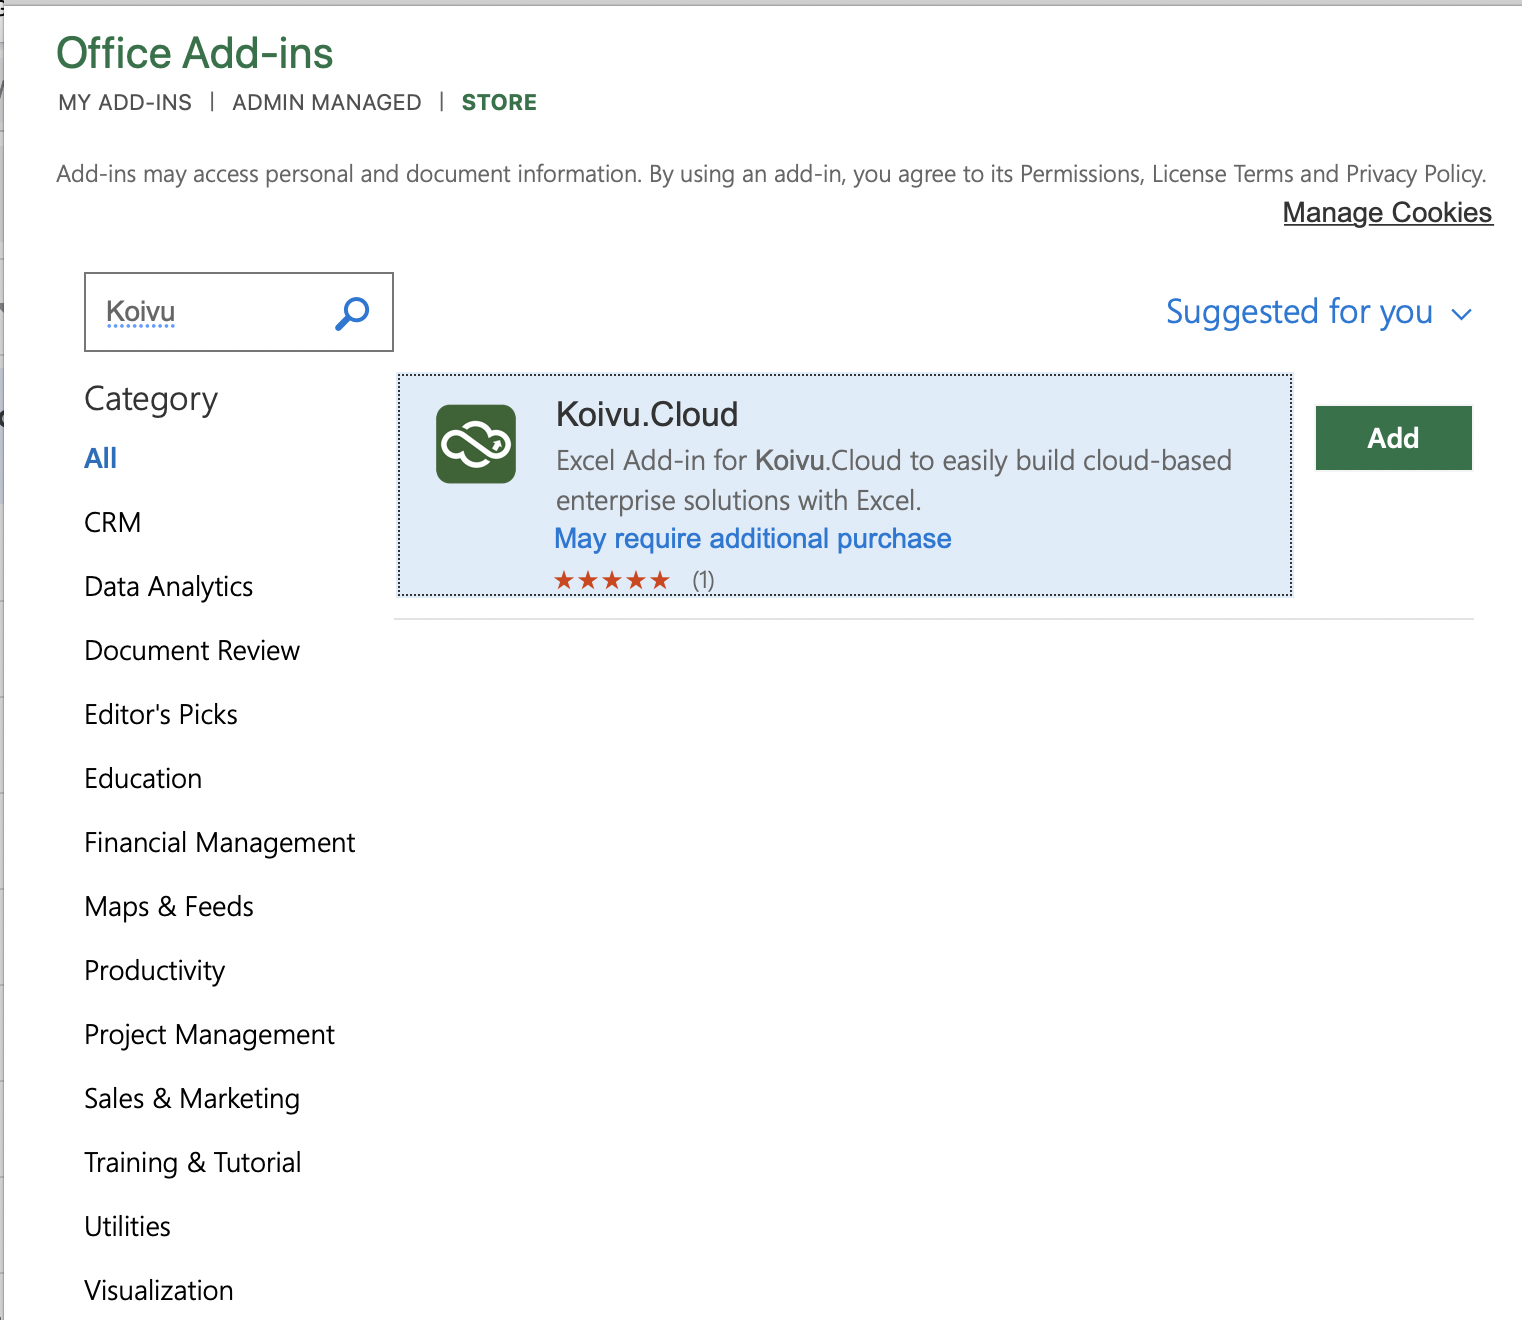
Alternatively, if your Office Admin has approved the Koivu.Cloud add-in, select Admin managed instead of Store.
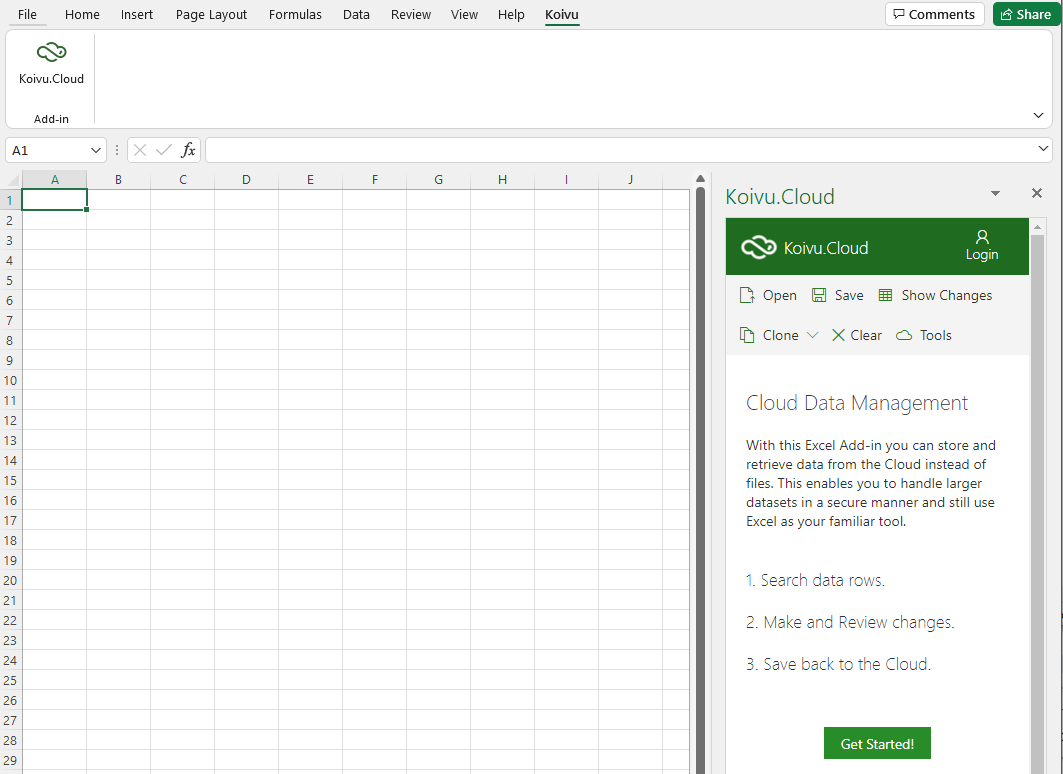
Open the Koivu.Cloud add-in
Once you've installed the add-in you still need to open it in Excel.
To open the add-in:
- Select the Koivu menu.
- Click the Koivu.Cloud icon. This opens the add-in pane.
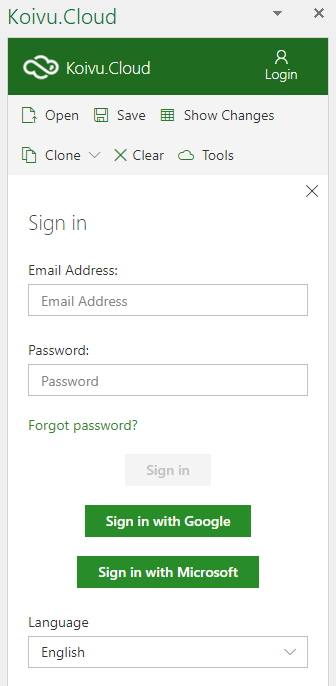
Login to Koivu.Cloud add-in
Before you can start using the add-in, you need to login:
- In the Koivu.Cloud pane, click Login.
- Enter your email address in the Email Address field.
- Enter your password in the Password field.
Alternatively, you can use the other sign-in possibilities, such as Google Sign-In.
In summary, you can use the Excel add-in to search, view, create and change data that is stored in the cloud database. The following sections introduce how you can perform basic data management with the Koivu.Cloud Excel add-in. Including how to:
- Search data
- Modify data
- Save data
Search data from a database
The Excel workbook can be empty, but it is recommended that you build a specific template for your data. This template file would have all but the actual data rows. We'll go through templates in another tutorial. But for now we'll discuss only the very basic use of the Excel add-in.
You can use the Search command to retrieve data from the cloud database into an Excel sheet:
- From the Select Table dropdown list, select the appropriate table. If the table has already been opened into any sheet, that sheet will be activated.
- In the Search field, enter the appropriate search criteria. If you leave the field empty, all data of the selected table is retrieved. Also, if you're getting data into an empty sheet, the add-in asks you to confirm that the current data of the sheet is replaced with the cloud table data, which the add-in inserts into a new Excel table.
- Click Search to retrieve the data.
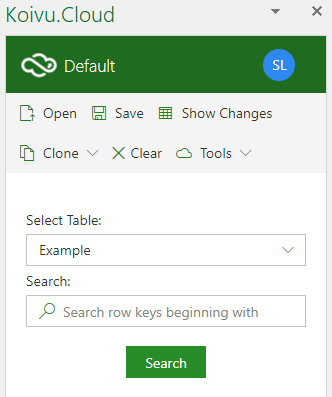
Different cloud tables have different query options. The Example table above only includes a default search field.
Modify the data
You can modify the spreadsheet's values in the usual manner. For example, you can insert and delete rows if needed. However, we've put some of the most used operations as helper tools into the add-in to make it easier to add rows.
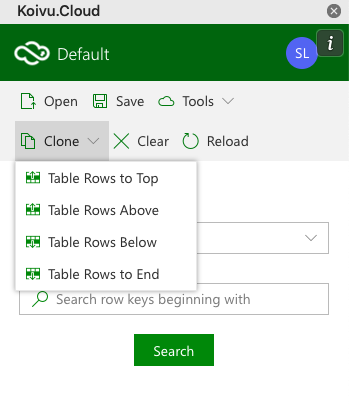
Clone the data
Cloning data copies the data from the selected row(s) into the new row(s).
To clone the data:
- Select a cell from the row(s) you want to clone. Note that you do not need to select the whole row, instead you can select, for example, three cells from a single column, and thus clone these three rows.
- Select the appropriate command from the Clone menu. You can add rows to the top or the bottom of the table, or just above or below the currently active cell. As many rows are added as you have selected in the spreadsheet.
Save the data
After you have done your modifications, you need to save the changes into the cloud database.
To save your data:
- Click Save in the add-in's toolbar. Note that the Save button in the Excel ribbon is not used. If you want to review your modifications before saving, click Show Changes. The system generates a new sheet that lists all your changes, additions, and deletions. You can still edit the data in the Change Sheet. Also, if you have deleted rows, the change sheet is always displayed.
- If the Change sheet opens, review the changes, and click Save to save them to the cloud.
Congratulations, you now know how to find your way around the Koivu.Cloud Excel add-in! Of course, the add-in includes plenty of additional functionality, which we'll cover in other tutorials, but these skills are enough to get you started.
You now have the Koivu.Cloud add-in, and know how to search, modify and save data. You also learned how Koivu.Cloud uses a cloud database to store data.
Additional training material
Next, explore these tutorials to learn more about what you can do with Koivu.Cloud:
- Get your spreadsheet into a database - Cloud Tables
- Design a Solution - Part 1
- Design a Solution - Part 2
- Design a Solution - Part 3
Note that these tutorials are meant to be read in order, so start with the first one.
Further information
Make sure to visit our community site and learn more about Koivu.Cloud.