
From a Shopify product
to a measured sale.
Six simple steps take you from your existing catalog to published content, a better product page and clear results. You stay in control at every one.
STEP 1Install and connect
Add ShopiVision AI Studio to your Shopify store and connect your Instagram, Facebook and Pinterest accounts from Settings. Your products are already there. Nothing to upload. In the same place, choose which email notifications you want and who receives them.
STEP 2Set up your Brand Kit
Upload your logo, review the colours ShopiVision AI Studio picks, choose a tone of voice and a default look. Everything you create from now on is on brand.
STEP 3Create images and videos
Use Image Studio and Video Studio for a single product, Bulk Studio for many at once, or switch on Autopilot to photograph new products automatically. Choose a studio shot with a model, a 1-credit packshot with a clean white background, or an offer banner that puts your real Shopify discount on the image. For a studio shot, the poses offered suit your product, and a few short questions about fit, length or size tell the AI how it should look on a person. Runs carry on while you work in the app, a small panel in the corner follows them, and a notification tells you when each one is ready, by email too if you like. Not ready? Save it as a draft. Everything you make is kept in My Creations, which can also group it by product.
STEP 4Review and publish
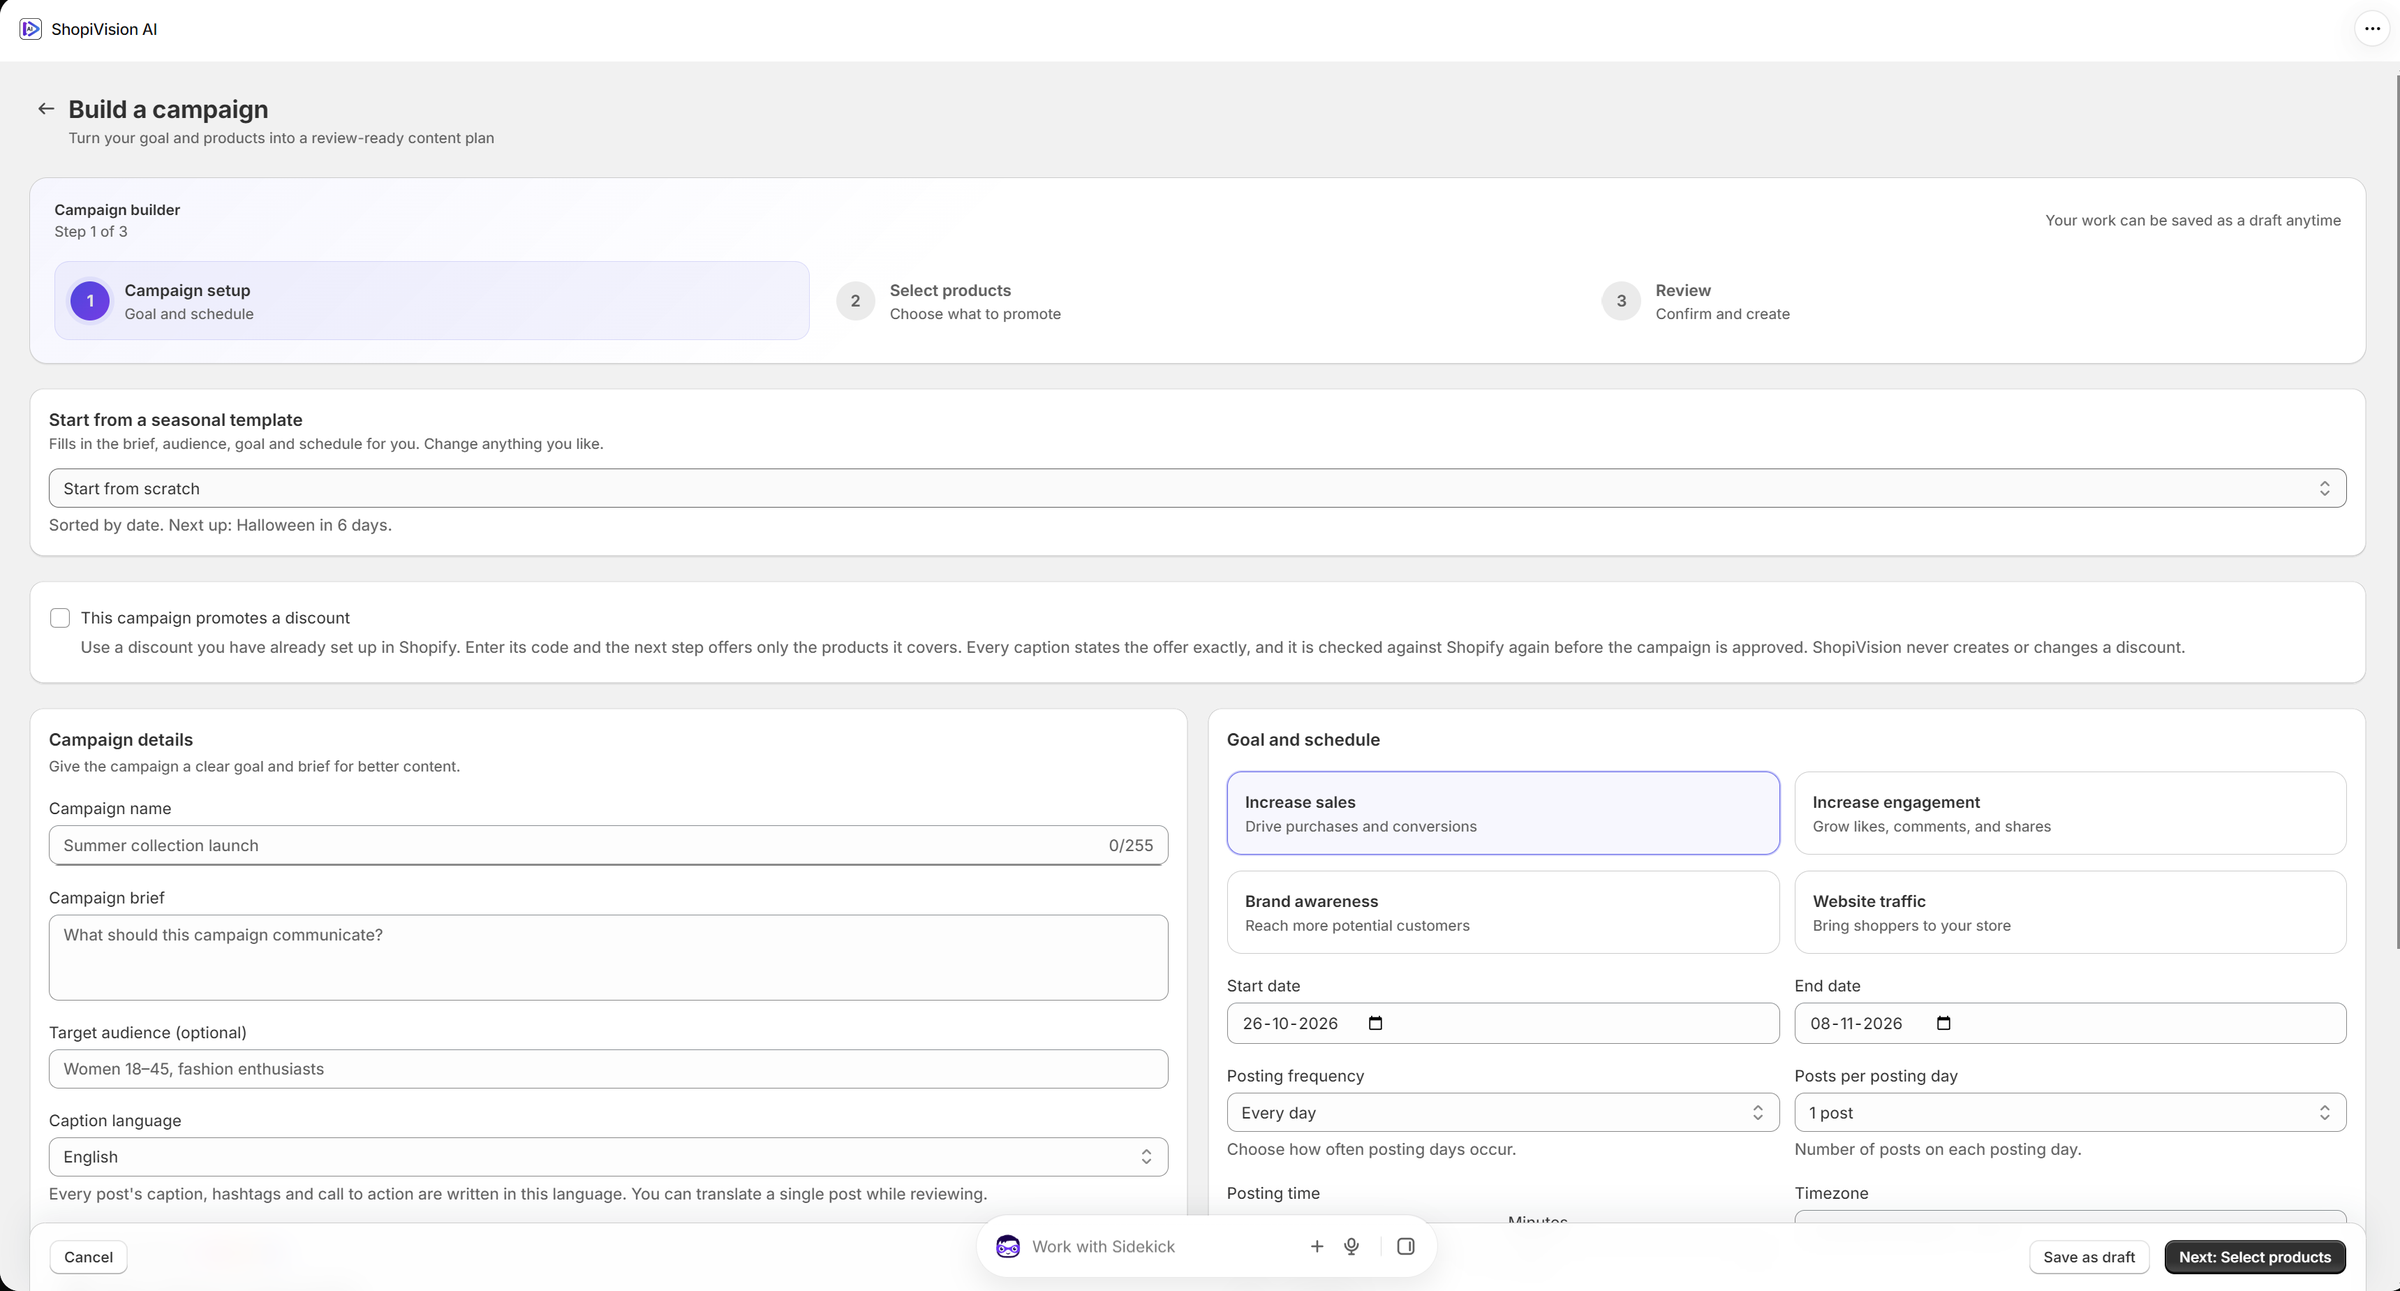
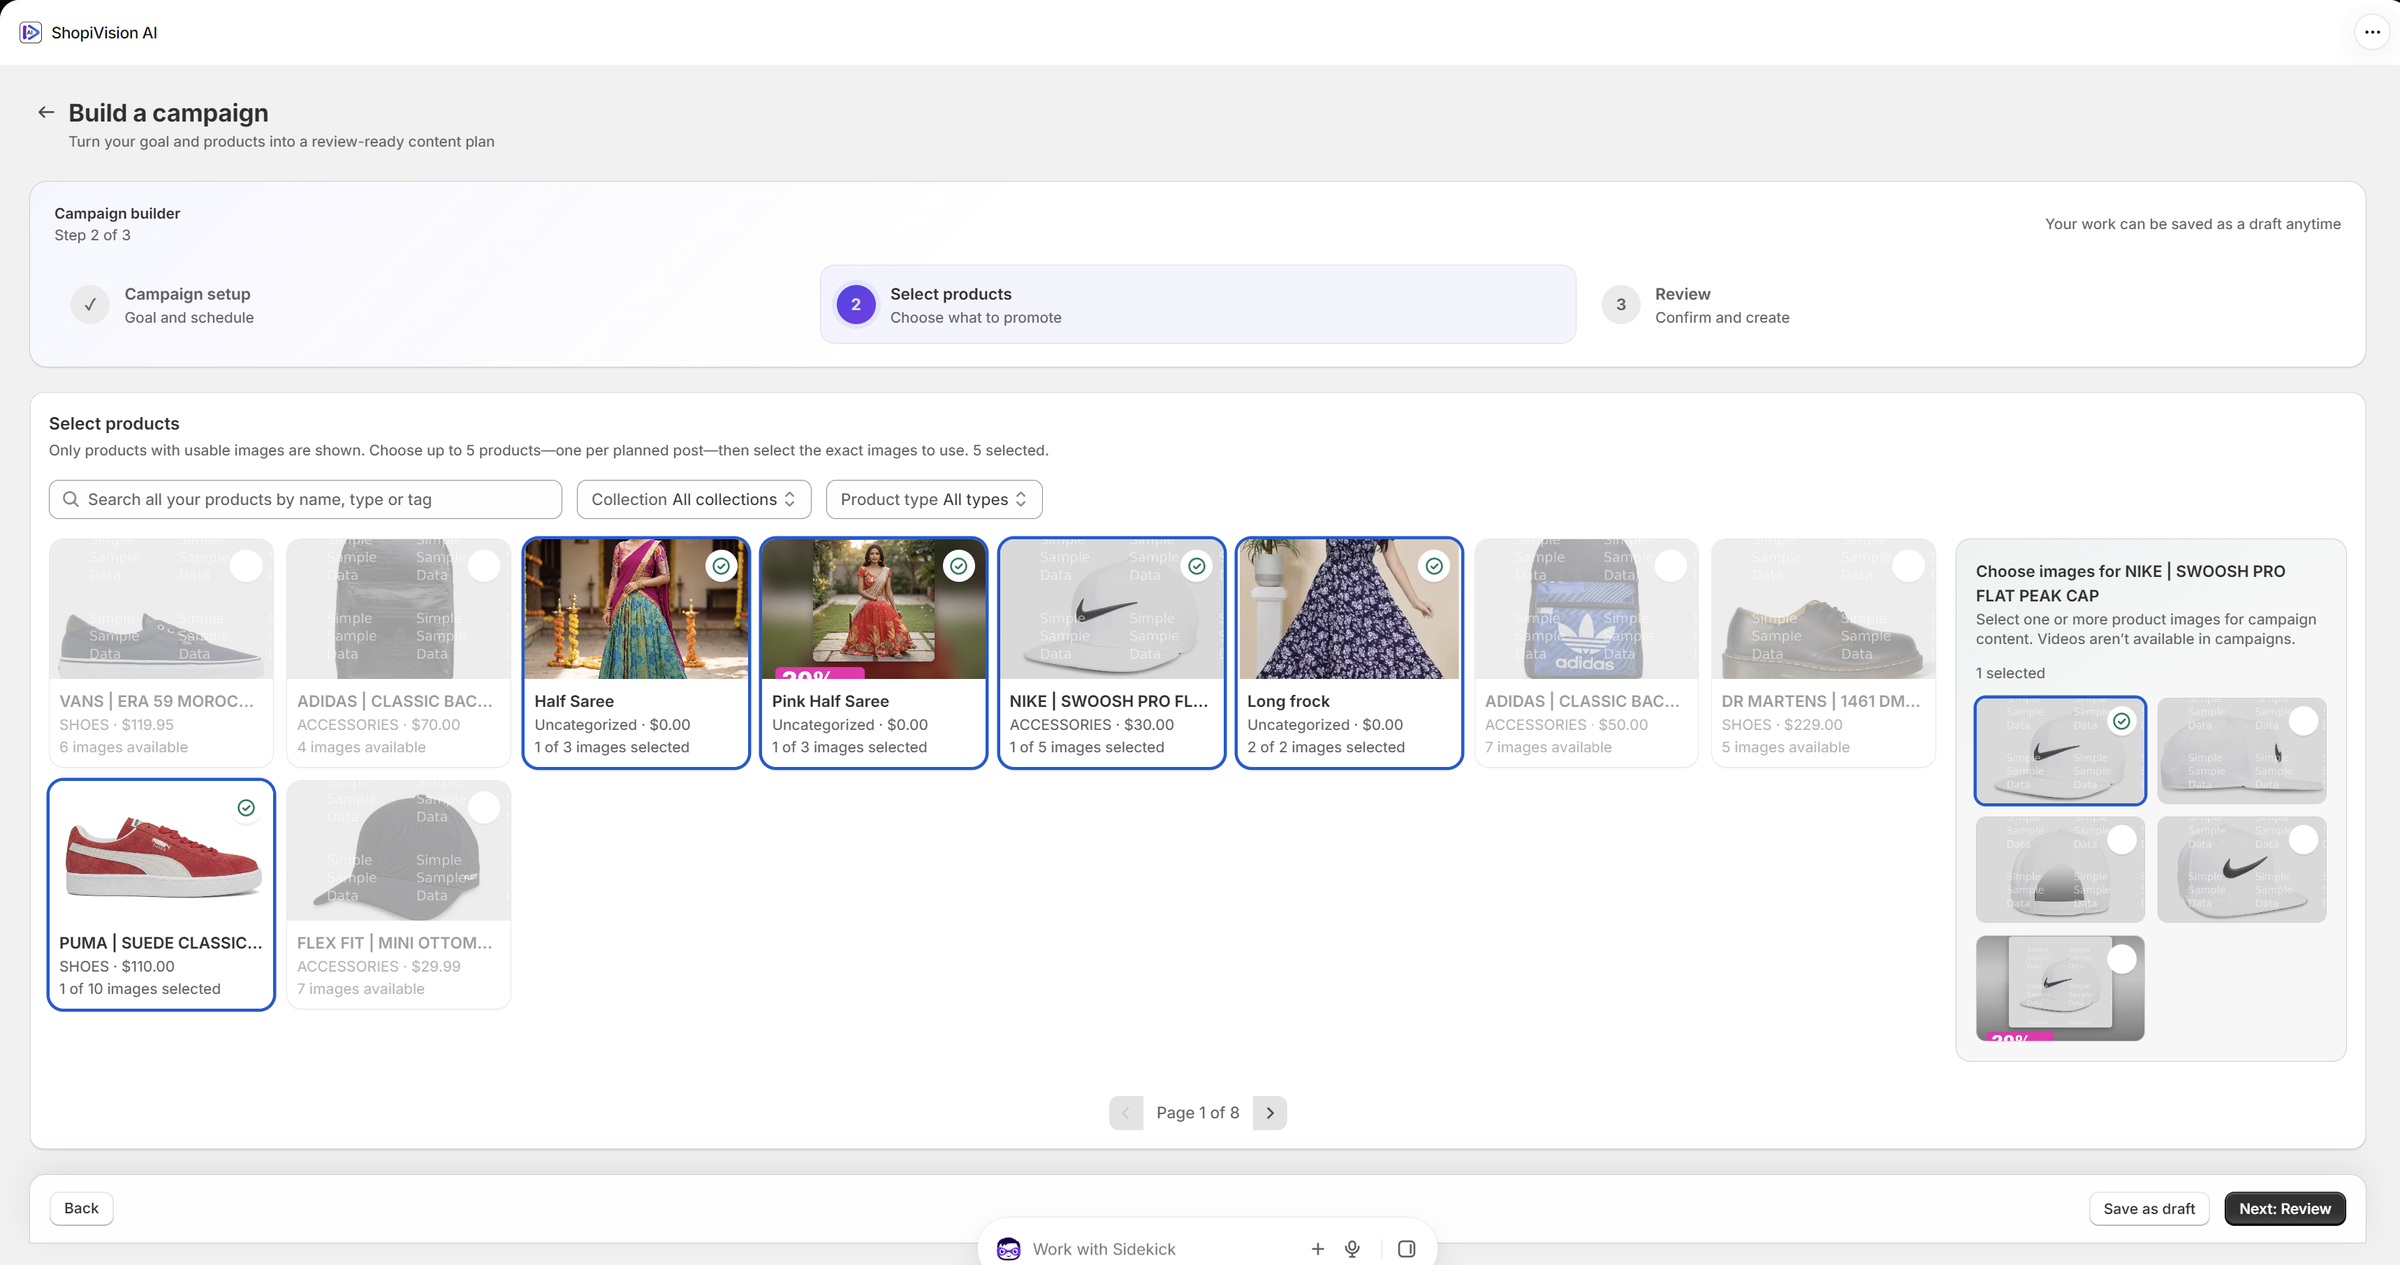
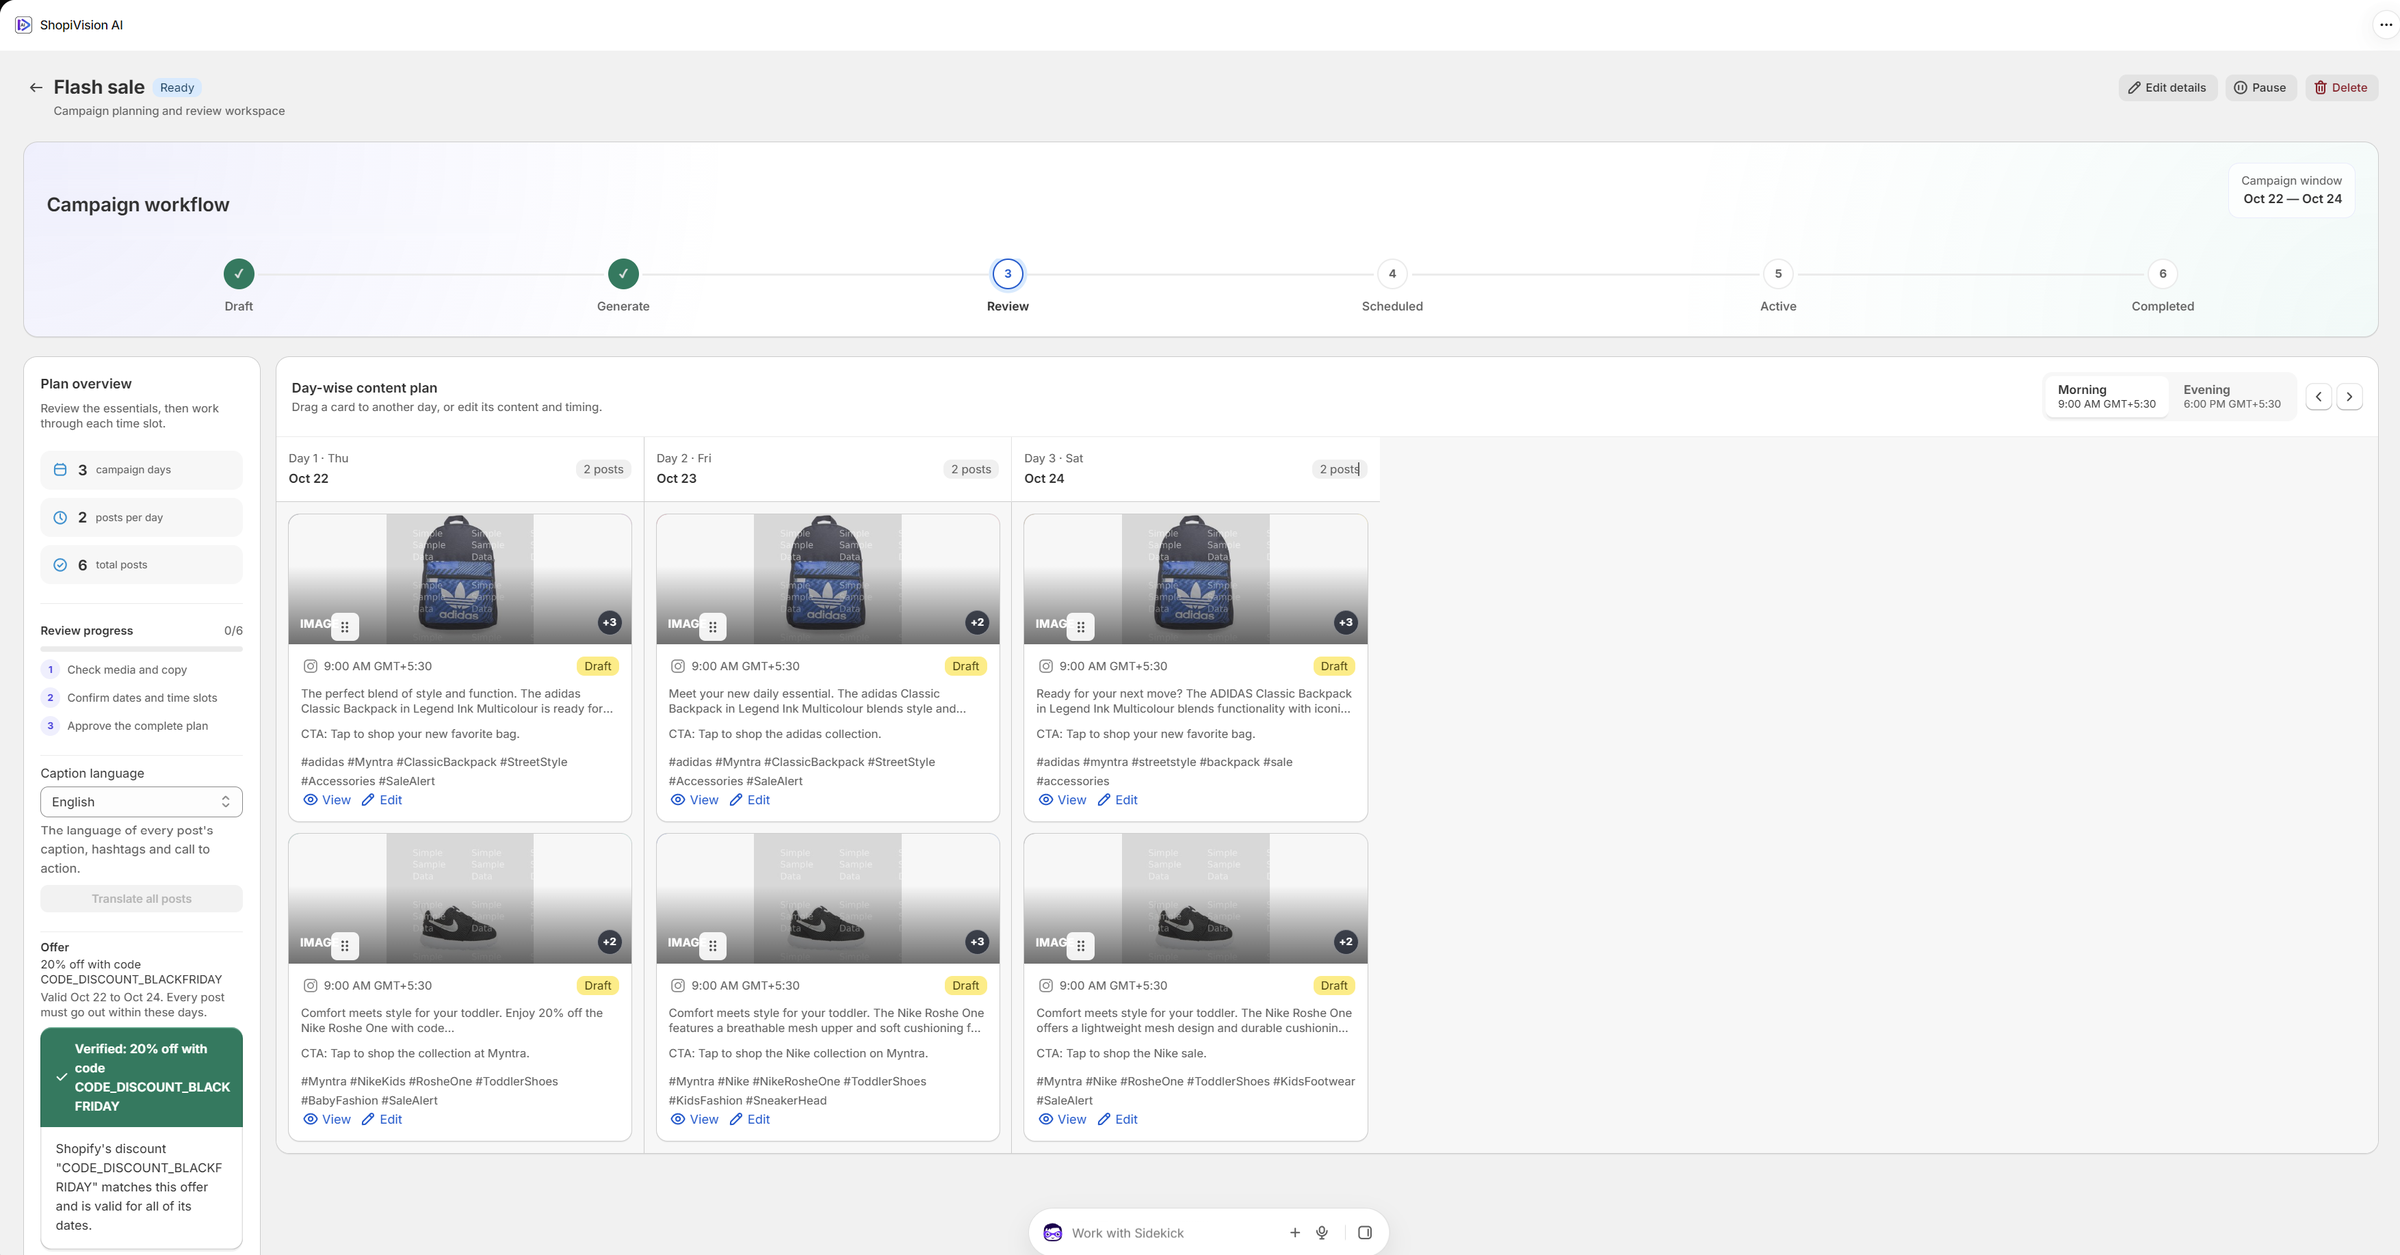
Open Social Studio to turn creations into posts with captions in 19 languages, or plan a whole seasonal campaign. Not sure what to run? AI Campaign Advisor suggests the next occasion and the products that fit. Running a sale? Add your Shopify discount to the campaign and it is checked against Shopify before you approve. Review everything, then publish or schedule to Instagram, Facebook and Pinterest.
STEP 5Upgrade your product pages
Add your best image or video to its product in one click, with alt text, a description and a search listing written for you and shown to you first.
STEP 6See what it earned
Social Insights counts the clicks, visits, orders and revenue from your tracked posts, so you can keep doing more of what works.
Follow the steps.
See the actual app.
1. Set the goal and schedule
2. Choose products and exact images
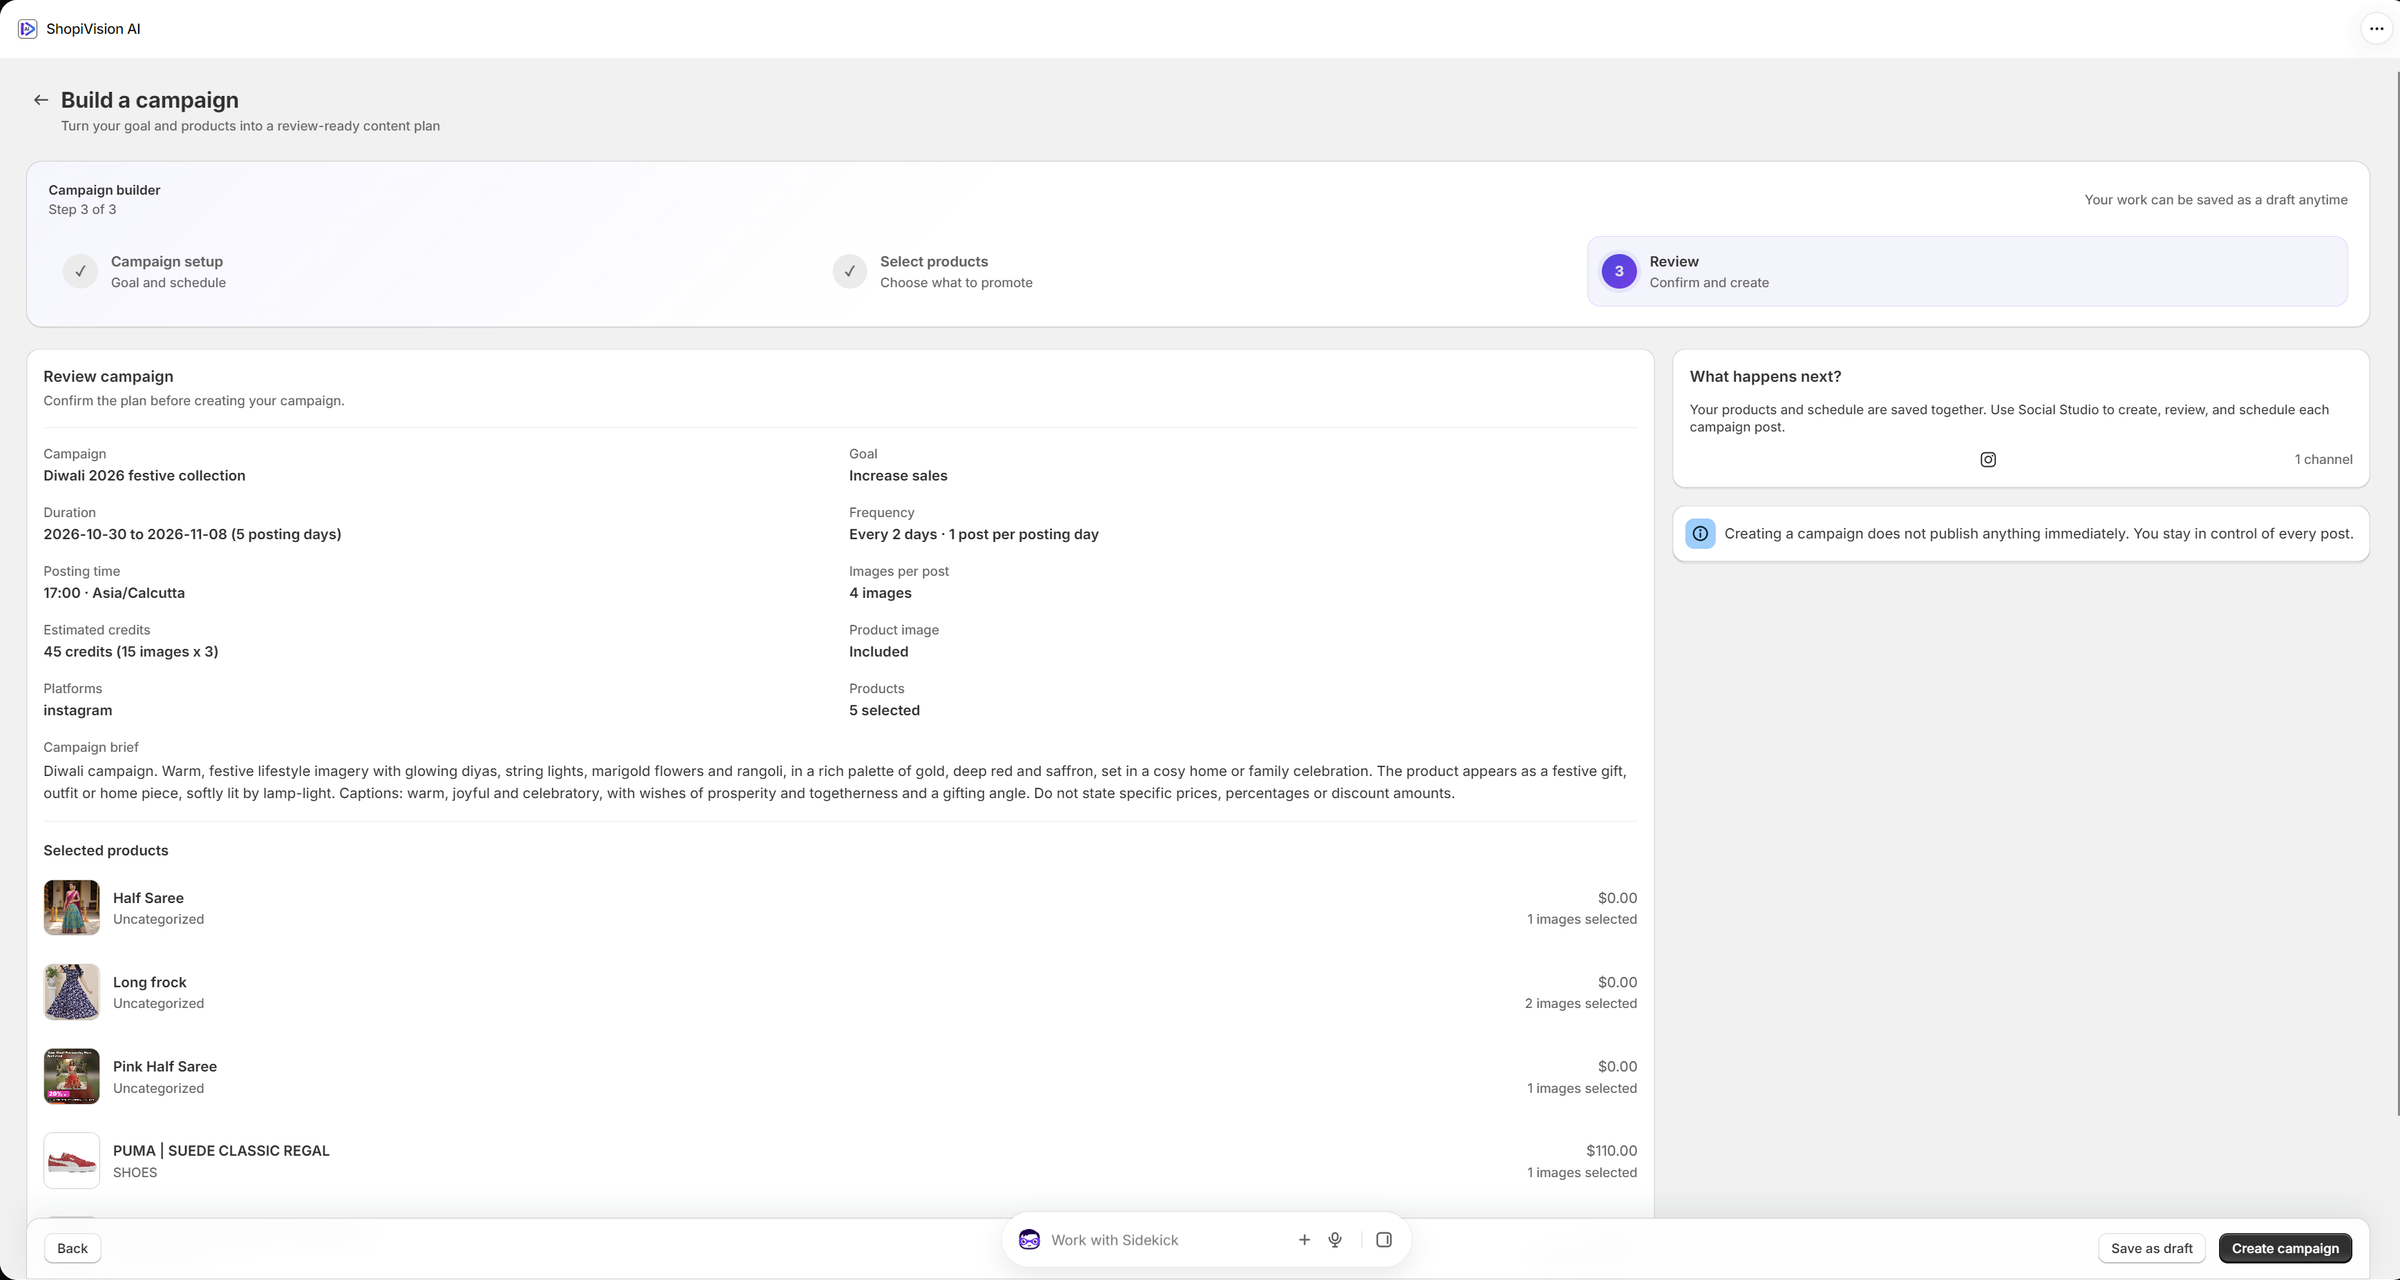
3. Review and create the plan
4. Review every post, then approve
Your campaign starts
only when you approve it.
Creating a campaign saves the plan. Its posts are generated for you to review, edit and translate, and the campaign is scheduled only after you confirm the review. Then see exactly how it performed in Social Insights.
Explore AI Campaign Advisor ↗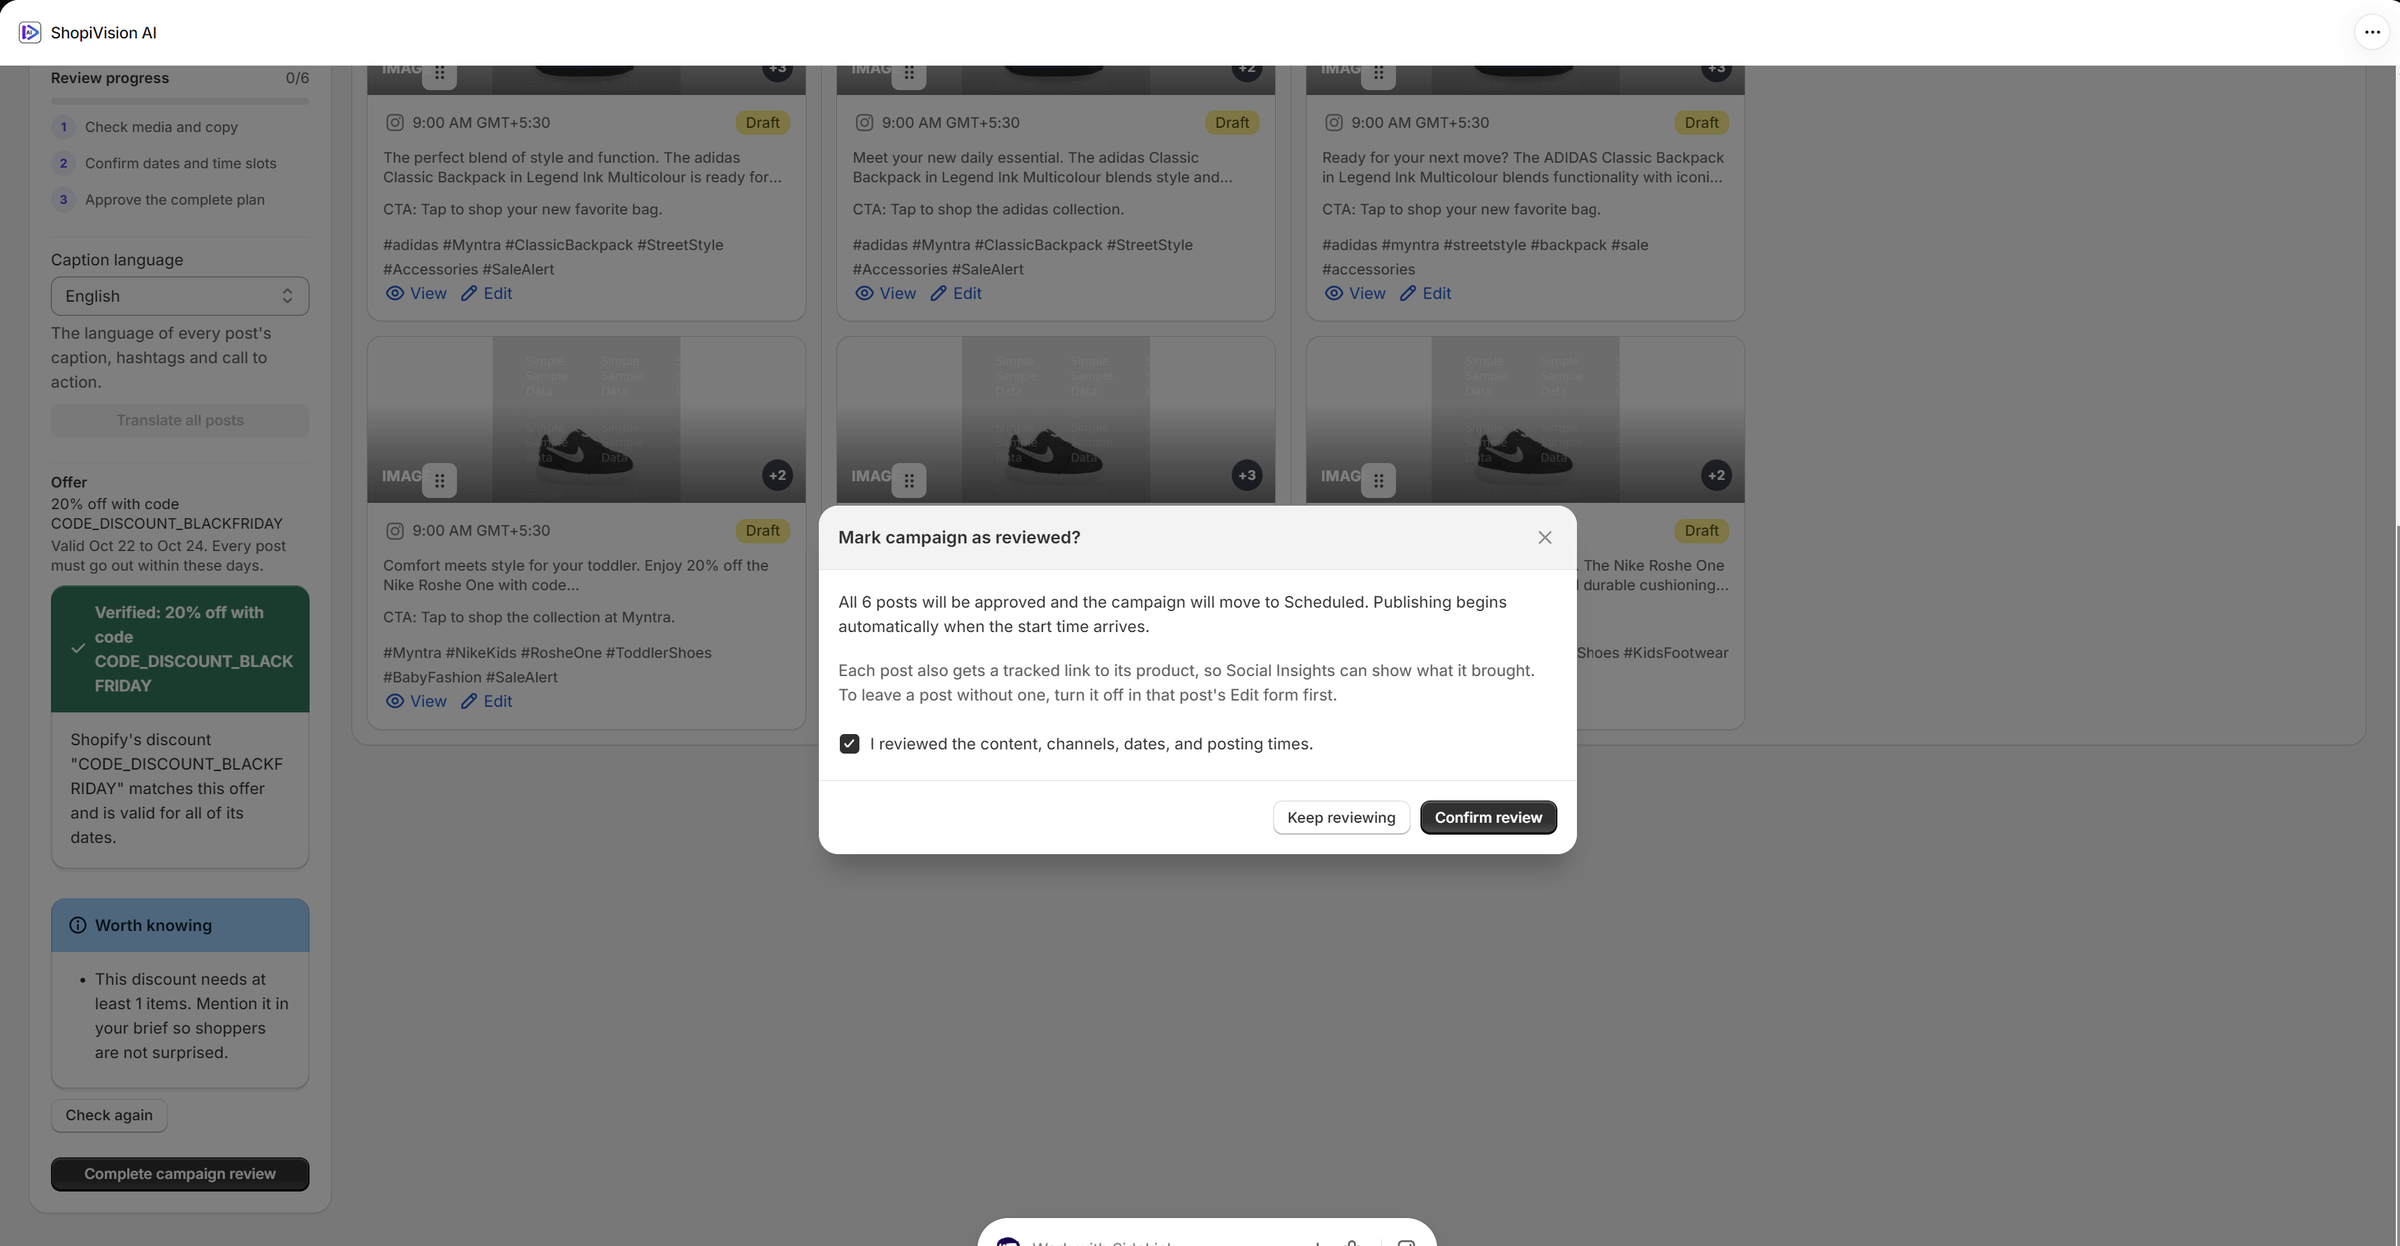
Create more.
Sell more. Know why.
Start your 14-day free trial and turn your catalog
into content that earns its place.