
Configure Service Account for GCP
Cloud Snapshot Manager allows you to use Service Account to discover and protect resources within a GCP project.
Prerequisites
Following are the prerequisites to configure a Service Account for GCP.
- IAM Custom Role: GCP IAM custom roles are used to create and manage roles with specific permissions for Service Account. They allow for granular access control to GCP resources. This custom IAM role has the minimum permissions necessary for the CSM to safeguard the GCP resources.
- Service Account: A GCP Service Account is a special type of account in Google Cloud Platform. It is used to authenticate and authorize access to GCP resources and can be granted specific roles and permissions to perform certain actions. In CSM, it is used to discover, protect, and expire resources. This should be a dedicated Service Account for CSM per GCP project.
- Service Account Key: A service account key in GCP is a JSON file that contains the private key and other information that is associated with a service account. The key is used to authenticate the service account and authorize access to GCP resources.
About this task
The following steps have been provided as an example to assist you create a Service Account:
Create IAM Custom Role
Steps
- Log in to GCP Management Console.
- Select the project where you want to create a role.
-
Complete the following steps to create a custom role.
- Go to IAM and Admin page > Roles tab.
- Click Create Role.
- Update details such as Title, Description, ID, and Role launch state.
- Click ADD PERMISSIONS. Add all required permission ( GCP Privileges).
-
Click
Create.
 NOTE: You can also create a custom IAM role with minimum permissions using the cloud shell command in GCP Cloud Shell command for custom IAM role with minimum GCP permissions
Create Service Account
Steps
- Log in to GCP Management Console
- Select the project where you want to create a role.
- Provide Service Accounts details such as Service account name, Service account ID, and Service account description.
- Click CREATE AND CONTINUE .
- Select the custom role that you created in the previous step.
- Click DONE.
Generate Service Account Key
Steps
-
Open the file in the text editor.
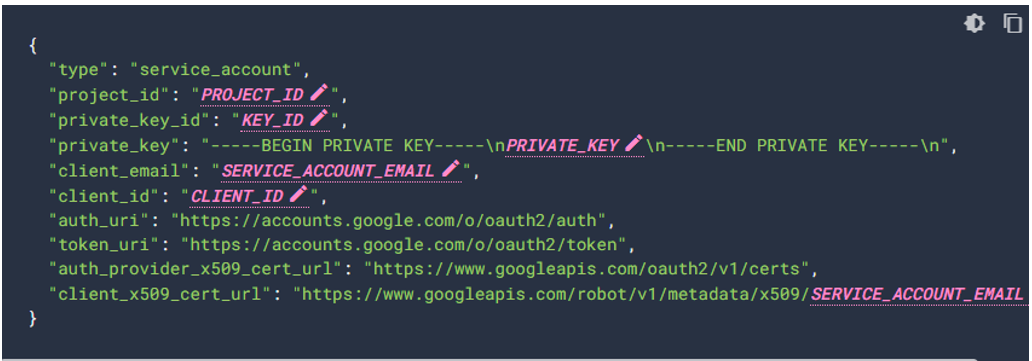 NOTE: Ensure that when registering a cloud account, for a private key, you fill in the entire value within the double quotes and do not omit any characters.